
Before you can fix a flat roof, you have to play detective. A proper repair always starts with a good, old-fashioned damage assessment. This means getting up there (safely!) to see what you're dealing with—be it standing water, ugly blisters, or seams that have given up the ghost. Figuring this out first, along with knowing what your roof is made of, is the only way to ensure your fix actually lasts.
Your Initial Flat Roof Damage Assessment

Before you even think about grabbing sealant or patches, a careful inspection is your absolute first step. What you find during this initial look will dictate everything that comes next, from the supplies you buy to the repair methods you use. A common mistake is rushing this part and ending up with a "fix" that fails the minute the next storm rolls in.
Your goal here is bigger than just finding one leak. You need to get a sense of your roof's overall health. A single puddle might just mean a clogged drain, but it could also be a symptom of something much worse, like sagging in the structure itself. A little methodical patience now will save you a world of hurt later.
Identifying Common Flat Roof Problems
Believe it or not, your inspection can start from the ground. A pair of binoculars can help you spot glaring issues without even climbing a ladder. When you do go up, make sure that ladder is secure on level ground and you’re wearing shoes with good grip.
Once you’re up top, keep an eye out for these usual suspects:
- Ponding Water: If you see water still sitting on your roof more than 48 hours after it rains, that's a problem. That standing water is heavy, putting a ton of stress on your roof structure, and it’s a clear sign of bad drainage.
- Blisters and Bubbles: These look exactly like they sound—pockets of air or moisture trapped under the roof membrane. They create weak spots that will eventually crack and let water in.
- Cracks and Alligatoring: Constant sun exposure can make roofing material brittle over time. You'll see a network of fine cracks that looks like alligator skin, which means the membrane is old and has lost its flexibility.
- Failing Seams: The seams—where sheets of roofing material overlap—are the most common failure point on any flat roof. Check for any peeling, gaps, or separation where water can sneak through.
If you spot something that looks serious or makes you question the roof's structural integrity, it’s best to call in a professional. For a better understanding of what an expert looks for, you can find great information on independent building inspections.
To make this easier, here’s a quick-reference table to guide your initial look.
Common Flat Roof Problems and Initial Actions
This simple table can help you quickly identify what you're seeing and what your first move should be.
| Symptom | Potential Problem | What to Do First |
|---|---|---|
| Water pools staying for 2+ days | Poor drainage, clogged scuppers, or structural sagging. | Clear any debris from drains and scuppers. If water remains, check for low spots. |
| Raised bubbles on the surface | Trapped moisture or air beneath the membrane. | Do not pop them. Note their location and size for a proper patch repair. |
| "Alligator skin" cracking | The roof membrane is aging and becoming brittle from UV exposure. | Assess the extent. A small area can be coated, but widespread alligatoring may need a new roof. |
| Gaps or peeling at overlaps | Seam adhesive has failed due to age or improper installation. | Gently probe the seam with a trowel to find the full extent of the separation. |
This isn't an exhaustive list, but it covers the most common issues you're likely to encounter.
Understanding Your Roof Material
Using the wrong repair materials is like putting diesel in a gasoline engine—it will only make things worse. You absolutely have to know what kind of roof you have. The three most common types are pretty easy to tell apart once you know what to look for:
- EPDM (Rubber): This is a synthetic rubber membrane that’s usually black and has the feel of a bicycle inner tube. Repairs require specific EPDM primers, cleaners, and self-adhering patches.
- TPO (Thermoplastic Olefin): Typically white or light gray, TPO feels more like a thick sheet of plastic. Its seams are welded together with heat, and any patches need to be TPO-specific.
- Modified Bitumen: This is an asphalt-based roof, often with a rough, granular surface like you’d see on shingles. It’s much thicker and more rigid than EPDM or TPO.
Knowing your roof type is non-negotiable. A common mistake is slathering asphalt-based sealant all over a TPO roof, which can cause the plastic to chemically break down. This can turn a small leak into a major problem that requires a whole new roof.
It’s no surprise that getting this right is so important, especially as the flat roofing market grows. Valued at US$30.9 billion in 2021, it's expected to climb to US$52.3 billion by 2031. This just shows how many homes and buildings rely on these systems, making proper maintenance more critical than ever.
Gathering the Right Tools and Repair Materials
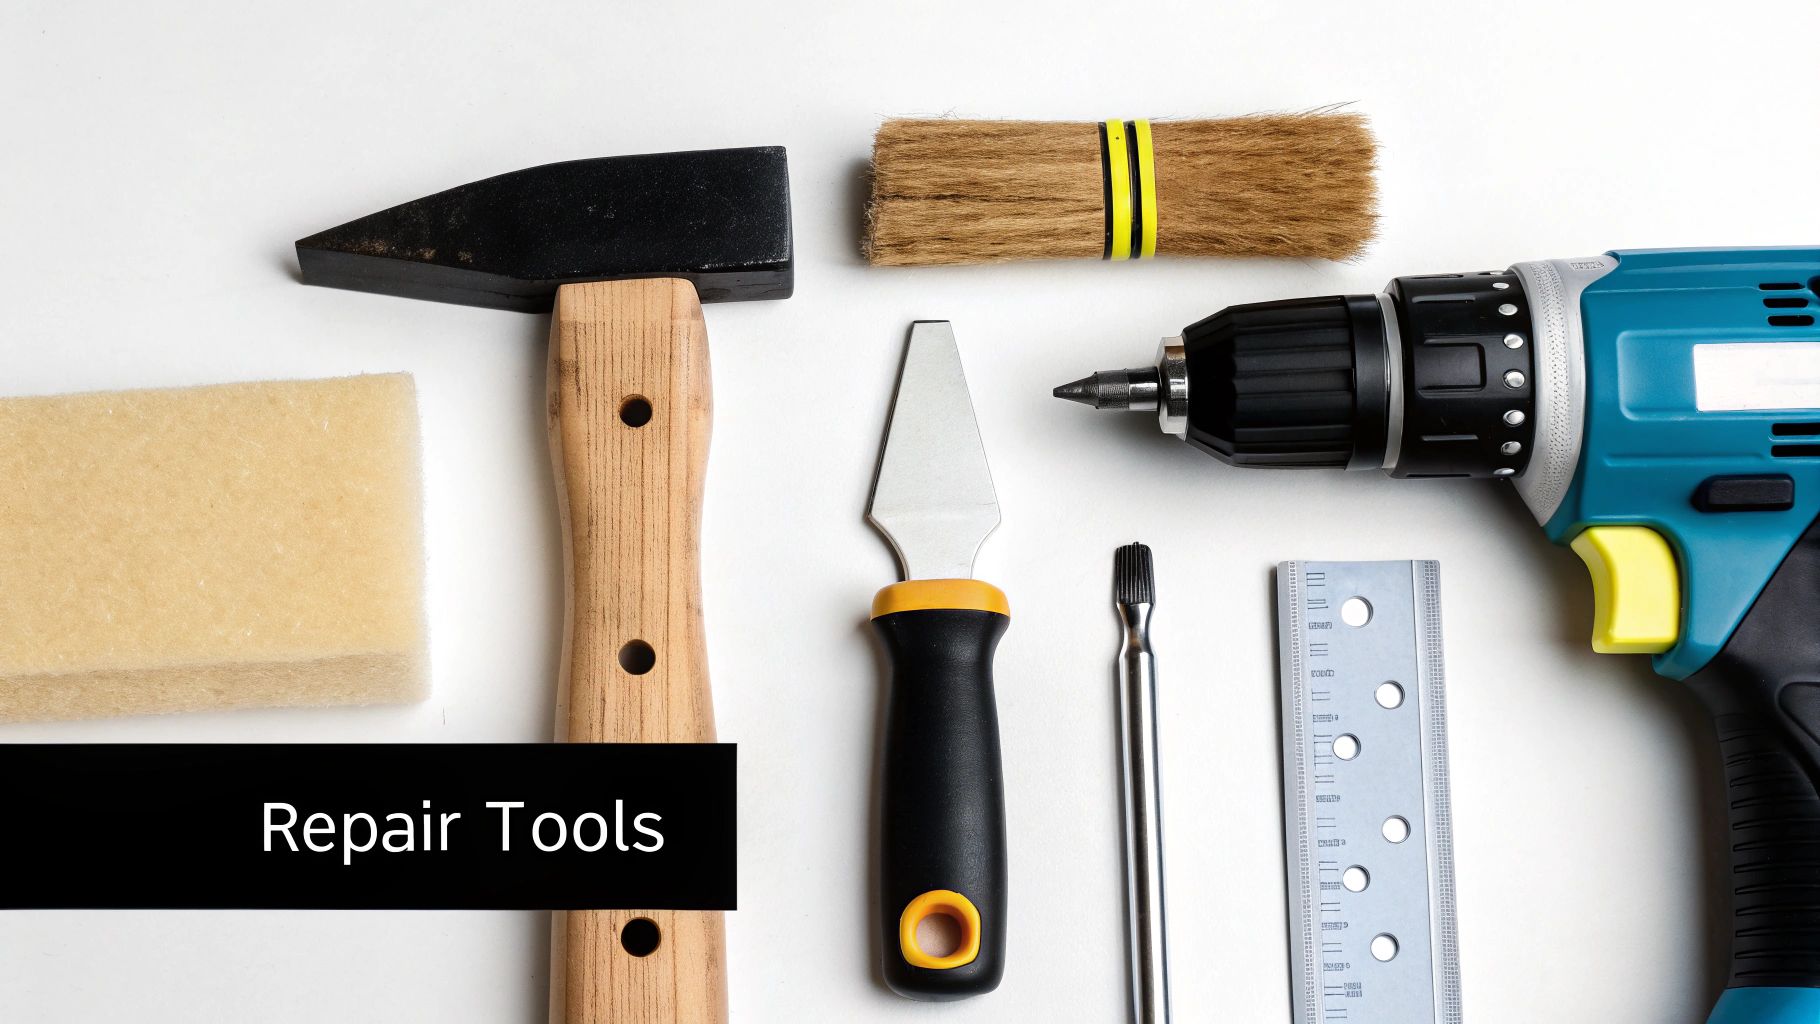
Trying to fix a flat roof without the right equipment is a classic recipe for a botched job and a wasted weekend. Showing up with the correct tools—and more importantly, the compatible materials for your specific roof type—is easily the biggest factor in getting a repair that actually lasts.
We're not just plugging a hole here. The goal is to create a seamless, waterproof bond that can take a beating from rain, sun, and whatever else the weather throws at it. You wouldn't use wood glue to fix a cracked pipe, and the same logic applies to roofing. Using asphalt cement on a rubber roof, for instance, can chemically eat away at the membrane, turning a small problem into a huge one.
Let’s walk through exactly what you need to get the job done right the first time.
Essential Safety and Preparation Gear
Before you even think about the repair itself, let's talk safety. Getting this wrong isn't an option. A fall is the last thing anyone needs, so a few key pieces of gear are absolutely non-negotiable.
Here’s your primary safety list:
- A Sturdy, Reliable Ladder: Make sure it's on solid, level ground and extends at least three feet above the roofline. This gives you something secure to hold onto when getting on and off the roof.
- Non-Slip Footwear: Good grip is critical. A flat roof can get surprisingly slick, especially with a bit of morning dew or some loose granules underfoot.
- Thick Work Gloves: You'll be glad you have them when you're dealing with abrasive roofing materials and messy, sticky sealants.
- Safety Glasses: These are a must for keeping dust, debris, and any chemical splashes out of your eyes while you're cleaning and applying products.
With safety covered, the next step is preparation. For this, you’ll need a stiff-bristled brush and a good wire brush. These are your workhorses for scrubbing away all the grime, dirt, and loose material that will prevent your patch from sticking. A clean surface is everything.
The Right Tools for the Repair Job
Now for the application tools. Having these ready will make the whole process go smoother and give you a much more professional result. You don't need to raid the local hardware store, just grab the right items for the task.
Your repair toolkit should include:
- Utility Knife with Extra Blades: You need a sharp blade for clean cuts. A dull one will just tear the membrane and create more headaches.
- Trowel or Putty Knife: This is what you'll use to spread roofing cement or sealant smoothly and evenly.
- Caulking Gun: If you're using sealants that come in a tube for seams or cracks, a decent caulking gun is essential for controlled, clean application.
- Paint Roller or Brush: For liquid-applied coatings, a small roller is perfect for applying a consistent, even layer over a larger patch area.
A common mistake is "eyeballing" measurements. Don't do it. Always have a tape measure on hand. A golden rule is to cut your patch so it overlaps the damaged area by at least two inches on all sides. This is key to a truly watertight seal.
Choosing the Correct Repair Materials
This is where knowing your roof type really pays off. The material you pick must be chemically compatible with your existing roof. Mismatched products are one of the biggest reasons repairs fail down the line.
Here’s a quick guide on what to get based on your roof type:
- For EPDM (Rubber) Roofs: You'll want an EPDM patch kit. These usually come with everything you need: a self-adhering patch, a special primer to clean and prep the surface, and a small roller to press out any air bubbles.
- For TPO Roofs: Look for TPO-specific patches and seam sealants. TPO requires a clean bond made with a heat welder or a specially formulated adhesive—generic stuff just won't cut it.
- For Modified Bitumen Roofs: The go-to repair is usually an asphalt-based roofing cement, often one that’s reinforced with fibers. You'll trowel this thick, tar-like substance over cracks or use it to glue down a new piece of bitumen.
- For General-Purpose Repairs: A high-quality liquid rubber coating or silicone sealant can work wonders on small cracks or seams on many roof types. Just make sure you pick a product that’s rated for permanent UV exposure and stays flexible—it needs to handle temperature swings without cracking.
Pinpointing and Preparing the Leak Source
Finding a leak on a flat roof can be a real head-scratcher. Water is a sneaky thing. It can find its way in through a tiny crack, travel sideways across the roof deck, and then decide to show up as a drip in your living room ceiling—often nowhere near the actual problem spot.
The best way to hunt it down is with a garden hose and a second set of eyes. Get a helper to stay inside and watch for drips. You’ll want to start low on the roof, around drains or scuppers, and work your way up. Soak one small section at a time, then wait a good 10-15 minutes before moving on. This slow, methodical process is key to not getting a false positive.
When your helper finally yells, “We’ve got a drip!” you’ve found the general vicinity. Now it's time to get on your hands and knees and look for the obvious culprits: a cracked seam, a blister in the membrane, or a puncture from a fallen branch. For a more detailed look at this detective work, check out our guide on finding a roof leak.
Meticulous Cleaning for a Permanent Bond
Once you’ve circled the problem area, the real prep begins. Let me be blunt: 90% of a lasting flat roof repair is in the prep work. A common mistake is to just smear some tar over a dirty spot. That's not a repair; it's a temporary plug that’s guaranteed to fail.
You have to give the new material a perfectly clean, dry, and solid surface to grab onto. Anything less, and you're just wasting your time and money.
Here's how to do it right:
- Scrub Off the Grime: First, take a stiff-bristled brush and get aggressive. You need to clear away all the loose gravel, dirt, leaves, and any bits of old roofing that are peeling up.
- Break Out the Wire Brush: For the really stubborn gunk or any algae growth, a wire brush is your best friend. It also scuffs up the surface just enough to give the new adhesive something to really bite into.
- Wipe it Down: After all the scrubbing, wipe the area clean with a rag and a solvent like acetone. This step is crucial because it removes the invisible oils and residues that will kill a good seal.
- Make Sure It's Bone Dry: This is the make-or-break step. The repair area must be completely, totally dry. You can use a heat gun on a low setting or just let a sunny day do the work. If you trap any moisture underneath, it will turn to vapor and push your patch right off.
The goal is to make that small patch of roof look almost new again. If it isn't spotless, your repair won't stick, and you'll be back up there after the next rain. Trust me, it's the single biggest mistake people make.
Understanding the Importance of a Solid Foundation
This obsessive prep work is about more than just making a patch stick. It’s about protecting the long-term health of your entire roof system. A solid, well-maintained roof is what stands between your home and some very expensive water damage.
This focus on durability is a huge deal in the roofing industry right now. The global market for roofing materials hit about $141.1 billion in 2023 and is on track to shoot past $231 billion by 2034. That growth is all about the demand for tougher, more resilient roofing. You can read more about the roofing material market's expansion on RoofingContractor.com.
When you take the time to prepare your repair surface the right way, you’re doing more than just stopping a leak. You're ensuring your hard work actually adds to your roof's lifespan instead of taking away from it.
Applying Patches and Sealants Like a Pro
You've found the leak, cleaned the area until it’s spotless, and let it dry completely. Now for the satisfying part: making the actual repair. All that prep work is about to pay off, setting you up for a solid, watertight seal that will last.
The exact method depends on what your roof is made of, but the core principles are always the same. It’s about attention to detail and, most importantly, using the right materials for your specific roof type. This isn't the time for a "one-size-fits-all" approach.
A common rookie mistake is globbing on way too much sealant, thinking more is better. In reality, that just creates a mess. It can trap air bubbles under the patch and lead to a weak bond that fails down the road. You’re aiming for a clean, consistent application that makes the patch a seamless part of the roof.
Patching Punctures on an EPDM Roof
If you're working with EPDM (the black, rubbery stuff), you need to be precise. You'll want a patch kit made specifically for EPDM. A great tip learned over the years is to cut the patch with rounded corners. It seems small, but it makes a huge difference in preventing the edges from catching the wind and peeling up over time.
Your patch needs to extend beyond the damaged spot by at least two inches in every direction. Don't skimp on this overlap—it’s what gives the patch the strength to handle the roof expanding and contracting with temperature changes.
Here’s how to get it done right:
- First, coat both the roof area and the bottom of the patch with the primer from your kit. This isn’t just cleaner; it’s a chemical activator that ensures the adhesive forms a powerful bond.
- Let the primer sit for a few minutes until it’s tacky to the touch. This step is critical. If you rush it, the patch won't stick properly.
- Carefully position your patch. Start pressing it down from the center and work your way out to the edges using a small, firm roller. The goal here is to push out every single air bubble.
- Once the patch is flat and secure, run a bead of EPDM lap sealant around the entire edge. This is your final line of defense against water getting underneath.
Sealing Seams on a TPO or PVC Roof
For thermoplastic roofs like TPO and PVC, leaks often happen at the seams where panels are joined. These are usually heat-welded, so when they fail, the fix involves cleaning and re-sealing, not just patching over the top.
You absolutely must use a sealant designed for TPO or PVC. Generic roofing cement or certain caulks can actually react with the plastic and cause more damage. After cleaning the seam thoroughly, apply a steady bead of the correct sealant right into the gap. Use a small putty knife to smooth it out, forcing it deep into the seam and feathering the edges so it lies flat.
Pro Tip: Whatever you do, don't try to "re-weld" a seam with a blowtorch. The pros use specialized hot-air welders with precise temperature controls. An open flame will melt right through the membrane, turning a small leak into a catastrophe.
Repairing Modified Bitumen Roofs
Modified bitumen is that tough, asphalt-based material, often with a granular surface. For this, you’ll be working with a fiber-reinforced roofing cement. It's thick, sticky, and incredibly effective, so make sure you're wearing gloves you don't mind ruining.
For small cracks, just trowel a generous layer of cement over the damage. Make sure you extend it two to three inches beyond the crack on all sides. If you’re dealing with a larger area of damage, you’ll need to build a "three-course patch." This is a classic, bomb-proof technique:
- Apply a layer of cement.
- Embed a piece of fiberglass mesh into the wet cement.
- Cover the mesh completely with a second layer of cement.
This reinforced patch is far stronger and more flexible than just a thick glob of cement on its own.
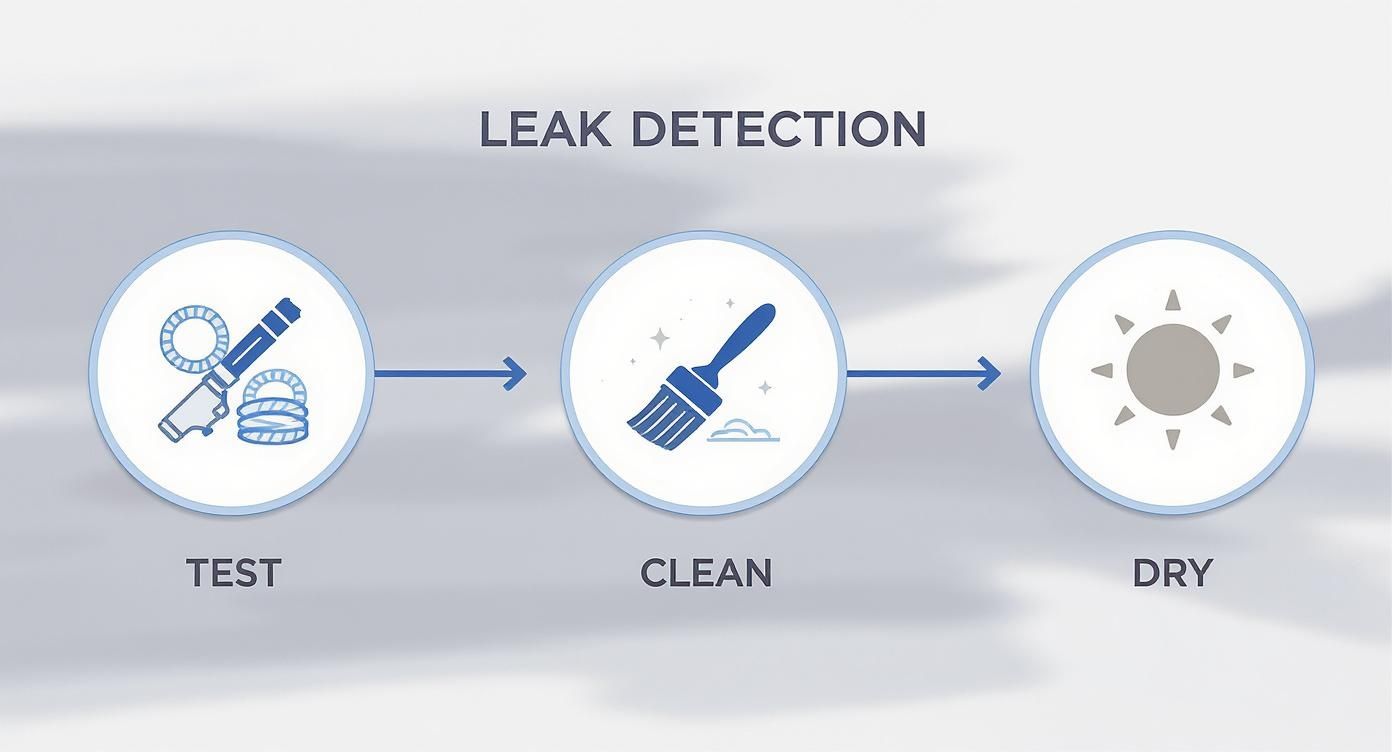
As the infographic shows, a good repair is a systematic process. It starts long before you ever open a can of sealant.
Don't forget that many leaks originate where the roof meets a wall, vent, or chimney. These vulnerable spots are protected by metal strips. If you're not familiar with them, take a moment to learn what is roof flashing and see why it’s so vital for keeping a building dry.
Choosing the Right Materials for the Job
I can’t stress this enough: using the wrong product is the fastest way to guarantee your repair will fail. The chemical compounds in EPDM, TPO, and Bitumen are completely different. A sealant that works wonders on one can literally dissolve another. Always, always match your repair materials to your roof type.
To make it simple, here's a quick guide to keep you on the right track.
Repair Material Compatibility Chart
Use this table to make sure you're buying the correct patch and sealant for your specific type of flat roof.
| Roof Material Type | Recommended Patch Material | Recommended Sealant/Adhesive | Common Mistakes to Avoid |
|---|---|---|---|
| EPDM (Rubber) | EPDM Self-Adhering Patch | EPDM Primer & Lap Sealant | Using asphalt-based cement, which will degrade the rubber. |
| TPO (Plastic) | TPO-Specific Patch Material | TPO-Compatible Sealant | Applying generic silicone caulk that won't bond properly. |
| Modified Bitumen | Granulated Bitumen Sheeting | Fiber-Reinforced Roof Cement | Not embedding mesh for larger repairs, leading to cracking. |
Sticking to these proven techniques and ensuring your materials are compatible is the difference between a temporary fix and a professional-grade repair that you won't have to worry about for years to come.
Looking After Your Roof Post-Repair
You’ve patched the leak and the sealant is cured. Job done, right? Not quite. A solid repair is a great first step, but the real secret to a long-lasting flat roof is what happens next. Think of it this way: you just fixed one weak link in the chain. Now, the goal is to keep the entire chain strong so another link doesn't snap.
This is where you shift from reacting to problems to preventing them. A little bit of attention now saves you a ton of time, money, and headaches later. It turns your one-time fix into the foundation of a smart maintenance strategy, protecting your home for years to come.
A Simple Maintenance Schedule That Works
You don't need a professional's toolkit to keep your roof in good shape. All it takes is a consistent schedule to spot tiny issues before they turn into major leaks. The trick is to be methodical, especially after the weather really tests your roof.
Here’s a straightforward plan that has proven to work time and time again:
- Twice-Yearly Inspections: Set a reminder for spring and fall. These are the perfect times to get up there for a good look. Check on your patch—is it still perfectly bonded? Are the edges still sealed down tight? Then, scan the rest of the roof for new warning signs like blisters, cracks, or separating seams.
- Post-Storm Checks: Big storms with driving rain or high winds are a flat roof's worst enemy. Once it’s safe, take a quick walk up top. Look for punctures from fallen branches or any new debris that’s blocking your drainage.
- Keep a Simple Log: It sounds overly simple, but it's incredibly helpful. Just jot down the date and what you saw. Over time, this log creates a history of your roof’s health, making it easier to spot patterns before they become problems.
A huge mistake people make is thinking a new patch makes the whole roof bulletproof. Remember, the rest of the roof is just as old as the part that failed. These inspections are your early warning system for the next potential trouble spot.
The Most Important Job: Keeping it Clear
If there’s one task that gives you the most bang for your buck, it’s keeping debris off the roof. Leaves, dirt, and twigs are the main reason drains get clogged, which leads directly to ponding water—a flat roof’s number one enemy.
When water has nowhere to go, it pools. That standing water adds a surprising amount of weight, stressing the roof structure and your new patch. Sooner or later, it will find the tiniest pinhole or crack and start a brand-new leak.
Make this clearing routine a habit:
- Sweep the Surface: Grab a soft-bristled broom and gently sweep everything off the roof. Never use a metal rake or stiff-wire brush—you’ll risk gouging the membrane and creating the very problem you're trying to prevent.
- Clear Drains and Scuppers: This is where you need to be meticulous. Pull all the gunk out of your drains, scuppers, and gutters. Water needs a clear path to get off the roof.
- Trim Overhanging Branches: If you've got trees looming over your roof, trim them back. This cuts down on leaf litter and dramatically reduces the risk of a heavy branch puncturing your roof during a storm.
This kind of proactive care is more important than ever. The global market for roof repair is expected to hit a massive US$52.27 billion by 2031, which shows just how much value there is in making a roof last. You can read more about the growing roof repair market on infinitymarketresearch.com. By following a simple maintenance plan, you’re making a smart investment in your own property's longevity and protection.
Common Questions About Flat Roof Repair
Even after you've wrapped up a repair, a few questions might still be nagging you. Getting the answers not only builds your confidence but also helps you know what to expect from your roof in the years ahead. Let's dig into some of the most common things people wonder about.
How Long Does a Flat Roof Repair Typically Last?
This is a great question, and the honest answer is: it depends. The durability of your patch really hinges on how well you prepped the area, the quality of the materials you used, and the overall state of the roof.
When you do everything right on a roof that’s still in decent shape, a solid patch can easily last 5 to 10 years, sometimes even longer. But if the surface wasn't perfectly clean and dry, or if you used the wrong kind of adhesive for your roof type, that same repair could fail in less than a year. The goal isn't just to stop a leak for now; it's to create a watertight seal that can expand and contract with the roof through every season.
Remember, a patch is only as strong as the material around it. If the rest of the membrane is brittle and old, the patch will hold, but a new leak might spring up right next to it. That's why post-repair inspections are so important.
Can I Repair My Flat Roof in Any Weather?
Definitely not. In fact, weather is probably the single most critical factor in whether a repair will succeed or fail. Trying to apply any kind of patch or sealant to a damp surface is a waste of time and money—the materials simply won't bond properly. You'll end up with a weak seal that’s guaranteed to let water through.
Temperature is just as important. Most roofing cements, sealants, and adhesives have a specific temperature range they need to cure correctly, which is usually above 40-50°F (4-10°C). Working in the cold makes adhesives go stiff and gummy, and patches can become too brittle to form a good seal. Always, always read the manufacturer's label on your products before you even think about starting.
When Should I Repair Versus Replace My Flat Roof?
Ah, the million-dollar question. The decision to repair or replace really comes down to the age of your roof and how widespread the damage is.
A repair makes perfect sense if you're dealing with isolated issues. Things like a single puncture from a fallen branch, a few blisters, or a small section of a seam that’s come loose are all great candidates for a patch.
However, you have to know when to stop patching. If your roof is nearing the end of its 18-20 year lifespan, shows extensive cracking that looks like alligator skin, or has multiple leaks popping up all over, you're fighting a losing battle. Those are clear signs the entire system is failing, and a full replacement is the smarter long-term investment. For a broader look at tackling different kinds of roof problems, you can learn more about general roofing repair services.
A few well-executed repairs can certainly buy you a few more years, but they can't turn back the clock on an old roof. Understanding the financial side is also key, and you can get a better sense of what to expect by exploring typical flat roof repair costs and how they stack up against a full replacement.