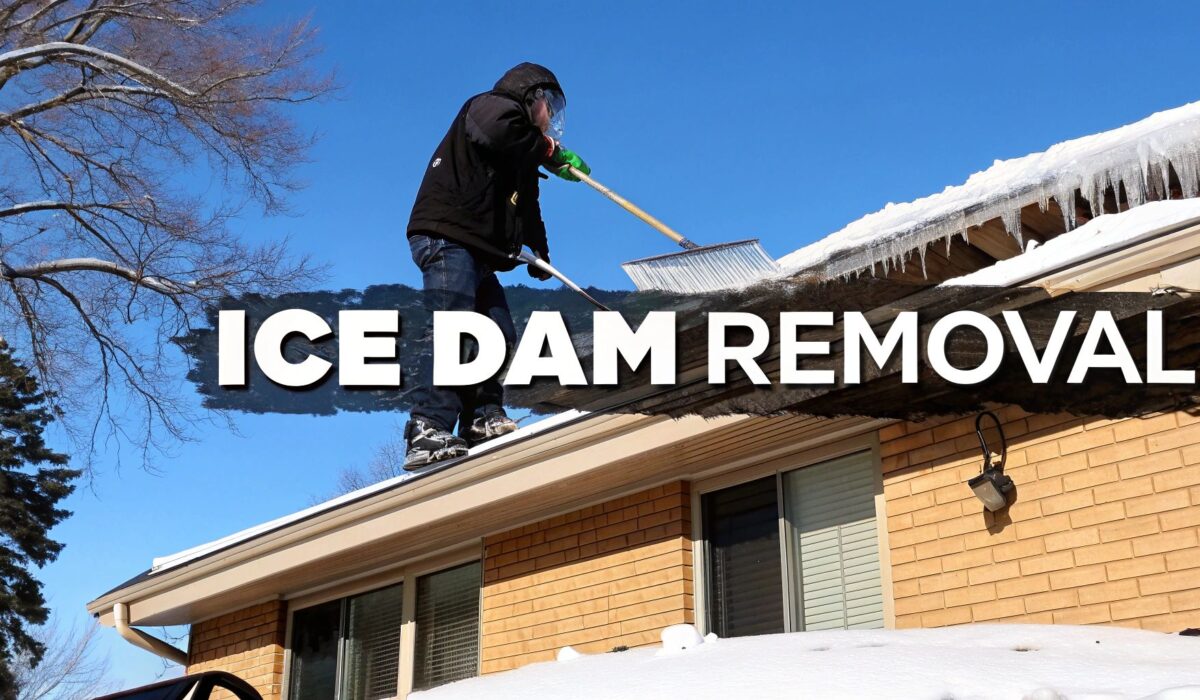
So, you've got an ice dam. The first impulse is to attack it directly, but hold on. The right way to handle it involves two main steps: first, you've got to cut off its supply by removing the snow above it with a roof rake. Then, you need to create channels through the ice so the trapped water can drain away. The best tool for this is calcium chloride ice melt packed into a stocking.
Whatever you do, don't reach for a hammer, chisel, or hot water. These methods are a fast track to damaging your shingles and gutters, turning a temporary problem into an expensive repair.
What's Really Causing Ice Dams to Form?
Ice dams are more than just a winter headache; they're a giant, flashing sign that your house is bleeding heat. If you want to get rid of them for good, you need to understand what’s happening up there. Think of an ice dam as the final, destructive act in a play that starts inside your home.
It all begins with a toasty warm attic. When heat from your living space escapes into the attic, it warms the underside of your roof sheathing. This warmth is enough to melt the snow sitting on your roof, even when the thermometer outside reads well below freezing.
This meltwater starts to trickle down the roof, but its journey comes to an abrupt halt when it reaches the eaves. Because the eaves and gutters hang out past the heated walls of your house, they stay at the same frigid temperature as the air. The water hits this cold zone and refreezes, building up layer by layer into a thick ridge of ice. That's your ice dam.
The Real Culprits Behind Ice Dams
This whole cycle gets supercharged by a few common problems in many homes. Nailing down which of these is affecting your house is the key to a permanent fix. The main things that feed this heat-loss cycle are:
- Skimpy Insulation: Not enough insulation in the attic floor is the number one offender. It’s like leaving a window open in winter; heat just pours out of your living space and into the attic, warming the roof.
- Bad Attic Ventilation: A well-ventilated attic is a cold attic. It needs a constant flow of cold outside air to keep the roof deck from warming up. If your soffit vents are blocked or you don't have proper ridge vents, that airflow stalls.
- Air Leaks: These are the sneaky heat thieves. Gaps around light fixtures, plumbing stacks, attic hatches, and bathroom fans act like tiny chimneys, funneling warm, moist air straight into your attic.
Another major contributor is something called thermal bridging. This happens when materials that don't insulate well, like the wooden rafters in your attic, create a direct path for heat to travel right through your insulation and warm the roof.
The Bottom Line: An ice dam isn't the actual problem—it's just the symptom. The root cause is an unevenly heated roof, and that's caused by heat escaping from inside your home.
Dealing with a fully-formed ice dam can get expensive, fast. When professionals have to come in with steamers, you can expect to pay anywhere from $600 to $900 per hour. Since a typical job takes 4 to 6 hours, you could be looking at a bill between $2,700 and $4,500.
By understanding what triggers them in the first place, you can stop fighting the symptoms every winter and start focusing on a permanent solution.
Assessing the Risks Before You Begin
Before you grab a ladder or a roof rake, the absolute first step is to take a hard, honest look at the situation. This isn't just a bit of snow—ice dams are heavy, unpredictable, and can be downright dangerous. Rushing in without a clear-eyed assessment can lead to a trip to the emergency room or a home repair bill that makes the ice dam look like a minor inconvenience.
Think about it: you've got slippery surfaces, the surprising weight of falling ice chunks, and maybe even power lines lurking nearby. A slip from just a few feet up can be devastating. And a big piece of ice breaking free can do serious damage to anything—or anyone—below.
Honestly Evaluating Your Roof
Not every roof is a candidate for a do-it-yourself job. What might be straightforward on a single-story ranch with a gentle slope is a completely different—and far more dangerous—ballgame on a two-story home with a steep pitch. You have to be realistic about your own comfort level and physical ability.
Ask yourself these questions before you even consider tackling it yourself:
- How high is my roof? Can you even reach the problem area safely from the ground with a roof rake? Those rakes are really only effective for the first few feet of the roof's edge and get unwieldy fast on taller homes.
- What's the weather doing? Trying to work during a snowstorm, in high winds, or in bone-chilling cold is just asking for trouble. Your risk of slipping or losing your grip skyrockets in bad weather.
- How big is the problem? Are we talking about a small, isolated ice dam over the porch? Or is this a monstrous ridge of ice running the entire length of your house? Truly massive dams often require professional-grade equipment, like a steamer, to remove safely.
This graphic really breaks down how escaping heat from your home is the root cause of the whole mess.
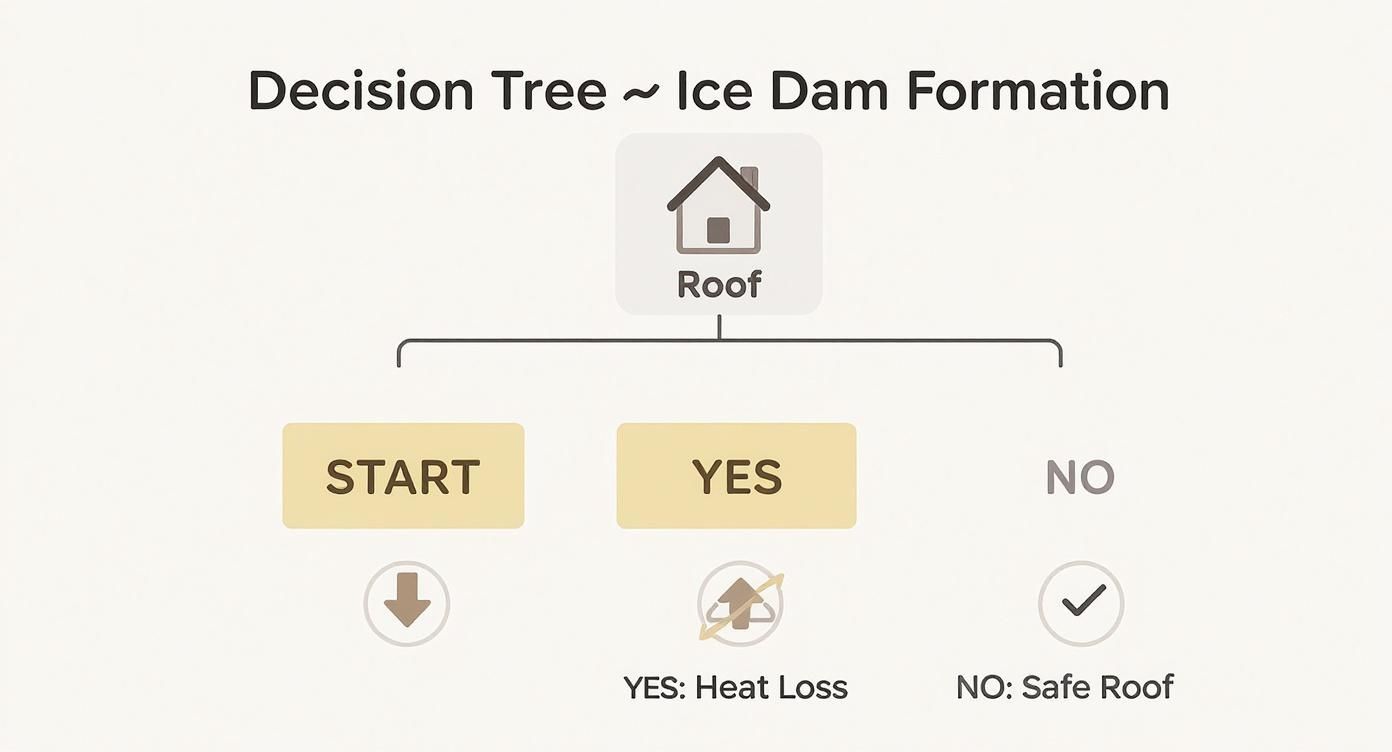
Ultimately, you can see that a well-insulated and ventilated roof—one that doesn't lose a lot of heat—is a roof that stays free of ice dams.
Understanding the Financial and Structural Risks
Beyond the risk to yourself, you need to consider the risk to your house. Going at the ice with the wrong tools or a heavy hand can cause some serious, long-term damage. Chipping away with a hammer or shovel can easily puncture shingles or rip your gutters right off the house.
Even a tiny hole in your roofing can let in a surprising amount of water, leading to a rotted roof deck, soggy insulation, and ugly water stains on your ceiling. It's also critical to understand what is roof flashing and how easily it can be damaged. Banging up these metal pieces around chimneys and vents can create brand new leaks that are often worse than the original problem.
Before you start any removal work, it’s a good idea to know where you stand with your insurance. For a better understanding of what your policy covers, check out an essential guide to homeowners insurance. This can clarify what might be covered if the ice dam has already caused damage inside your home.
Taking a moment to weigh these risks isn't meant to scare you off. It's about making a smart, informed decision. If you have any doubt at all about your ability to handle the job safely and without damaging your home, calling a professional is always the right move.
Ground-Based DIY Removal Techniques That Work
If you've checked things out and decided you can tackle the ice dam from the ground, you're in a good spot. You can get a lot done without ever needing to climb a ladder. The real secret to DIY ice dam removal isn't about brute-forcing the ice off your roof. It’s about managing the two things causing the problem: the snow that feeds the dam and the water that gets trapped behind it.
Let's break down how to handle this safely and effectively. The absolute first thing you need to do is stop the ice dam from getting any bigger. Think of the snow on your roof as fuel. As long as it's there, it will keep melting, running down to the cold edge, and freezing. This just makes the dam—and your problem—grow.
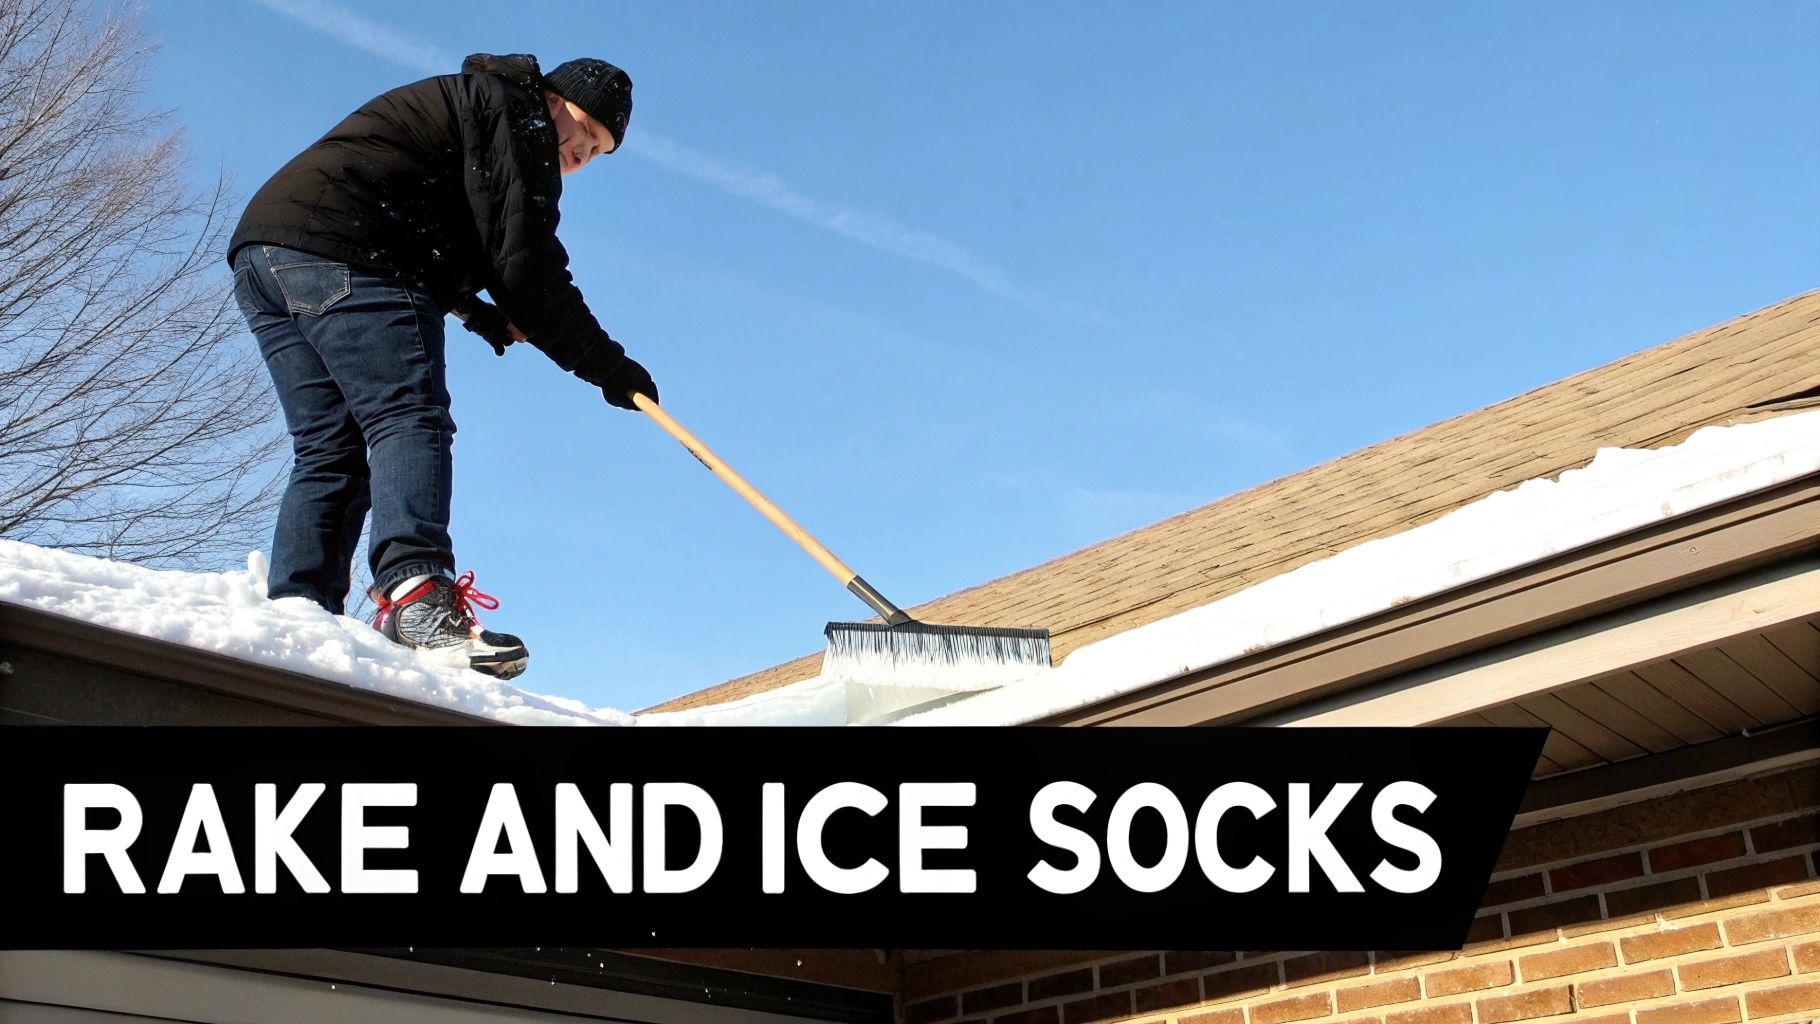
This is where a good roof rake becomes your most valuable tool. These have long, extendable handles that let you pull snow down from the eaves while your feet are planted safely on the ground.
Mastering the Roof Rake
Using a roof rake seems simple enough, but a little technique goes a long way. Your main goal is to clear a 3 to 4-foot-wide strip of snow all along the edge of your roof. Doing this creates a cold buffer zone where any new meltwater won't have a blanket of snow to freeze into, effectively cutting off the ice dam's supply line.
Work gently. You're not trying to scrape the roof clean. Let the tool's weight do the work and pull the snow down in sections. Banging the rake head against your shingles can knock off the protective granules, which is the last thing you want. And, of course, make sure no one is standing where all that snow is about to land.
With the snow gone, you can now deal with the ice itself. The mission isn't to obliterate the dam but to give the trapped water an escape route. The safest way to do this from the ground involves a chemical helper: calcium chloride.
Using Calcium Chloride Ice Socks
Calcium chloride is a real workhorse for melting ice, even when it's bitter cold outside. But—and this is important—never just toss the pellets directly onto your roof. That's a fast track to damaged shingles and corroded gutters.
The pro-level DIY method is to create "ice socks" that apply the deicer in a controlled, targeted way.
Here’s how you can make and use them:
- Get Your Supplies: All you need is an old pair of pantyhose or stockings and a container of pure calcium chloride pellets. Be sure it’s not rock salt (sodium chloride).
- Fill 'Em Up: Pour the calcium chloride into the leg of the stocking to create a long, weighted tube. A 2-3 foot sock is a good length. Tie a knot in the open end to seal it.
- Place Them on the Dam: Now, using your roof rake or another extension pole, carefully lift and lay the socks vertically over the ice dam. You want them to cross the dam perpendicularly, creating a path from the pooled water down over the gutter.
The calcium chloride will slowly pull in moisture and generate heat, melting a clean channel right through the ice. This lets all that backed-up water drain away, taking the pressure off your roof and stopping potential leaks in their tracks. For best results, place a sock every few feet along the dam.
Key Takeaway: The goal of DIY removal is not to eliminate the entire ice dam with force. It is to create drainage paths that allow trapped water to escape, which is the immediate threat to your home.
Common DIY Mistakes That Cause More Harm Than Good
When you see water dripping inside, it’s easy to panic and grab the nearest tool. I've seen it a hundred times. Unfortunately, some of the most common "quick fixes" are also the most destructive. You have to steer clear of these methods:
- Hammers, Chisels, or Hatchets: Attacking the ice with sharp tools is a fantastic way to shatter your shingles, dent your gutters, and create brand-new leaks.
- Hot Water or Pressure Washers: Pouring hot water on an ice dam sounds smart, but you're just adding more water to the equation. It will refreeze almost immediately, often making the dam bigger. A pressure washer will strip the protective granules right off your shingles.
- Rock Salt (Sodium Chloride): This stuff is bad news for your house. Unlike calcium chloride, rock salt is incredibly corrosive to the metal in your gutters, flashing, and downspouts. It can also damage shingles and will kill any plants or grass it drains onto.
Speaking of drainage, keeping your gutters clean is a huge part of preventing ice buildup in the first place. When gutters are clogged, water has nowhere to go but back up onto the roof. You can find a complete guide on how to clean downspouts and gutters to make sure your system is ready for winter's worst.
When the ice dam on your roof is just too big for ground-based tactics, or worse, you're seeing water creep into your home, it's time to call in the professionals. And when it comes to safe, effective ice dam removal, nothing beats low-pressure, high-temperature steam. This isn't just about using a powerful tool; it’s a surgical approach designed to protect your roof's integrity.
A steamer acts like a hot knife through butter. It doesn't rely on the brute force of a hammer or the harshness of chemicals. Instead, it uses targeted heat to methodically cut through thick ice. This allows a technician to break the dam into manageable chunks that can be cleared away without ever making forceful contact with your shingles.
How Steam Gets the Job Done Safely
The secret is in the physics. A proper ice dam steamer runs at a very low pressure—usually under 300 PSI—but at an extremely high temperature, often between 250-300°F. This specific combination is what makes it so effective and safe.
The low pressure means the steam is gentle on your shingles, so it won't strip away the protective granules like a power washer would. At the same time, the intense heat transfers a massive amount of energy right into the ice, melting it remarkably fast.
A skilled operator can use this focused steam to carve precise channels, slice the ice dam free from the gutters, and break down the main ridge in a completely controlled way. It’s the only method that truly removes the ice without adding more stress or impact damage to your roofing system.
Watch Out for High-Pressure Impostors
Here's something you absolutely need to know: not all "steam" services are the same. A common trick among less-than-reputable outfits is to use a hot-water pressure washer and call it a steamer. This is a massive red flag and can cause irreversible damage.
A high-pressure washer is a roof's worst nightmare. It will:
- Blast Away Shingle Granules: The intense jet stream scours the protective surface off your shingles, which can take years off their lifespan.
- Force Water Uphill: The pressure can drive water under the shingles and past your roof’s protective layers, soaking the sheathing underneath.
- Crack and Tear Materials: A powerful jet can easily lift or tear shingles, crack siding, and damage window seals.
A real low-pressure steamer looks different. It typically has a large heating unit and a trigger gun that emits a soft cloud of steam, not a forceful jet of water. Before you hire anyone, ask them for their machine's PSI rating. If they tell you it’s in the thousands, they have the wrong tool for the job. Walk away.
Comparing Your Options
Before you decide, it's helpful to see how different methods stack up against each other. While DIY options can seem cheaper, they often introduce risks that can lead to much more expensive repairs down the road. This table breaks down the most common approaches.
| Method | Effectiveness | Roof Safety | Average Cost | Key Risk |
|---|---|---|---|---|
| Low-Pressure Steam | Very High | Excellent | $800 – $2,400+ | Hiring an unqualified operator |
| Calcium Chloride | Moderate | Poor | $20 – $50 (DIY) | Damages shingles, gutters, and plants |
| Rakes/Chisels | Low to Moderate | Very Poor | $50 – $150 (DIY) | High risk of puncturing/damaging shingles |
| Hot Water Hose | Low | Poor | Minimal (DIY) | Can refreeze, adding to the problem |
As you can see, professional steaming is the only method that combines high effectiveness with excellent roof safety. It directly addresses the problem without creating new ones.
The Final Verdict: Is It Worth the Cost?
Hiring a professional for steam removal is an investment in your home's long-term health. It has become the industry-preferred method for a reason. While a typical job might cost between $800 and $2,400 and take 2 to 5 hours, it eliminates the immediate threat of water damage and prevents costly roof repairs. When you explore a detailed cost comparison of different ice dam removal methods, the value of doing it right the first time becomes crystal clear.
When you're dealing with a large, stubborn ice dam that’s actively leaking, low-pressure steam is simply the best tool for the job. It's the safest, most efficient way to protect your home and give you back your peace of mind.
Creating a Cold Roof to Prevent Future Ice Dams
Knocking down an ice dam is a temporary fix for a problem that's guaranteed to come back. If you want to win the war against ice dams for good, you have to stop them from forming in the first place. The real, permanent solution is creating what we call a "cold roof."
A cold roof doesn't mean your house gets cold—it means your attic does. The goal is to keep the roof's surface temperature as close to the outdoor air temperature as possible. By keeping the attic space chilly, you cut off the engine that drives that destructive melt-and-freeze cycle. This isn't a single fix, but a balanced system built on three pillars: insulation, ventilation, and air sealing. When they work together, they stop heat from your living space from ever reaching the underside of your roof.
The Three Pillars of a Cold Roof System
Think of these three elements like legs on a stool. If one is missing or wobbly, the whole thing fails, and you'll be right back where you started.
- Insulation: This is your home's main thermal shield. A thick, continuous blanket of insulation on the attic floor is what stops most of the heat from rising out of your living areas.
- Ventilation: This is the cooling system. A steady flow of cold, outside air moving through the attic whisks away any heat that does manage to sneak past the insulation.
- Air Sealing: This is all about the details. Sealing up small gaps, cracks, and penetrations prevents warm, moist air from bypassing the insulation entirely and creating hot spots on your roof.
Address all three, and you can turn your roof from an ice dam factory into a stable, weather-proof structure. We break down exactly how these pieces work together in our comprehensive guide on how to prevent ice dams.
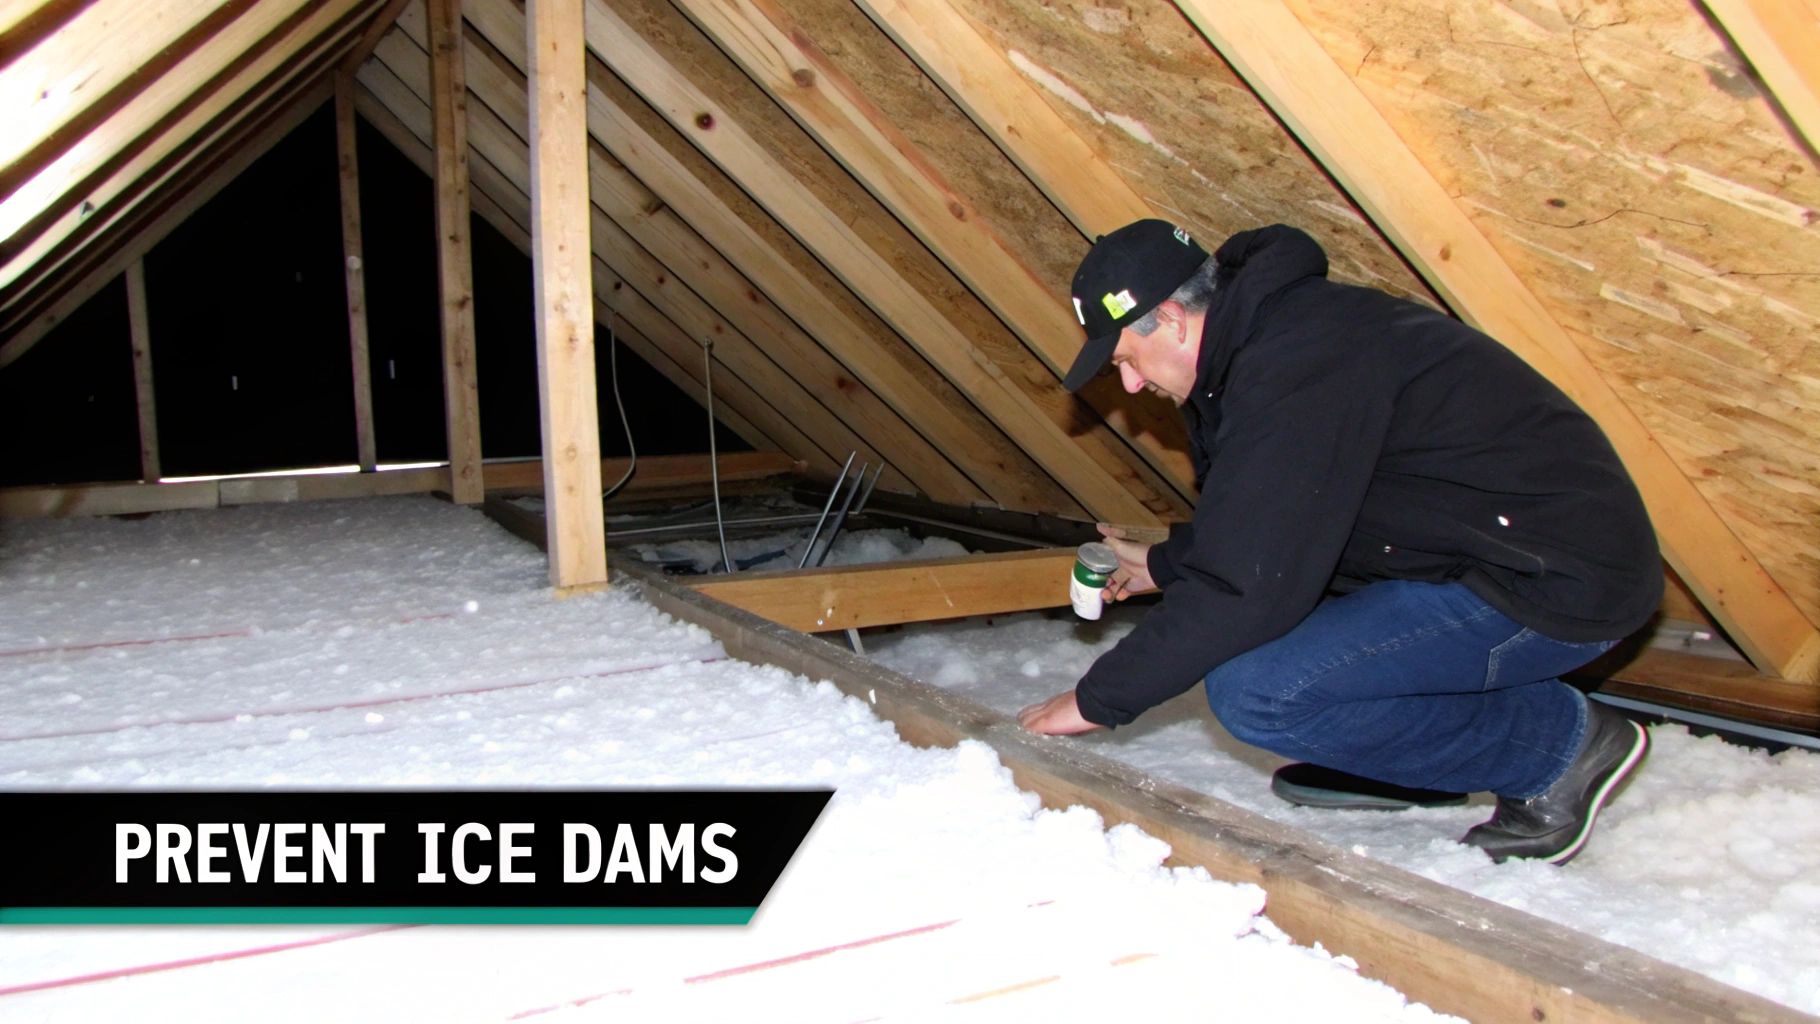
Conducting a Basic Attic Audit
Before you can start fixing things, you need to play detective. A quick attic audit will show you exactly where your home is losing heat. On a cold day, just grab a good flashlight and head up to look for these common culprits.
First, check out the insulation. Is it deep and evenly distributed? For most colder climates, you should be looking at a minimum of 12 to 15 inches of insulation. If you can easily see the tops of your ceiling joists, you definitely need more.
Next, it's time to hunt for air leaks. These are often the biggest offenders, acting like tiny chimneys that funnel warm air straight into your attic.
Pro Tip: On a really cold day, you can often spot air leaks without any special gear. Look for small patches of melted frost or condensation on the underside of the roof sheathing. That's a dead giveaway of a warm air leak directly below.
Be sure to check these common trouble spots:
- Around recessed can lights (unless they are specifically IC-rated and airtight)
- Where plumbing pipes or electrical wires come through the ceiling
- Gaps around the chimney chase
- The attic access hatch or pull-down stairs—these are notoriously leaky
- Ductwork for your bathroom and kitchen exhaust fans
Evaluating Your Attic Ventilation
Finally, take a look at your ventilation. A good system needs balanced airflow: cool air enters through vents in your soffits (the underside of the roof overhang) and exits through vents near the peak, like a ridge vent.
From inside the attic, look toward your soffit vents. Can you see daylight? It's incredibly common for insulation to get shoved into the eaves, blocking these intake vents and choking off the airflow. You should see plastic or cardboard baffles that create a channel, holding the insulation back so air can flow freely.
If your soffits are blocked or you don't have enough venting at the roof's peak, your attic can't breathe. Any heat that leaks in gets trapped, warms up the roof deck, and starts the whole snow-melting process over again.
By methodically checking your insulation, sealing those hidden air leaks, and making sure your ventilation is working, you're doing more than just getting ready for next winter. You’re making a permanent investment that protects your home, lowers your energy bills, and makes ice dam removal a thing of the past.
Common Questions About Removing Ice Dams
When you're staring at a massive ridge of ice on your roof, it's natural to have a lot of questions. We've been there, and we've heard them all from homeowners over the years. Let's walk through some of the most common concerns to give you the clarity you need to handle things the right way.
Should I Worry About a Small Ice Dam?
Honestly, yes. Even a little ice dam is a red flag. It’s a clear signal that heat is escaping from your attic and melting snow on your roof, creating the perfect conditions for a much bigger problem.
Think of that small ridge of ice as a warning shot. It might not be causing a leak right now, but it tells you something is wrong with your insulation or ventilation. It’s your chance to investigate and fix the root cause before the next big snowstorm creates a monster that sends water pouring into your living room.
Can I Just Chip the Ice Off Myself?
This is probably the most common mistake people make, and it's a gut-wrenching one to see. Grabbing a hammer or an ax and going to town on an ice dam is a recipe for disaster. Your shingles are incredibly brittle in freezing temperatures, and one wrong move can easily crack, shatter, or puncture them. You'll end up with a much bigger leak than the one you were trying to stop.
Expert Insight: Brute force is the enemy of a healthy roof. The only truly safe professional method for removing thick ice is low-pressure steam, which melts the ice without any forceful impact on your roofing materials.
There's a reason professional removal costs what it does. It's slow, careful work. You can expect to pay anywhere from $150 to $700 per hour, and most companies have a two-hour minimum to cover their setup and safety measures. Depending on the size of the dam and the pitch of your roof, a job can easily range from $650 to $4,000. If you want to understand what's behind those numbers, it's worth learning about the complexities of ice dam removal costs.
Will My Homeowners Insurance Cover Ice Dam Damage?
Most of the time, yes—but there’s a catch. Standard homeowners policies typically cover the damage caused by the ice dam, like ruined drywall, soaked insulation, and warped floors. What they often don't cover is the cost of removing the ice dam itself.
The exception is when removal is deemed necessary to prevent further, immediate damage. Every policy is different, so your first step should be to pull out your documents or call your agent. Before you do anything, be sure to take plenty of photos and videos to document the situation for your claim.
What Is the Safest Way to Hire a Professional?
With an urgent problem like an ice dam, it's tempting to hire the first person who answers the phone. Don't. You need a specialist, not just a guy with a ladder.
Here's a quick checklist for finding a legitimate pro:
- They Use Low-Pressure Steam: This is non-negotiable. Ask them directly what equipment they use. If they say "hot pressure washer," hang up. That's a great way to blast the granules right off your shingles.
- Proof of Insurance: Don't be shy about asking for their certificates of liability and workers' compensation insurance. This protects you from any liability if someone gets hurt on your property.
- Experience and Reviews: Look for a company that specializes in this and has a solid local reputation. Check their reviews online and see if they have photos of past work.
- A Clear Contract: A professional will always provide a written agreement. It should clearly state the work they'll be doing, the estimated cost, and their insurance details.
Taking a few minutes to vet your contractor ensures you get someone who will solve the problem, not create a new one.
Dealing with recurring ice dams can be a sign of underlying roofing issues. If you're tired of battling ice every winter, the team at Penn Ohio Roofing & Siding Group can help diagnose the root cause, from poor insulation to inadequate ventilation. Contact us today for a free estimate and a permanent solution. Learn more at https://pennohiorc.com.