When you're trying to hunt down the source of a roof leak, you have to play detective. The search starts inside your home—usually the attic—and then moves to the roof itself.
The trick is to trace the water stains backward to their highest point. Water is sneaky; it can travel a long way from where it gets in before you ever see a drip, so you can't just assume the wet spot on your ceiling is directly below the hole. Before you start, though, let's talk about getting prepared.
Your Pre-Inspection Safety and Tool Checklist
Before you even touch a ladder, a little prep work is essential. Finding a leak isn't just about spotting the problem; it's about doing it safely and without wasting time. Rushing in without the right gear can turn a small leak into a big personal injury. The last thing you want to worry about is your footing when your focus should be on the hunt.
Gather Your Essential Tools
Having everything you need within arm's reach makes the whole process smoother and saves you from endless trips up and down the ladder. Think of it as your leak-hunting kit.
- High-Powered Flashlight: A good, bright flashlight is non-negotiable for peering into the dark corners of an attic. You need a strong beam to catch the subtle shimmer of a water trail.
- Binoculars: A great way to get a first look from the safety of the ground. Scan the roof for anything that looks out of place, like shingles that are curled up or missing entirely.
- Sturdy Ladder: Make sure your ladder is solid, in good repair, and high enough to get you to the roofline safely. No overreaching.
- Utility Knife and Pry Bar: If you need to peek under a suspicious shingle, these are the tools for the job. Just be gentle.
- Chalk or Duct Tape: When you find a spot you think is the culprit, mark it. It makes it a whole lot easier to find again later.
Prioritize Safety Above All
I can't stress this enough: cutting corners on safety is a massive mistake. A leak is a problem, but a fall from a roof is a life-altering event. The cost of water damage from roof leaks is already huge—exceeding $12 billion annually in the U.S. alone. Don't become a statistic.
My best tip? The perfect time to look for a leak is on a dry, sunny day right after it rains. As the water trails dry, they leave behind a very clear path, making them much easier to follow.
Always wear soft-soled, slip-resistant shoes. They give you a better grip and won't damage the shingles. And please, have a spotter on the ground to hold the ladder and be there just in case. If you find some busted shingles and are thinking of a DIY fix, it's worth reading up on how to patch shingles to see what's involved.
And common sense rules: never, ever get on a roof during a storm, in high winds, or if there’s any chance of ice.
Start Your Search Inside by Following the Clues
The hunt for a roof leak almost always starts inside your home, not on top of it. Think of yourself as a detective. The evidence often shows up long before you see an actual drip, so your first move should be to grab a good flashlight and head for the highest point in your house. For most homes, that means the attic is ground zero.
Forget the roof for a moment. Once you're up there, you’re looking for the subtle calling cards that water leaves behind. Take your time. Methodically scan the underside of the roof sheathing, the rafters, and pay special attention to the insulation.
Deciphering the Clues in Your Attic
You're looking for more than just a puddle. Any of these signs are a red flag for moisture getting in:
- Dark Water Stains: Check the wood sheathing and rafters for any discoloration. Sometimes these stains are faint, like a shadow, but other times they're impossible to miss, looking like a dark ink blot that has spread across the wood.
- Damp or Compressed Insulation: Fiberglass or cellulose insulation is supposed to be fluffy. When it gets wet, it mats down and clumps together. If you see a spot that looks compressed, give it a gentle poke. If it feels damp or stays packed down, you’re getting warm.
- Mold or Mildew Growth: That musty, damp smell is a dead giveaway. Look for any black, green, or white fuzzy spots on the wood. Mold can't grow without moisture, so finding it is a sure sign you have a persistent water problem.
Here’s something I’ve learned over the years: water is a trickster. It almost never drips straight down from where it gets in. Gravity will pull it along the path of least resistance, which usually means it travels down a rafter or along the underside of the roof deck for several feet before it finally decides to drip.
Your best clue is the high-water mark. Trace any water stain or moisture trail back up to its highest and darkest point. That spot is almost always directly below, or very close to, the actual entry point on the roof.
When you find that spot, mark it with a piece of chalk. Even if the wood feels dry to the touch right now, the stain tells the real story. This chalk mark will be your map when you finally head outside.
Checking Your Living Spaces for Evidence
What if you don't have an attic? Or what if the water is finding a way to sneak past it? In that case, the clues will start appearing in your main living areas. The signs are often subtle at first but get more obvious as the problem gets worse. A little proactive searching can help you stop a small issue from becoming a catastrophe.
Keep an eye out for these telltale signs on your ceilings and walls:
- Peeling or Bubbling Paint: As water seeps behind drywall, it pushes the paint away from the surface, creating bubbles or causing it to peel. If you press on one of these bubbles and it feels soft—or worse, water squishes out—you've got an active leak on your hands.
- Discoloration Around Fixtures: Pay close attention to the ceiling around light fixtures, ceiling fans, and smoke detectors. Every one of these is a penetration through your ceiling, creating a natural weak point where water loves to collect. You'll often see it as a yellowish or brownish ring.
- Swollen or Sagging Drywall: This is a sign that things are getting serious. When drywall gets saturated, it loses all its strength. It will start to swell, feel mushy to the touch, and eventually begin to sag under its own soggy weight.
Pinpointing these clues inside is the critical first step. It dramatically narrows down your search area and gives you a much better idea of where to focus when you take the investigation outdoors.
2. Taking the Hunt Outside: Your Exterior Roof Inspection
Now that you've gathered clues from inside your home, it's time to head outdoors. Think of yourself as a detective—your interior inspection gave you a general search area, and now you're going outside to find the culprit. The goal is to match the indoor water stains with a specific point of failure on the roof.
You don't always have to climb a ladder right away. In fact, a safe start from the ground can reveal a surprising amount. Grab a pair of binoculars and scan the roof section directly above where you found the interior leak. You're looking for anything that seems off—a shingle that's missing, flashing that's bent, or a vent that looks damaged. This simple ground-level check often spots the most obvious problems.
Focus on the High-Risk Areas
Roof leaks rarely spring up in the middle of a perfectly shingled field. They're much more likely to happen where something interrupts the roof's surface, creating a seam that has to be sealed. Over time, these seals are where things tend to go wrong.
When you're inspecting, make a beeline for these common problem spots:
- Chimneys and Skylights: The metal flashing that seals the gap between your roof and these structures is a notorious failure point. Check for rust, gaps, or old, cracked sealant.
- Vents and Pipes: Look at the plumbing vents, exhaust fans, or any other pipes coming through the roof. They're usually sealed with a rubber boot or collar. After years of sun and weather, these boots can dry out, crack, and split wide open, giving water a direct path inside.
- Roof Valleys: These are the channels formed where two roof planes meet. They're designed to guide water down, but they also collect leaves, pine needles, and other debris. When a valley gets clogged, it acts like a dam, forcing water to back up and sneak under your shingles.
To make this easier, here's a quick reference table for what to look for when you're inspecting the most common exterior leak sources.
Common Exterior Leak Sources and What to Look For
| Roof Component | What to Inspect for | Why It Leaks |
|---|---|---|
| Flashing | Rust, cracks, bent metal, or gaps between the flashing and the roof/chimney. | The metal seal that protects seams has failed, allowing water to get behind it. |
| Shingles | Missing, cracked, curled, or "bald" shingles with no granules left. | Damaged shingles expose the underlayment, and lifted ones can funnel rain underneath. |
| Roof Vents | Cracked rubber boots/collars, missing nails, or damaged vent hoods. | The rubber seal has deteriorated from sun exposure, creating a direct opening for water. |
| Valleys | Piles of leaves, sticks, or other debris. Missing or damaged shingles in the valley. | Debris dams up water, forcing it to back up and seep under the shingles at the roof's edge. |
| Gutters | Clogs from leaves and granules. Water overflowing from the top. | When gutters can't drain, water pools and can seep back under the roofline, rotting the fascia board. |
By checking these key areas first, you’re focusing your efforts where over 90% of roof leaks typically occur.
What Damaged Shingles and Gutters Are Telling You
While you’re focused on the penetrations, don't forget to give the rest of the roof a good once-over. Are any shingles curling up at the edges? Do you see any that are cracked or have bald spots where the protective granules have worn off? Even one shingle that's lifted can be enough to catch wind-driven rain and channel it right where you don't want it.
Clogged gutters can be a sneaky source of leaks, too. When water has nowhere to go, it pools up and can easily seep back under the edge of your roof. If you notice a ton of shingle granules in your gutters, that’s a big red flag that your shingles are nearing the end of their life. For a deeper dive on this, our guide on how to clean downspouts and gutters is a great resource.
Pro Tip: Remember that water flows downhill. The spot where the leak enters your roof is almost always uphill from where you see the stain on your ceiling. Start your search at the interior mark and work your way straight up the roof slope.
By methodically checking these vulnerable spots, you stop guessing and start diagnosing. This targeted approach is the fastest and most reliable way to find exactly where the water is getting in.
Using a Water Test to Find Stubborn Leaks
Sometimes, a visual inspection just isn’t enough. You can stare at your shingles until you're cross-eyed and seal every vent flashing, but that frustrating drip-drip-drip persists. When you've checked all the usual suspects and come up empty, a controlled water test is your best bet for finding exactly where the water is breaking through.
This isn't about blasting your roof with a pressure washer or a firehose. Think of it more like a careful bit of detective work. It's a methodical process that takes some patience and, ideally, a helper. You'll need one person outside with a garden hose and another inside the attic, ready to spot the first sign of a drip.
How to Conduct a Systematic Water Test
The secret to a successful water test is moving slowly and deliberately. You want to start low on the roof slope, working your way up. Find the general area inside where you've seen the stain or water, then go outside and start soaking the section of roof directly above it, near the eaves.
Let the hose run on that one small area for several minutes. Your partner inside needs to keep their eyes glued to the underside of the roof sheathing. If nothing shows up, move up the roof a few feet and soak the next section. This low-to-high approach is absolutely crucial.
The biggest mistake people make is starting at the top of the roof. Water runs downhill, so if you soak the peak first, it will flow over the entire slope. When a drip finally appears inside, you'll have no idea if it started at the top or somewhere halfway down that the water just ran across.
Stay in constant communication. The second your spotter inside yells, "I see it!"—you've found your leak.
This infographic gives you a great overview of the whole inspection process, showing how you'd get to the point where a water test becomes your next logical step.
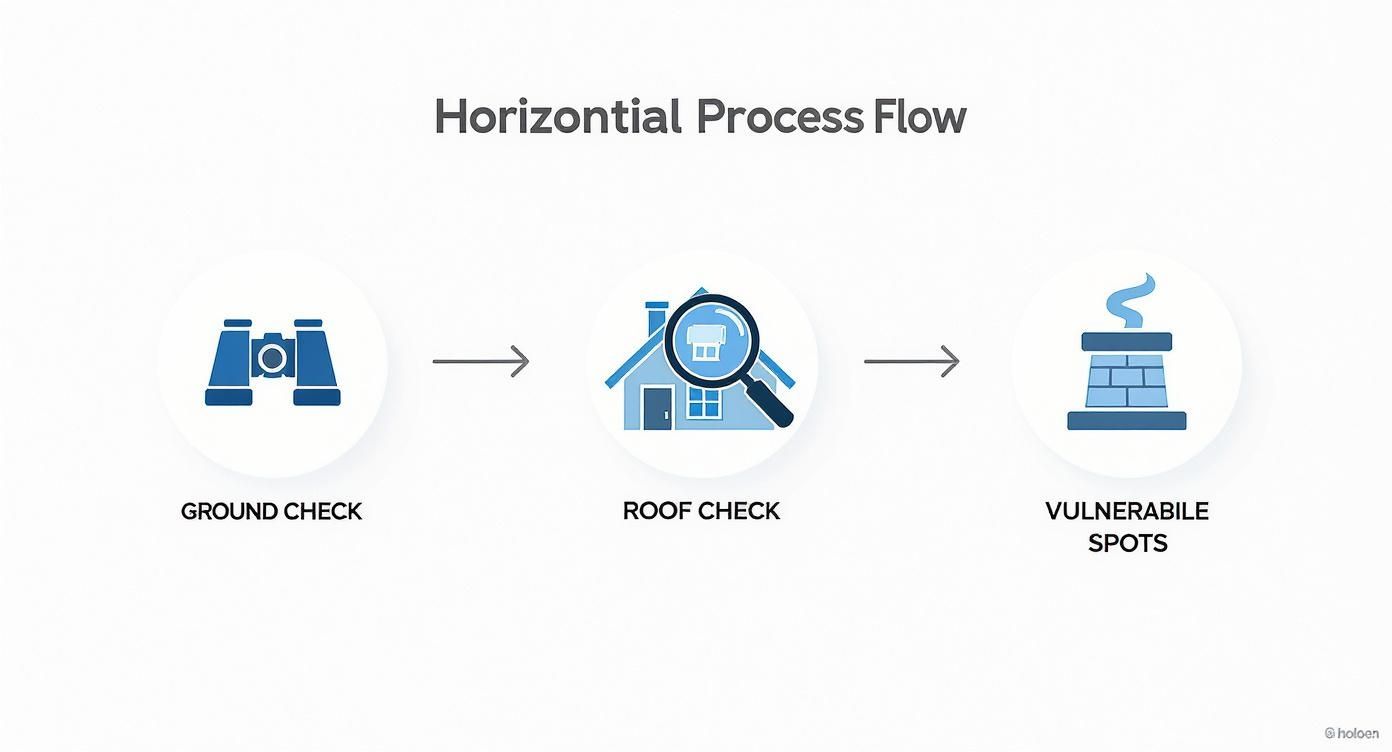
As you can see, you start from the ground and systematically narrow down the possibilities before getting the hose out. It's all about eliminating variables.
Why This Method Is So Effective
By soaking small, targeted areas, you're essentially recreating a steady rainstorm on your own terms. This gives the water time to seep through the problem spot and travel to where it becomes visible indoors. It takes all the guesswork out of the equation and pinpoints the exact point of entry.
When you're trying to figure out how to find roof leaks that a simple visual check can't, this is hands-down the most reliable DIY method.
Catching roof leaks early can save you from a world of hurt and expensive structural repairs. While some electronic leak detection kits can get you in the right ballpark, they often don't have the precision you need. The industry is even seeing more advanced solutions, which you can read about in this roof water leak detector market report from Future Market Insights. By using a simple water test to confirm the source, you can be confident your repair efforts are aimed at the real problem.
Troubleshooting Tricky Leaks and Common Mistakes
So you've poked around the attic, given the roof a thorough once-over, and even tried the water test, but the drip persists. Don't throw in the towel just yet. This happens all the time. Some leaks are just incredibly deceptive and require a bit of detective work.
One of the biggest mistakes I see homeowners make is assuming the leak must be directly above the water stain on the ceiling. That’s rarely the case. Water is sneaky; it can sneak in through a tiny gap in the flashing, travel ten feet sideways along a roof rafter, and then decide to drip. The stain you're seeing is just the final destination, not the point of entry.
Debunking Phantom Leaks
Sometimes, what you're convinced is a roof leak isn't coming from the roof at all. These "phantom leaks" can have you chasing your tail for days. Before you climb that ladder again, it's worth ruling out a couple of other common culprits.
- Attic Condensation: This is a classic impostor, especially in places with cold winters. When warm, moist air from your house rises into a chilly attic, it condenses on the cold roof sheathing. The result? Drips that look exactly like a roof leak.
- Hidden Plumbing Issues: A pinhole leak in a pipe or a dripping HVAC unit in the attic can easily be mistaken for a roof problem. If the damp spot is there whether it’s raining or not, you should probably suspect a plumbing issue first.
Here’s my rule of thumb: If the dampness only shows up or gets worse after rain or snow, it’s almost certainly the roof. If it’s a constant issue, start looking for other water sources inside the house.
Investigating Intermittent Leaks
What about those leaks that only appear during a heavy, wind-driven storm? These are hands-down the most frustrating to track down.
This kind of leak almost always points to a problem where rain is being forced sideways or even upwards into small gaps. Think about areas where the roof meets a vertical wall or around a chimney. A gentle rain might just flow right over it, but a driving rain finds every little weakness. This is where understanding what is roof flashing and its role becomes absolutely critical.
Broadening your knowledge base can also be a huge help here. While this guide is all about roofs, learning some general water leak detection tips for your home can make you a much better troubleshooter when the source isn't obvious. When you're stuck on how to find roof leaks in these tricky situations, a methodical, patient approach will always be your best bet.
Common Questions About Finding Roof Leaks
Finding where a roof leak starts can feel like a bit of a detective game. To give you a head start, here are some answers to the questions I hear most often from homeowners trying to track down a leak. Think of this as a quick guide to help you figure out what you're up against and decide what to do next.
What’s the Fastest Way to Find a Roof Leak?
The quickest route usually begins inside your house. If you can, get into your attic on a sunny day. Bring a good flashlight and look for water stains, dark spots, mold, or damp insulation on the underside of the roof sheathing. The highest, darkest part of that stain is almost always right near the entry point.
No attic access? No problem. Just find the highest spot of the water stain on your ceiling and measure its distance from two exterior walls. Then, you can take those same measurements and apply them to the outside of your roof. This gives you a pretty good starting point for your outdoor search.
Why Can It Be So Hard to Find Some Leaks?
Oh, absolutely. Some leaks are incredibly tricky to pin down. The real challenge is that water rarely drips straight down. It often finds a path of least resistance, traveling along rafters, roof decking, or even a vapor barrier before it finally shows up as a spot on your ceiling. That means the damage you see inside could be a long way from the actual hole on the outside.
I've found that the most frustrating leaks often come from a few usual suspects:
- Flashing around chimneys, vents, or skylights
- Roof valleys where two different roof planes meet
- Ice dams that build up along the edge of the roof in winter
If a quick look around doesn't give you an obvious culprit, a methodical water test is your best bet.
Here's a tip I always share: The leak's entry point is almost always uphill from where you see the water inside. Gravity is your guide, so always trace stains back up toward the peak of the roof.
How Can I Tell if It's My Roof or Something Else?
The key to figuring this out is all about timing and location. If that water spot on your ceiling only shows up or gets worse right after it rains or snows, you can be 99% sure it’s a roof leak. It's a classic cause-and-effect scenario.
On the other hand, if you're dealing with a constant drip that doesn't care what the weather is doing, you're likely looking at a plumbing problem. Condensation is another possibility, but it usually looks different—think widespread moisture or a layer of frost across a large surface in the attic, especially in cold weather. A roof leak almost always leaves a distinct, localized stain or a clear drip trail.
When Is It Time to Call a Professional Roofer?
Your safety is non-negotiable. If you're not comfortable getting on your roof, or if you don't have the right safety gear, that's your sign to call a pro. The same goes for roofs that are especially steep or if you see signs of bigger problems, like a sagging roof deck.
You should also call for help if you've done your due diligence—you've checked inside and out—and still can't find the source. Pros have seen it all and have tools and techniques to find even the most stubborn, hidden leaks. A professional can track it down safely and efficiently, stopping a small annoyance from snowballing into a massive structural headache.
If you’ve gone through these steps and are still stumped, or if you’d simply rather have an expert handle it from the start, we're here to help. With years of hands-on experience, we can diagnose the issue quickly and offer a solution that lasts. Contact us today for a free estimate.