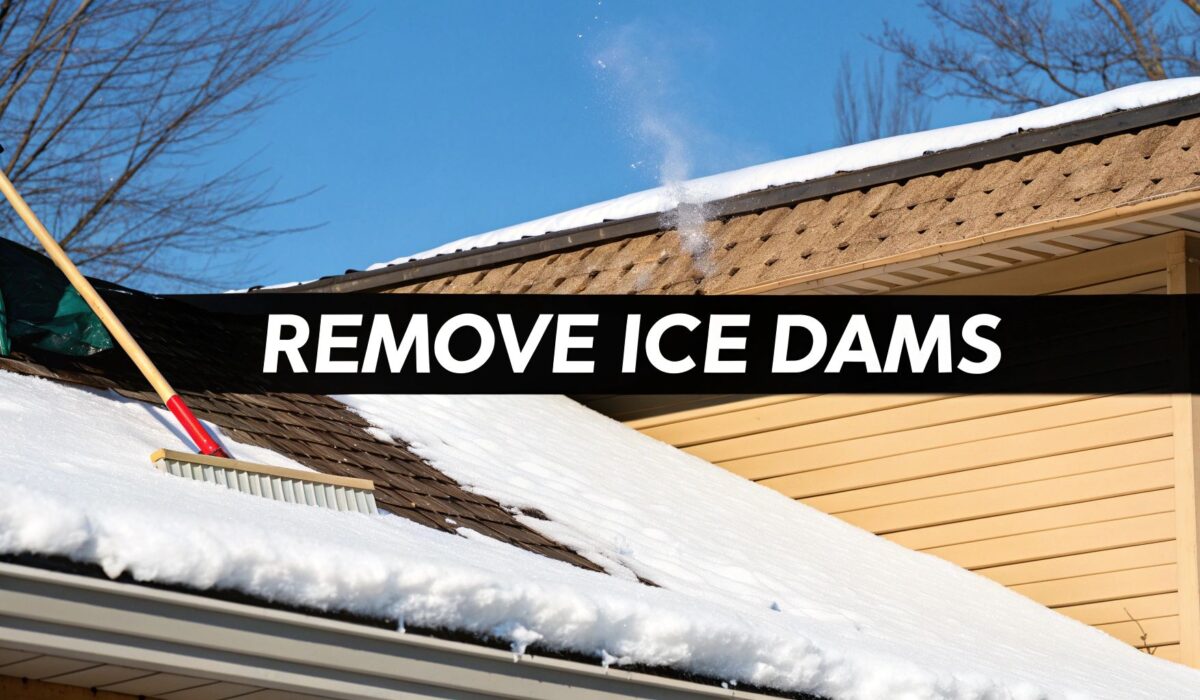
Quick Answer And Key Steps To Remove Ice Dams
When heat from your attic melts snow on the roof, water refreezes at the colder edges, forming an ice dam. Left unchecked, that trapped water can slip under shingles and wreak havoc on ceilings and insulation.
A practical approach blends snow raking, gentle ice melting, and attic sealing. First, clear away loose snow. Then soften the remaining ice using low-pressure steam or calcium chloride flakes. Finally, install heat cables along the eaves and seal attic air leaks to keep your roof surface at an even temperature.
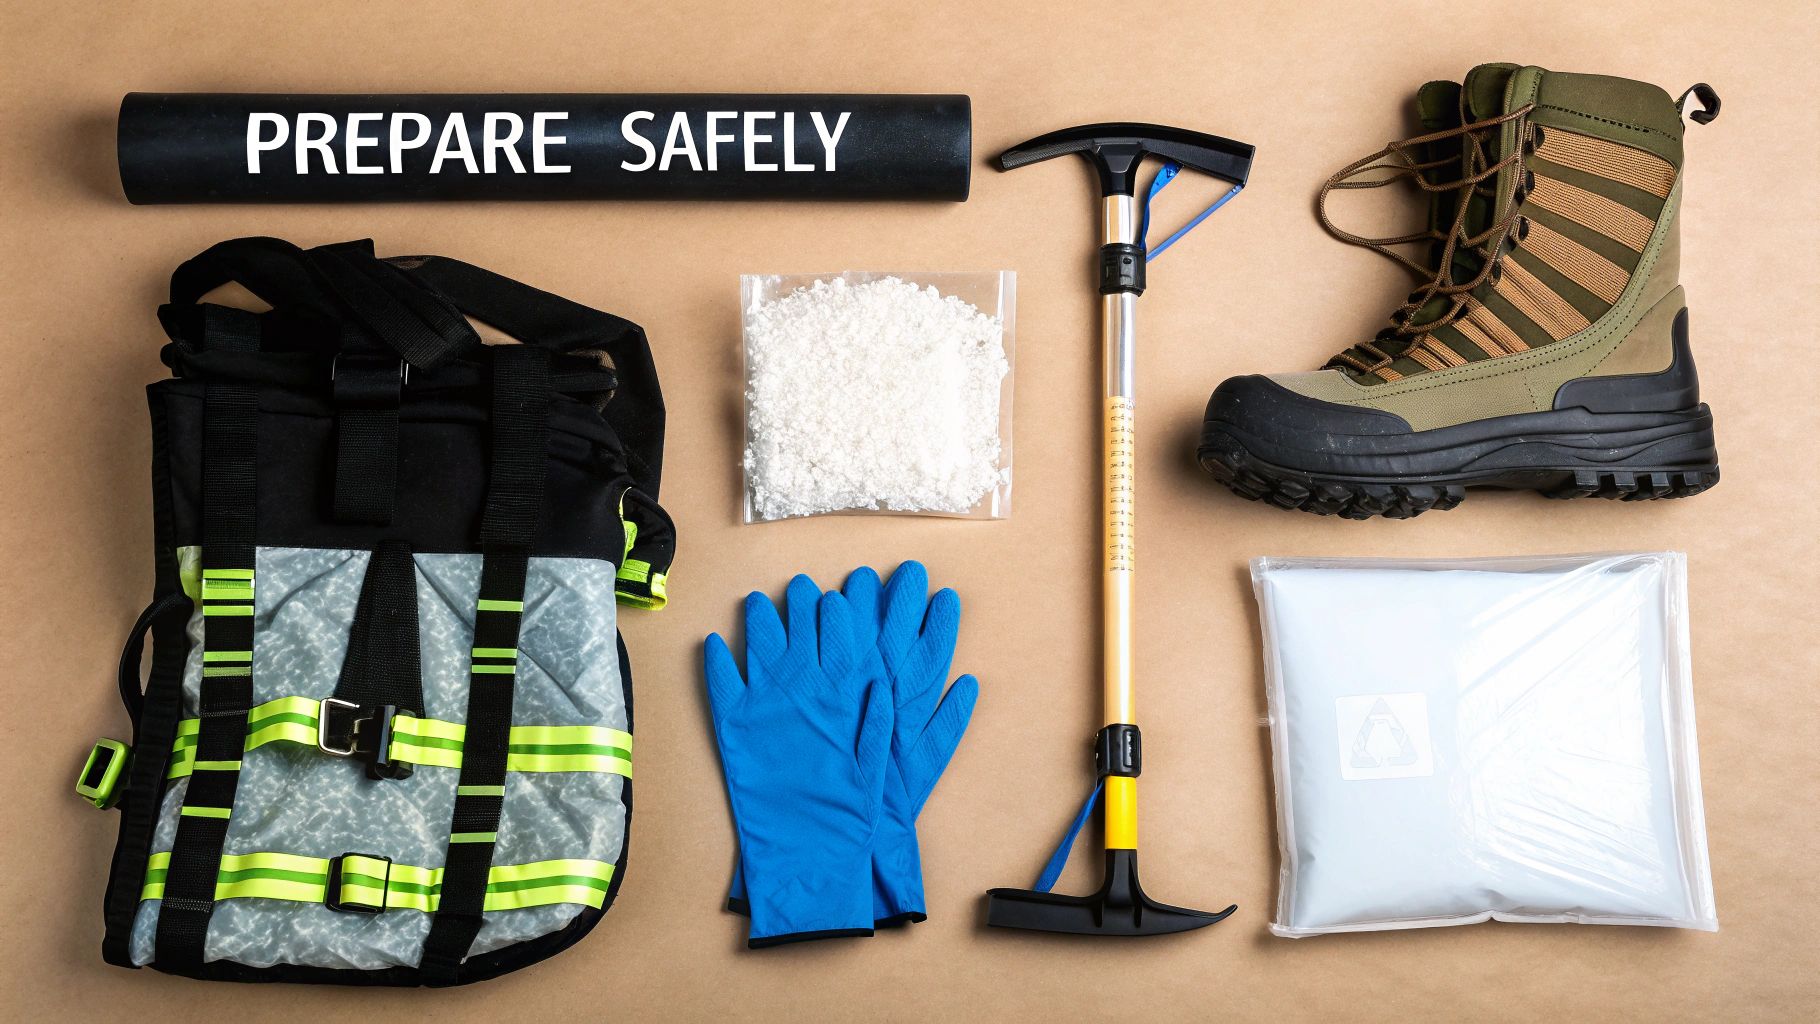
Key Tools And Safety Gear
-
Roof Snow Rake
Telescoping handle lets you stay safely on the ground. -
Low-Pressure Steamer
Melts ice without chipping shingles or creating gouges. -
Calcium Chloride Flakes
Sprinkle in lines above the dam to break up the ice bond. -
Safety Harness And Non-Slip Boots
Essential for any rooftop work in icy conditions.
Ground-based tools dramatically reduce your risk compared to scaling a slick roof.
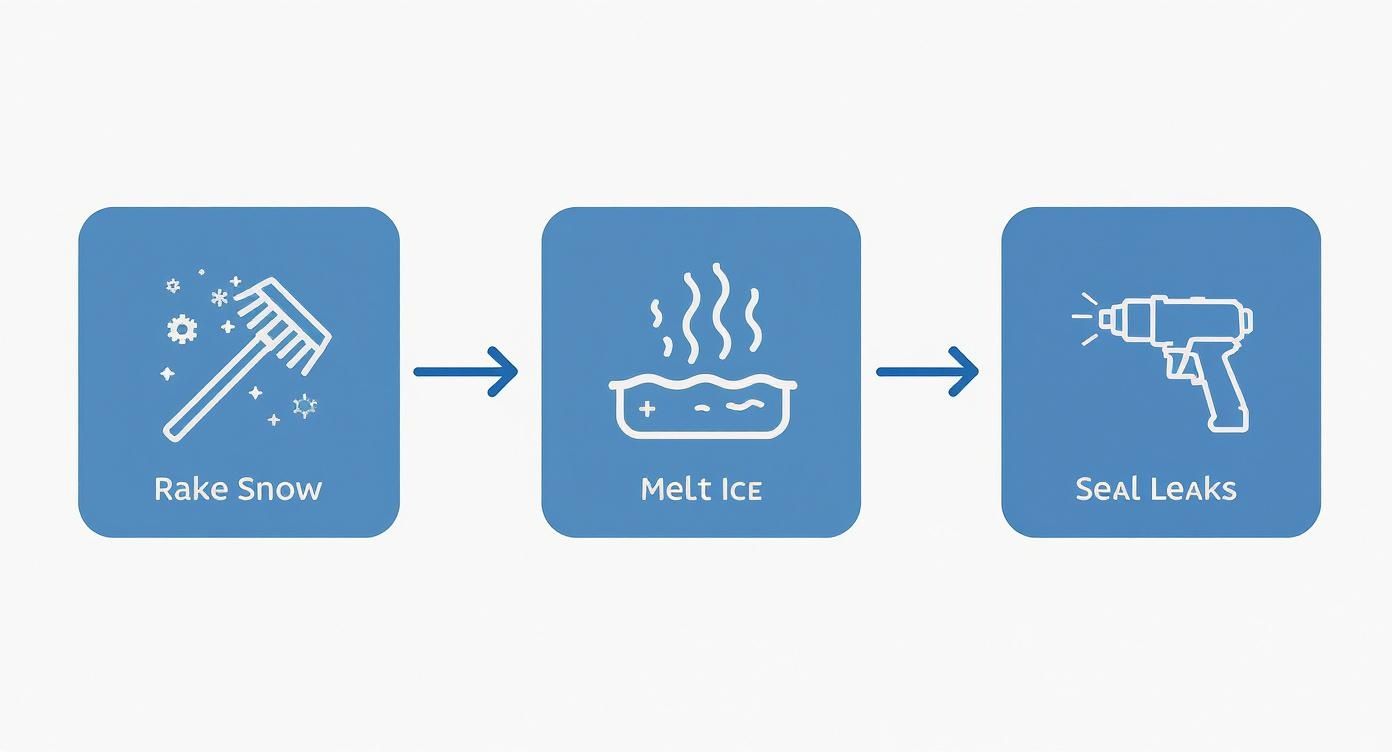
This infographic walks through the three-phase process: snow removal first, targeted ice melting next, and attic sealing last. Together, these steps clear existing dams and stop new ones from forming.
Quick Comparison Of Ice Dam Removal Techniques
Below is a side-by-side look at the most common options so you can weigh cost, safety, and performance before you take action.
| Technique | Typical Cost | Safety Level | Effectiveness |
|---|---|---|---|
| Snow Raking | $50–$200 | High | Moderate |
| Steam Removal | $800–$2,400 | Very High | High |
| Calcium Chloride | $20–$50 | Medium | Moderate |
| Heat Cables | $100–$500 | High | Long-Term |
Each method has its merits. Steam removal delivers the safest, most thorough results, while calcium chloride is the budget-friendly pick for minor buildup.
Common Pitfalls To Avoid
- Using sharp tools to chip away ice—this can gouge shingles and shorten your roof’s lifespan.
- Skipping attic sealing—without addressing air leaks, your ice dams will simply return.
- Ignoring gutter clearance—blocked eaves force meltwater to pool and refreeze.
Benefits Of Early Action
-
Prevents Roof Damage
Stopping ice dams early keeps meltwater from sneaking under shingles and rotting the deck. -
Reduces Energy Bills
A well-sealed attic traps heat indoors, so your roof stays cool and the snow above it doesn’t melt unevenly. -
Lowers Repair Costs
Addressing the problem now can save hundreds on drywall, insulation, and ceiling repairs. -
Keeps Gutters Clear
Free-flowing eaves let water drain properly, avoiding overflow and ice blockages.
Proactive steps today mean fewer emergencies tomorrow. Stay safe by working from the ground, wearing proper protective gear, and choosing the right removal strategy for your situation.
Refer to the next section for detailed methods and additional safety precautions.
Recognize Ice Dam Risks And Early Warning Signs
Heat escaping from an attic will slowly thaw snow on the upper roof, only for it to freeze again at the colder eaves. Over time, that ice ridge acts like a dam, backing up meltwater until it finds a way under shingles.
In my years on roofs across Penn Ohio, I’ve learned that catching ice dams early makes all the difference. A homeowner I recently helped noticed just a thin ribbon of ice in January—ignored until ugly water stains appeared on the hallway ceiling. They ended up paying $5,000 for repairs that a simple attic check could have prevented.
Why Early Detection Matters
- Limits Water Damage
Stops leaks before they soak insulation and framing. - Slash Repair Bills By Over 50%
Early fixes are far cheaper than major tear-offs. - Maintain Insulation Performance
A dry attic keeps heat where it belongs, cutting energy costs. - Prevent Mold And Rot
Trapped moisture is the perfect breeding ground for hidden damage.
Early Warning Signs
Keep an eye on your roof and attic after a snowfall:
- Growing clusters of icicles along the eaves
These indicate active thaw-and-freeze cycles. - Wet patches or discoloration on attic sheathing
Moisture in the insulation often shows up here first. - Small pools at the gutter line when temperatures are still below freezing
Standing water means meltwater isn’t draining as it should.
Ignoring these cues can lead to rotting wood framing, mold growth, and repairs that cost thousands.
DIY Attic Checkups
A quick attic glance can save you a bundle later:
- Shine a flashlight around recessed lights and plumbing vents
Any daylight or damp spots know someone’s letting warm air escape. - Feel the insulation for moisture or clumping
Wet batts lose their R-value in no time. - Scan rafters and joists for tiny droplets
Early spotting is always easier than chasing a full-blown leak.
These few minutes of inspection deliver big savings down the road.
Monitor After Each Snowfall
Stay on top of conditions outside:
- Use a telescoping roof rake to clear snow about 3 to 4 feet from the eaves
Reducing buildup cuts meltwater volume. - From the ground, sweep your eyes along the roof edge
New icicles mean an active ice dam. - Peek into gutters and downspouts for ice blockages
A free flow prevents backups.
Homes in cold climates face anywhere from $1,000 to $10,000 in ice-dam repairs per event. For more in-depth prevention tips, check out Servpro’s website.
Keeping an attic thermometer or thermal camera handy gives you a snapshot of hidden hot spots that fuel these dams. By pairing regular interior checks with quick exterior observations, you move from a reactive winter maintenance plan to a proactive one—saving your home from rot, mold, and hefty repair bills.
Gather Tools And Prepare Safely
Winter chores demand more than muscle; they need preparation. Sorting gear before you step outside keeps frustration—and frostbite—at bay.
Essential Gear Checklist
-
Roof Snow Rake with Extendable Pole
Telescoping reach lets you clear snow right from the ground. -
Non-Slip Boots and Safety Harness
Keeps you steady on icy patches. -
Heavy-Duty Gloves and Eye Protection
Shields hands from cold tools and flying ice. -
Low-Pressure Roof Steamer
Designed specifically for shingles; avoid pressure-washer models. -
Magnesium or Calcium Chloride Pellets
Place them on a board above plants to prevent any damage. -
Heat Cable Kit
Match the cable length to your roof’s pitch and eave span.
I keep my gear in a weatherproof tote by the back door. That way, I can grab everything at a moment’s notice. On windy days, having a face mask and balaclava already in the lid is a real time-saver.
Inspect Equipment Condition
Before you climb or rake, do a quick gear check:
- Swipe along pole joints to ensure they extend and collapse smoothly.
- Thread safety harness straps through buckles until each click is solid.
- Give the steamer hose a gentle twist to spot any hidden leaks.
- Confirm de-icing pellets sit dry inside a sealed bag—moisture leads to clumps.
I learned the hard way: a snapped rake pole on the roof is more than an inconvenience. Taking these few minutes at ground level prevents unwelcome surprises.
Plan Your De-Icing Strategy
Assess your roof’s slope, ice thickness, and wind direction before you start. In my experience, tackling the lower edges first prevents large sheets from breaking loose unexpectedly. Then, work your way up in layers. Lay out your pellets in even lines to melt sections systematically.
“Proper prep cuts ladder trips by over 70%,” one homeowner survey noted.
Arrange gloves, goggles, and spare liners in a pouch you can reach from the ladder. That kind of readiness translates into less climbing—and keeps you warmer.
Prepare Heat Cable Installation
If you’re adding heat cables, sketch an S-curve pattern along the eaves now. Opt for UV-rated clips and avoid piercing shingles with nails. Confirm a GFCI outlet is nearby and test its voltage before you clip anything.
For a complete walkthrough on gutter cleaning, check out our guide on cleaning downspouts and gutters.
| Tool | Purpose |
|---|---|
| Roof Rake And Pole | Remove loose snow from eaves |
| Roof Steamer | Melt stubborn ice safely |
| De-Icing Pellets | Break the ice bond without chipping |
| Heat Cable Kit | Prevent ice formation long term |
Reliable Suppliers And Gear Sources
Local hardware stores often carry snow rakes, pellets, and cables—perfect for quick grab-and-go runs.
Equipment rental shops let you borrow roof steamers by the day or weekend.
Specialty roofing outlets stock pro-grade harnesses and gloves.
Online dealers ship 90% of kits within two business days and run end-of-season deals.
One neighbor saved $150 by renting a steamer instead of buying one outright.
Expert tip: Mark your tools with initials before lending them out. It avoids mix-ups when everyone’s sharing gear.
No matter which route you choose, sticking a simple checklist to your tote ensures nothing slips through the cracks. With your kit locked in, you’re set to tackle the actual ice-dam removal methods in the next section.
Compare Effective Ice Dam Removal Methods
Choosing the right ice dam removal technique can save you time, money, and stress. Your roof’s slope, the dam’s thickness, and how easily you can access your gutters all play a role in finding the best fit.
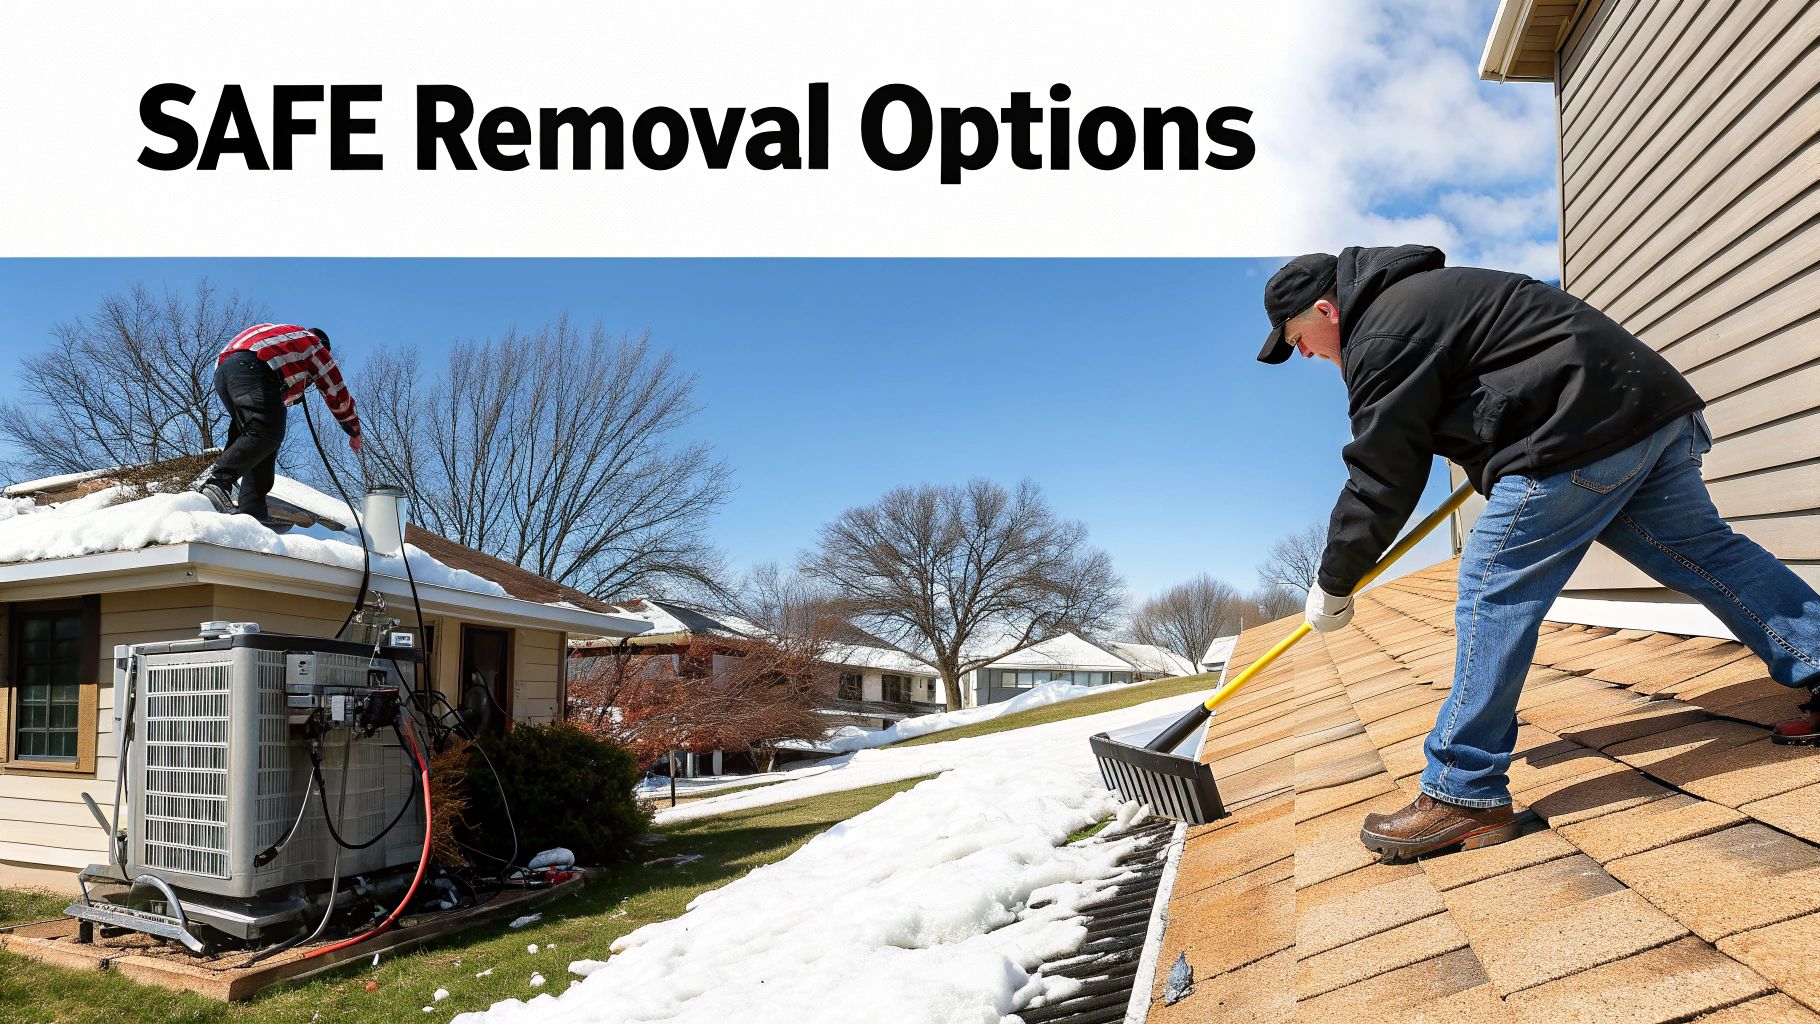
- Roof Snow Raking keeps you safely on the ground while clearing fresh snow before it turns to ice.
- Chemical De-icers rely on calcium chloride to dissolve ice slowly—just be mindful of nearby plants and pets.
- Heat Cables form a long-term barrier along eaves, but they demand precise placement and a reliable power source.
- Steam Removal uses low-pressure steamers to melt ice gently, preserving shingles and gutters without hammering the roof.
Often, a quick rake and a sprinkle of de-icer at the first sign of buildup will prevent a serious dam from forming. For steep or multi-story homes, professional steam crews can handle thick, hard-to-reach ice while protecting your roof finish.
Pros And Cons Side By Side
Before you decide, it helps to see how these methods stack up at a glance.
Comparison Of Ice Dam Removal Methods
| Method | Cost Range | Speed | Roof Safety |
|---|---|---|---|
| Snow Raking | $50–$200 | Moderate | High |
| Steam Removal | $800–$2,400 | Fast | Very High |
| Chemical De-icers | $20–$50 | Moderate | Medium |
| Heat Cables | $100–$500 | Gradual | High |
Steam removal often wins as the top choice for rapid ice clearing and minimal roof wear.
When To Use Each Method
Each home tells a different story. Here are a few real-world scenarios:
-
Two-Story Bungalow
A homeowner used a roof rake and timed calcium chloride treatments, clearing the dam in under two hours without setting foot on the roof. -
Cathedral-Ceiling Home
Thick snowpack hid a growing dam. Steam professionals preserved the shingles and stopped indoor leaks before they began. -
Complex Rooflines
One family combined heat cables with early raking, and they avoided repeat dams for three seasons straight.
Avoiding Common Mistakes
Small errors can turn a simple removal into a costly repair:
- Chipping ice with metal tools damages shingles and underlayment.
- Over-applying de-icers risks corrosion of gutter fasteners and nearby landscaping.
- Incorrect heat-cable layout creates hot spots or leaves gaps untreated.
- Skipping seasonal checks leads to brittle cables and unnoticed early warning signs.
Best Strategy Combinations
Sometimes you need more than one tactic. Here’s how pros layer methods for maximum effect:
-
Ground-Level Defense
Rake snow, then scatter calcium chloride for fast relief on single-story roofs. -
Full Professional Service
Seasonal steam removal paired with regular snow clearing stops dams before they form. -
Cable Backup
Install heat cables along eaves and add downspout loops for persistently frozen gutters.
Combining manual and chemical tactics early can cut removal time by 40% while protecting your shingles.
Key Safety Precautions
Ice removal is inherently risky. Gear up and plan every move:
- Wear a fall-arrest harness secured to a stable anchor point.
- Choose non-slip boots or roof cleats to stay sure-footed on icy surfaces.
- Position ladders on firm, level ground and plan clear egress routes.
- Check lighting and weather forecasts to avoid falling ice or sudden storms.
Signs You Need A Pro
When it’s time to call in experts:
- Ice dams thicker than 3 inches or spanning multiple roof planes.
- Visible water stains inside ceilings or walls after a thaw.
- Repeat dams despite DIY efforts or evidence of missing attic insulation.
Professional crews often include certified energy auditors and use specialized steamers, reducing repeat visits and protecting your roof for years to come.
Cost Versus Value
Weighing upfront costs against long-term roof health highlights the real winners:
- Snow Raking: Lowest cost ($50–$200) but requires frequent repetition.
- Chemical De-icers: Budget-friendly ($20–$50) with moderate speed and environmental trade-offs.
- Steam Removal: Mid-range ($800–$2,400) for fast, roof-safe results.
- Heat Cables: Higher initial outlay ($100–$500) for continuous prevention and peace of mind.
While a simple rake feels like a bargain, investing in steam removal or heat cables often reduces repair bills and extends shingle life over time.
For deeper insights into professional steam techniques, check out the Basement Systems Ice Dam Removal Insights.
Implement Prevention Strategies to Stop Future Dams
The best way to deal with an ice dam is to make sure it never forms in the first place. This fight starts inside your home, specifically in the attic. You need to focus on two key things: sealing air leaks and improving your insulation and ventilation.
Think about it—warm air from your living space shouldn't be escaping into the attic. When it does, it heats the underside of your roof, melting the snow from below. That meltwater runs down to the cold eaves and refreezes, and that's how an ice dam is born.
First, Attack the Attic
Your attic is likely full of small gaps that let warm air pour through. Look for leaks around plumbing vents, chimneys, recessed lighting fixtures, and attic hatches. Sealing these up with spray foam or caulk is your first and most critical step.
Next, you need to ensure your roof deck stays as close to the outside air temperature as possible. That’s where insulation comes in. For our climate, you should be aiming for an insulation R-value of at least R-49. This barrier keeps your home's heat where it belongs and prevents those melt-freeze cycles from ever starting.
Here’s a quick rundown of the most effective attic upgrades:
- Seal the Gaps: Use spray foam or caulk to meticulously seal every penetration and fixture in your attic floor. This is a game-changer.
- Bulk Up Insulation: Add blown-in cellulose or fiberglass batts to achieve that target R-value. Don't leave any thin spots!
- Improve Airflow: A properly ventilated attic pulls in cold air through soffit vents and pushes it out through a ridge vent. This "cold roof" system is essential for keeping the entire roof surface evenly chilled.
- Maintain Your Gutters: Clean them out every fall and consider adding gutter guards. Clogged gutters give meltwater nowhere to go but back up under your shingles.
- Add a Failsafe: For really stubborn spots or complex rooflines, installing high-quality heat cables along the eaves provides an extra layer of defense.
Taking a phased approach can make this more manageable. Start by sealing the most obvious air leaks. You might be surprised how much of a difference that alone makes. We've seen projects where simply sealing attic bypasses reduced ice dam risk by over 50%.
Does it Pay Off? Absolutely.
Spending money on insulation and air sealing might not be exciting, but the return on investment is undeniable. Compare the cost of an attic upgrade to the potential repair bills from a single ice dam event, which can easily run from $1,000 to a devastating $10,000. Most homeowners find that they recoup their investment in just 2 to 3 years through lower energy bills and avoided repairs.
“After we sealed attic bypasses and added insulation, we saw no ice dams for three winters in a row,” recalls a Mercer County homeowner.
Real-World Success Stories
It’s not just theory; we see this work for homeowners all the time. One client in Hermitage invested $1,200 to upgrade their insulation and add proper venting. Not only did their ice dam problems disappear completely, but their heating bills also dropped by 15% that first winter.
Another family in Lawrence County opted for a simpler approach on their newer home. They installed heat cables for around $350 and are diligent about using a roof rake after every big snow. For three seasons now, they’ve had zero issues with ice buildup in their gutters.
| Strategy | Approx Cost | Benefit |
|---|---|---|
| Air sealing | $300–$600 | Blocks the primary source of heat leaks |
| Attic insulation | $1,000–$2,500 | Can cut heat loss by 30% or more |
| Ventilation upgrade | $200–$500 | Balances roof temperature effectively |
| Heat cables | $300–$700 | Keeps meltwater flowing in problem areas |
| Gutter guards | $100–$250 | Prevents clogs that cause water backup |
Ongoing Maintenance is Key
Once you’ve made these improvements, a little upkeep goes a long way. Make it a habit to do a quick attic inspection every fall to check for new leaks or insulation that has settled. After a big storm, try to clear heavy snow off the first few feet of your roof edge with a roof rake—always from the safety of the ground.
If you have heat cables, inspect them before the first freeze. Look for any frayed wires or broken clips. Turn them on for a few minutes to make sure they're heating evenly. Keeping a small log of these checks helps you stay on top of your home’s performance year after year.
Your Seasonal Inspection Checklist
A quick check in the fall and spring can prevent major headaches. Grab a flashlight and head up to the attic.
- Look for daylight: Can you see any light coming in around pipes or vents? If so, seal it.
- Check for drafts: On a breezy day, feel for cold air movement.
- Inspect insulation: Make sure it’s fluffy and evenly distributed, with no compressed or cold spots.
- Clear soffit vents: From the outside, ensure leaves or debris aren't blocking airflow.
- Test your cables: A quick power-on test in October confirms they’re ready for winter.
This kind of proactive routine is the secret to avoiding unexpected leaks and making your shingles last longer. These small efforts truly compound into major savings over the life of your roof.
For a deeper dive into attic improvements and ventilation strategies, check out our full guide on preventing ice dams.
By combining these tactics, you can shift from reacting to winter emergencies to proactively defending your home. Stay ahead of ice dams with timely inspections and a little preventative maintenance—your roof will thank you.
Knowing When to Call in the Pros for Ice Dam Removal
Sometimes, an ice dam is just too much to handle on your own. If it’s massive, way up high on a steep roof, or you’re just not comfortable on a ladder in icy conditions, calling a professional is the smartest call you can make. While a roof rake can handle light snow, the pros have specialized equipment and experience that protect both you and your roof from serious harm.
The peace of mind that comes with hiring an expert is invaluable, but it's good to know what to expect financially. The final bill can swing pretty wildly based on a few things: the size of the ice dam, how complex your roofline is, and the method they use to clear it. A small dam on a simple, single-story ranch home is a much different job than a monster that’s wrapped around multiple gables and dormers on a two-story house.
Understanding Professional Ice Dam Removal Costs
So, what are you looking at, price-wise? On average, most homeowners in our area end up paying somewhere between $650 and $2,400 for professional ice dam removal. For really severe cases on large, complicated roofs, that number can climb to $4,000 or even higher.
A big chunk of that cost is labor, which usually runs from $150 to $700 per hour. The specific method they use is the other major factor:
- Steam Removal: This is the gold standard. It's gentle on your shingles and incredibly effective. Expect to pay between $800 and $2,400 for a professional steaming job.
- Manual Chipping: While it might seem cheaper, ranging from $800 to $1,800, we generally advise against it. The risk of a misplaced hammer or chisel damaging your shingles is just too high.
- Chemical De-icers: This is a more budget-friendly approach, typically costing $200 to $400. However, it’s more of a short-term fix and might not be suitable for every roof or environmental concern.
- Pressure Washing: You might see this quoted from $400 to $2,000, but it’s a risky method. High-pressure water can easily strip the protective granules off your shingles, shortening your roof's lifespan.
What a Good Contractor's Quote Looks Like
When you start getting quotes, don't just look at the bottom-line number. A true professional will give you an itemized estimate that clearly explains what you’re paying for.
A trustworthy quote will always break down the costs. It should detail the estimated labor hours, the specific removal technique they plan to use, and any extra charges, like clearing all the snow off your roof first—a service that can add $200 to $500 to the job.
Be skeptical of anyone who gives you a vague price over the phone without even looking at the problem. Transparency is key. For a deeper dive into vetting contractors, take a look at our guide on how to choose a roofing contractor.
It's also worth noting that beyond dedicated ice dam specialists, experienced professional handyman services can sometimes help with winter home maintenance, including tasks related to roof and gutter health that can prevent future dams.
Is It Worth the Investment?
The DIY vs. pro debate really boils down to safety and effectiveness. If your roof is steep, two or more stories high, or has a thick, menacing wall of ice, the risk of a fall or causing serious damage is just too great.
A professional crew has the proper safety harnesses, insurance, and the right tools—like commercial-grade steamers—to get the job done right. In those situations, paying a professional isn't just a convenience; it's a smart investment in your home's integrity and your own well-being.
Answering Your Ice Dam Questions
It's one of the most common winter questions we get: how did this massive chunk of ice form on my roof in the first place? It’s actually a pretty simple, and frustrating, process. When your attic is too warm, it melts the snow on the roof from the underside. That water then runs down to the cold edge of your roof—the eaves—and refreezes.
The cycle continues, building a bigger and bigger dam that traps more water behind it. The key to stopping this is keeping your roof's surface one consistent, cold temperature. You can achieve this by sealing up any air leaks from your living space into the attic, making sure you have enough insulation, and raking snow off the roof before a dam has a chance to form.
Are Chemical De-icers Safe for My Roof and Plants?
Chemical de-icers can definitely be a quick fix, but you have to be careful with them. Stick to products with calcium chloride or magnesium chloride, as they are generally safer for roofing materials.
A little goes a long way, so don't overdo it. To protect your landscaping below, always cover sensitive shrubs and plants before you start. It’s also a good idea to flush out your gutters with water after the ice has melted to get rid of any chemical residue.
Here are a few tips from the field:
- Place the pellets on a board or in a sock to shield your grass and flower beds from direct contact.
- Always follow the manufacturer's instructions to avoid damaging your shingles or gutters.
- Once the ice is gone, rinse the area and your gutters to prevent any buildup.
When Should I Just Call a Professional?
Knowing your limits is crucial when dealing with ice dams. If you see a dam that's more than 3 inches thick, it's time to call in the experts.
You should also leave it to a pro if the ice is on a steep part of your roof or if you live in a house that's more than one story high. If you can't safely reach the area from the ground, don't risk it. Climbing a ladder in icy conditions is a recipe for disaster.
Are Heat Cables a Good Long-Term Solution?
Heat cables can be a fantastic tool, but they aren't a "set it and forget it" solution. When installed correctly, they can prevent water from refreezing along your eaves for years. They create just enough warmth to maintain a clear channel for water to escape.
However, they are most effective when used with proper attic insulation and ventilation. Otherwise, you're just treating a symptom, not solving the underlying problem of a warm attic.
Key Insight: The secret to long-lasting performance is a professional layout and using high-quality, UV-rated clips. This small detail makes a huge difference in how well the system holds up over the years.
Before you get started, a few things to keep in mind:
- Always test your GFCI outlets to ensure they're working correctly.
- Secure the cables with clips spaced every 12 to 18 inches along the eaves.
- Give the cables a quick inspection each fall to check for any wear or damage before the first snowfall.
A Few Quick Safety Reminders
Safety should always be your number one priority. A few simple precautions can dramatically reduce your risk of injury.
- Whenever possible, stay on the ground. A long-handled roof rake is your best friend.
- Never work on a ladder or roof without checking the weather forecast first. An unexpected storm can make things incredibly dangerous.
- If you absolutely must get on the roof, wear a securely anchored fall arrest harness. No exceptions.
- Work with a partner. Having someone on the ground to spot you can be a lifesaver if something goes wrong.
If you’re facing a tough ice dam or just want some expert advice, don't hesitate to reach out to our team of specialists. Learn more on our website.