
To accurately calculate your roof's area, you need to do more than just measure your home's footprint. The secret is multiplying that footprint by a specific number, known as a pitch multiplier. This simple step accounts for your roof's slope, giving you the true surface area and ensuring you buy the right amount of materials.
Why Pitch Is the Secret to Accurate Roof Estimates

Ever wondered why a simple length-times-width calculation just doesn't cut it for a roofing project? The answer is the roof's pitch—its slope. It’s a game-changer, dramatically increasing the roof's actual surface area compared to the flat footprint of the house below it.
Ignoring the pitch is probably the single most common and costly mistake I see in DIY roofing. It almost always leads to running out of materials mid-job or having a wasteful, expensive surplus. Either way, it throws your budget off track right from the start.
The Financial Impact of Ignoring Slope
The consequences of a bad measurement are real. Imagine you're halfway through shingling, and you run out. Your roof is exposed, and you're scrambling to find more materials. On the flip side, over-ordering means you’ve just thrown money away on materials that will likely just collect dust in the garage.
This directly affects the core components of any roofing job:
- Shingles: Your home's main line of defense, sold in bundles designed to cover a very specific square footage.
- Underlayment: The critical water-resistant barrier sitting right under the shingles.
- Labor Costs: If you're hiring a crew, a bad estimate can drag out the project timeline, which means you're paying for more hours.
A simple miscalculation can turn a well-planned project into a logistical nightmare. That pitch isn't just some abstract number; it's the key to a precise, cost-effective, and successful roofing installation.
Industry data really drives this point home. Studies show that forgetting to use a pitch multiplier can lead to estimation errors of 10-15% or even more. For a typical residential roof that costs between $5,000 and $15,000, that small oversight can mean hundreds or even thousands of dollars in wasted materials or last-minute expenses.
Getting a handle on why pitch is so crucial is the first step, long before you learn how to measure it. Think of it as the solution to avoiding one of roofing's most expensive pitfalls. Once you have your calculations down, the next step is getting the word out; you can explore proven digital marketing strategies for roofers to connect with homeowners in your area.
Getting to Grips with Roof Pitch: What is Rise Over Run?
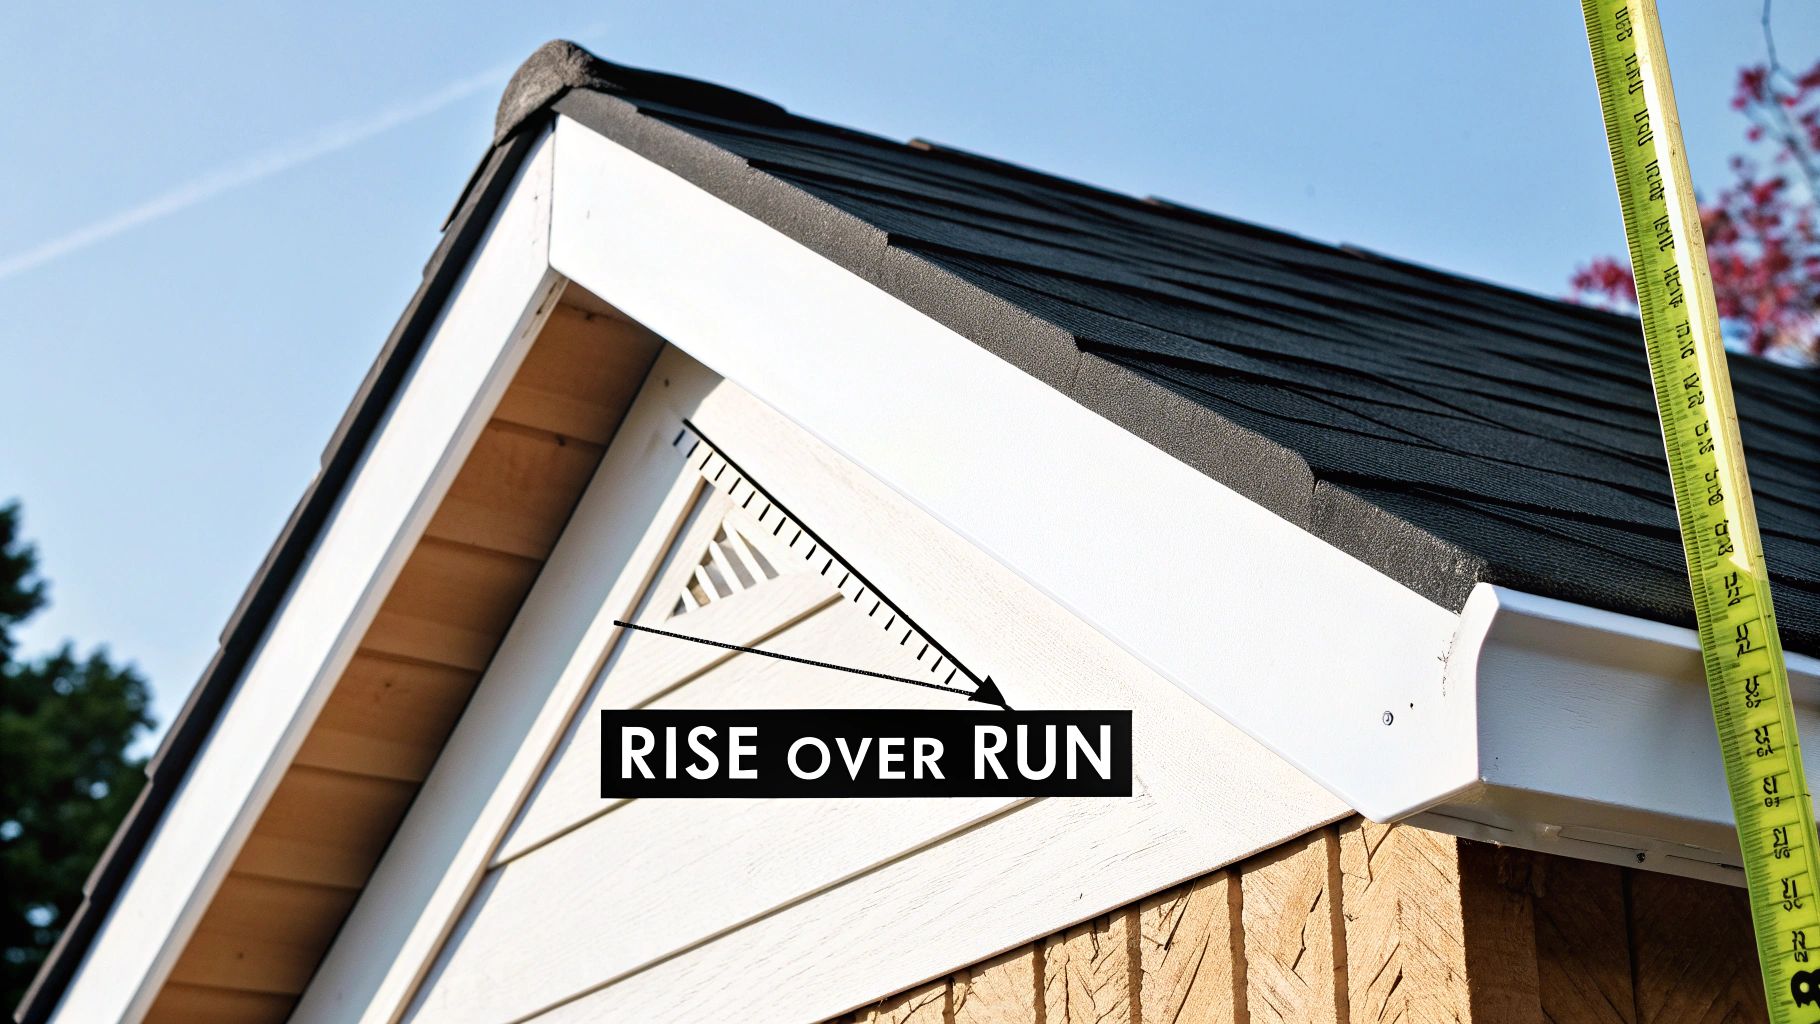
Before you can nail down the total area of a roof, you first have to understand its steepness. In the roofing world, we call this the pitch, and it's usually described as a simple ratio: rise over run. It sounds a bit technical, but the concept is actually pretty straightforward and it's the key to getting your numbers right.
Think of it this way: the "run" is always a fixed horizontal distance—12 inches. The "rise" is simply how many inches the roof goes up vertically over that 12-inch horizontal stretch.
So, if someone says a roof has a 4:12 pitch, it means for every foot you move horizontally across the roof, it rises by 4 inches. That little ratio tells you everything you need to know about the slope.
What Pitch Looks Like in the Real World
That simple ratio does more than just describe an angle; it dictates a roof's style, its ability to handle weather, and even the materials you can use.
-
Low-Slope Roofs (think 2:12 or 3:12): You'll see these on modern-style homes or commercial buildings. They're nearly flat, which creates a sleek look but means they need very specific materials to keep water from sitting around.
-
Medium-Slope Roofs (from 4:12 to 6:12): This is the bread and butter of residential roofing in most of the country. A common 6:12 pitch, for instance, has that classic look, sheds rain perfectly, and is still walkable for a pro doing repairs.
-
Steep-Slope Roofs (anything from 9:12 to 12:12): Found in places that get a lot of snow, these steep angles are designed to let snow and ice slide right off. A 12:12 pitch is a perfect 45-degree angle—dramatic and incredibly effective against heavy weather.
Knowing where your roof falls on this spectrum helps explain why it was built that way and why accurately calculating its area is so tied to that specific slope.
Your roof's pitch isn't just a number. It's the critical piece of information that turns a flat, 2D floor plan into the 3D, sloped surface that keeps your home safe and dry.
The Simple Geometry at Play
This all comes down to some basic high school geometry—specifically, the Pythagorean theorem. A roof's slope is just a right-angle triangle. The horizontal "run" is one side, the vertical "rise" is the other, and the actual surface of the roof is the hypotenuse.
While you can dig into the trigonometry and use arctangents to convert this into a precise angle in degrees, you really don't need to. For a deeper dive, you can learn more about the mathematical basis of roof pitch calculations to see how it all connects.
The main takeaway is simple: the steeper the rise, the longer the diagonal line (the rafter). This means the roof has more surface area. It's the reason why just measuring your home's footprint (length x width) will always give you a number that's way too low. Once you've got a handle on rise over run, you're ready to apply the right formulas for an accurate measurement.
Getting Your Measurements Safely and Accurately
Before you can crunch the numbers and figure out your roof's total area, you need solid, reliable measurements. A perfect calculation means nothing if it’s based on bad data. The good news is you have a couple of ways to get these numbers, and the best one for you really depends on your comfort level with heights and the complexity of your roof.
The first option is what I call the ground-based method. This is your best bet if you'd rather keep your feet on solid ground. It involves measuring your home's exterior walls to get the basic footprint, then adding the length of your eaves. It's a much safer approach and gives you a great starting point for applying pitch multipliers later on.
The other route is the on-roof method. This is where you get up on the roof and measure each plane directly, which will give you the most precise figures possible. I can't stress this enough: this is a job for someone with the right safety gear and experience. Whichever way you go, the goal is the same—get accurate numbers to work with.
The Right Tools for the Job
Showing up prepared makes all the difference. Having the right tools on hand not only speeds things up but also helps guarantee your measurements are spot-on. Nothing throws off your flow like having to hunt down a pencil when you're in the middle of a measurement.
Here’s a quick rundown of what you’ll want to have ready:
- A sturdy tape measure: A 100-foot tape is ideal for measuring from the ground, while a 25-foot tape is more manageable for on-roof work.
- A reliable ladder: Make sure it’s in good shape and set up on level, stable ground. This is your foundation for safety.
- Pencil and notepad: Keep them handy to write down dimensions immediately. Don't try to wing it from memory.
- Safety gear: If you're getting on the roof, this isn't optional. Think safety harness, good non-slip shoes, and gloves.
Having everything you need from the start lets you work efficiently and, more importantly, safely.
Tips for Measuring From the Ground
To measure from the ground, you'll start by figuring out the length and width of the house itself. Go from corner to corner along each exterior wall. Once you have that main footprint, it's time to factor in the overhangs.
You’ll need to measure how far your roof extends past the wall—that's the eave—and add that distance to your building dimensions. For instance, if your house is 50 feet long and has a 1-foot overhang on both ends, your total length for the roof calculation just became 52 feet. It's a simple step, but missing it is a classic mistake.
The key is to capture the entire horizontal area the roof covers, not just the footprint of the living space underneath. Forgetting the overhangs is one of the most common ways people end up short on materials.
Even if you're confident in your numbers, it never hurts to have a pro take a look, especially if you have a roof with a lot of hips, valleys, and dormers. Professional evaluations, like those explained in a guide to comprehensive roof inspections, can catch things you might miss and confirm you’re starting your project with the right information.
Using Pitch Multipliers to Calculate Total Roof Area
Once you’ve got your measurements and figured out your roof’s pitch, it's time to put it all together. This is where a simple but powerful tool called a pitch multiplier comes into play. Forget about dusting off your old geometry textbook—this is the professional shortcut for turning that flat, two-dimensional footprint into the true, sloped surface area of your roof.
Think of a pitch multiplier as a conversion factor. It’s a specific number that corresponds to a particular roof pitch, and its only job is to account for the extra surface area created by the roof's slope. By multiplying your flat footprint area by this number, you get a remarkably accurate estimate of your total roof area. It's easily the most efficient way to figure out how to calculate roof area with pitch.
Finding and Using Your Multiplier
The process couldn't be simpler: find your roof's pitch, look up its matching multiplier, and multiply it by your footprint measurement. One of the core methods to calculate roof area involves this exact process: measure the building's footprint (length × width) and then adjust this base number with a pitch multiplier.
For example, a very common 6:12 pitch, which rises 6 inches for every 12 inches it runs horizontally, corresponds to a multiplier of about 1.118. You can learn more about how these factors influence roof size calculations on economyroofing.la.
This infographic gives you a great visual of the two main ways you can get your initial measurements before you even think about the multiplier.
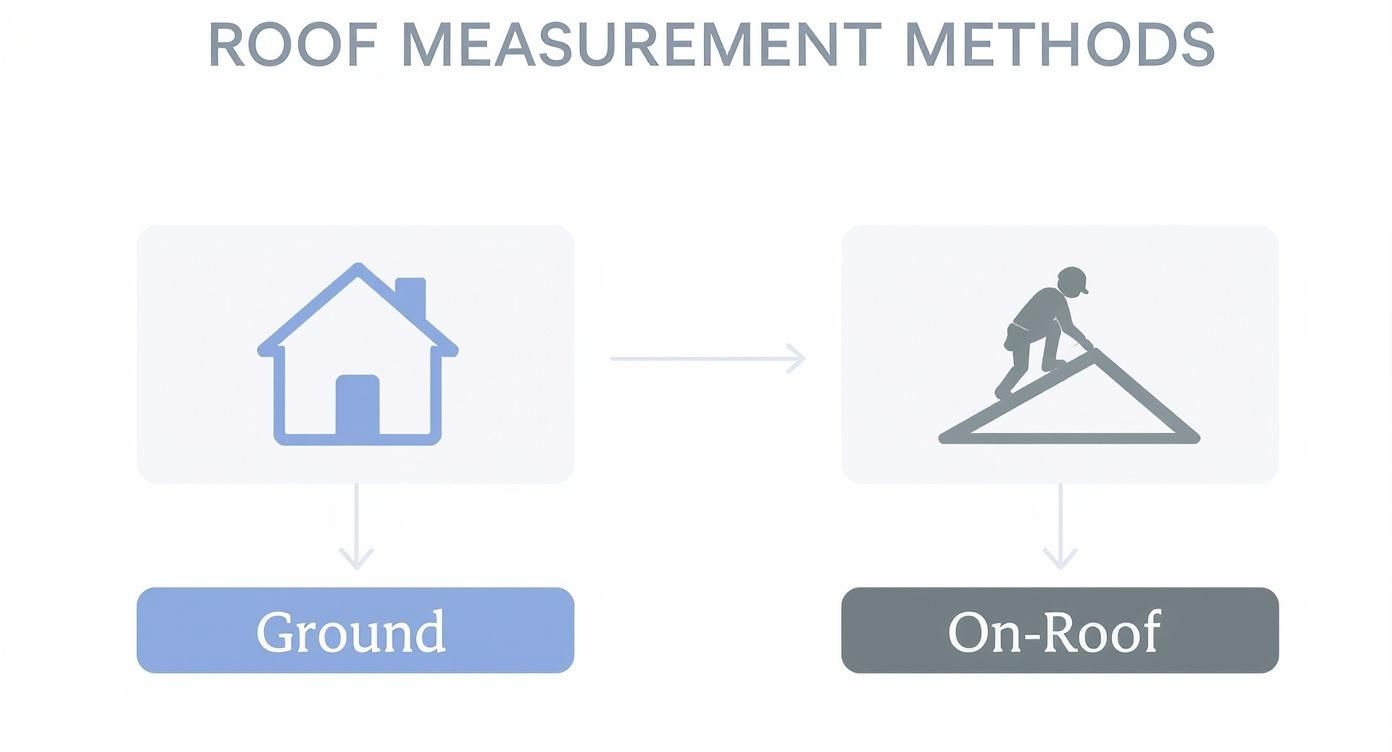
As you can see, you can start from the ground or measure directly on the roof. Either way, the pitch multiplier is the key to getting your final number.
The pitch multiplier is your bridge from a simple ground measurement to a true three-dimensional surface area. It’s the single most important number for ensuring your material estimates are accurate from the start.
To make things easy, I've put together a quick-reference table for the most common roof pitches and their corresponding multipliers.
Common Roof Pitch Multipliers
Here's a quick reference guide to find the correct multiplier for your roof's pitch. Find your pitch in the left column and use the corresponding multiplier on the right for your calculations.
| Roof Pitch (Rise:Run) | Pitch Multiplier |
|---|---|
| 3:12 | 1.031 |
| 4:12 | 1.054 |
| 5:12 | 1.083 |
| 6:12 | 1.118 |
| 8:12 | 1.202 |
| 10:12 | 1.302 |
| 12:12 | 1.414 |
Just find your pitch on this chart, grab the multiplier, and you're ready to calculate. It's that straightforward.
Example One: A Simple Gable Roof
Let’s walk through a real-world scenario with a standard gable roof on a rectangular house. It's a classic for a reason.
- Measure the Footprint: Let's say your house measures 50 feet long by 30 feet wide.
- Account for Overhangs: You have a 1-foot overhang on all sides. This makes your total footprint 52 feet by 32 feet.
- Calculate Flat Area: The flat area is simply 52 ft × 32 ft = 1,664 sq ft.
- Determine Pitch: You've measured the pitch and found it to be 6:12.
- Apply the Multiplier: Looking at the chart, the multiplier for a 6:12 pitch is 1.118.
- Final Calculation: Now, just multiply: 1,664 sq ft × 1.118 = 1,859.9 sq ft.
We’d round this up to a clean 1,860 square feet. That’s a difference of nearly 200 square feet compared to the flat measurement—a huge deal when you're buying shingles or underlayment.
Example Two: A More Complex Hip Roof
Okay, let's try a hip roof, which slopes down on all four sides. The good news is the process is almost identical. We'll use the same house dimensions from before: 52 feet by 32 feet, giving us the same flat area of 1,664 sq ft.
This time, the roof has a steeper 8:12 pitch.
Looking at our table, the multiplier for an 8:12 pitch is 1.202.
So, the calculation is: 1,664 sq ft × 1.202 = 1,999.9 sq ft.
You'd round this to 2,000 square feet. This example really drives home how much more surface area a steeper pitch adds to the total. Getting this right is the difference between a smooth project and a last-minute trip to the supplier.
Tackling Dormers, Valleys, and Other Complex Features
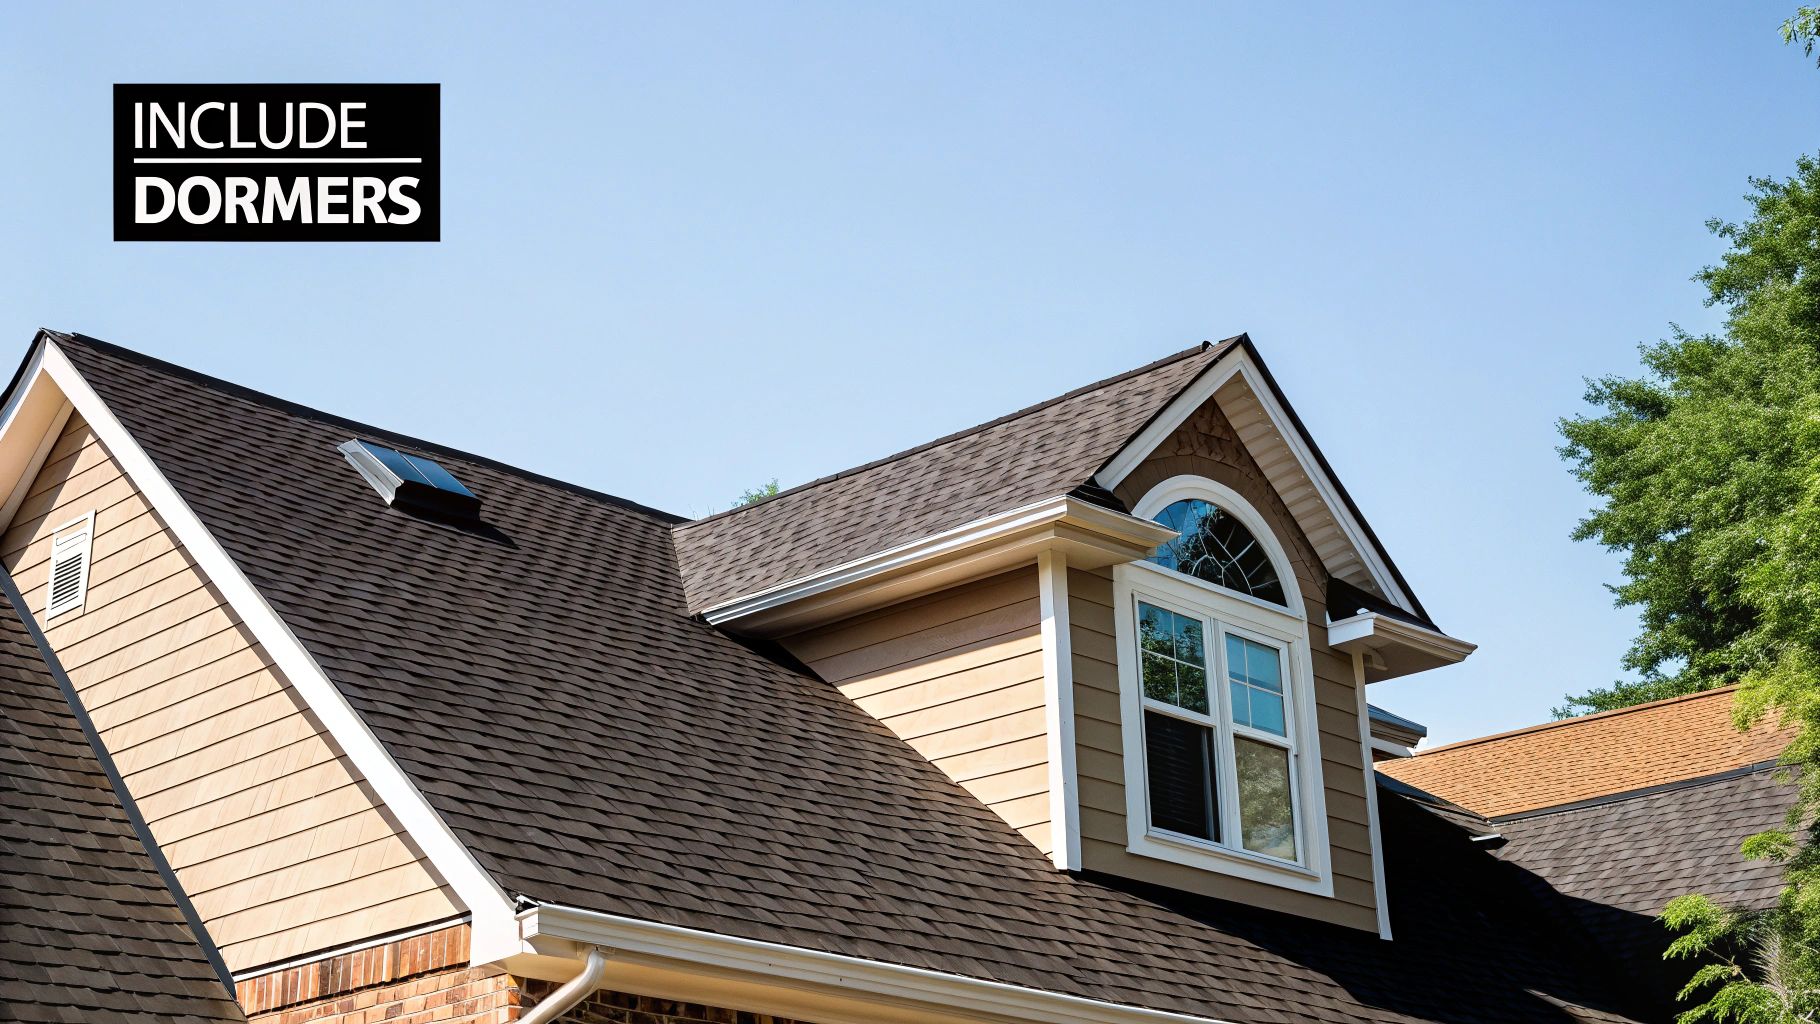
Very few roofs are just two simple, flat planes meeting at a peak. Real-world roofs have character—dormers, hips, valleys, skylights, you name it. To get an accurate roof area measurement, you have to account for every one of these features. Ignoring them will throw off your entire calculation.
The trick is to stop seeing a complex roof and start seeing a collection of simple shapes. Every architectural feature can be broken down into basic rectangles and triangles. Once you do that, you can measure and calculate each one individually before adding it to your main roof area. It's a methodical approach that takes the guesswork out of the equation.
How to Measure Common Roof Features
Let's walk through how to handle some of the features you'll run into most often. The process is pretty much the same for each one: isolate the feature, measure it, and calculate its area.
- Dormers: Think of a dormer as a tiny roof on top of your main roof. It usually has its own little gable. Just measure its length and width, find its pitch (it's often the same as the main roof), and use the pitch multiplier to find its area, just like you did for the larger roof planes.
- Hips and Valleys: This is a key distinction. Hips don't add surface area, but valleys absolutely do. A valley is where two roof planes meet and form a channel. You need to measure the length and width of the triangular areas on either side. It's also worth noting that knowing how to shingle a valley properly is critical, as these are high-risk areas for leaks if not handled correctly.
- Skylights and Vents: Here’s something that trips people up: you do not subtract the area of skylights, vents, or chimneys. You have to buy material to cut around these penetrations and you need extra material for flashing. It's always best practice to just include their footprint in your total square footage.
By tackling each feature one at a time, what looks like a complicated puzzle becomes a set of simple, manageable math problems.
Don't let a complex roof intimidate you. Every dormer, hip, and valley is just a combination of basic shapes. Measure each one, add it to your total, and you'll end up with a number you can count on.
The Final, Crucial Step: The Waste Factor
Once you've painstakingly measured every last plane and feature, you're still not quite done. There's one final step that separates the pros from the amateurs: adding a waste factor.
No roofing job uses material with 100% efficiency. You'll be cutting shingles to fit along valleys, hips, ridges, and the rake edges of the roof. All those cuts create scrap. To account for this, you have to order extra material.
- Simple Gable Roofs: For a straightforward roof, plan on a 10% waste factor.
- Complex Roofs: If you're dealing with a lot of hips and valleys, bump that up to 15%. The intricate cuts will produce more waste.
Skipping the waste factor is a classic rookie mistake. It almost always leads to a frantic, last-minute trip back to the supplier, which wastes time and can even be costly if you need to buy a different dye lot. Order a little extra from the get-go and save yourself the headache.
Common Questions About Calculating Roof Area
Even with a solid plan, a few questions always seem to pop up when you're figuring out your roof area. Let's tackle some of the most common hurdles people run into.
What Is an Easy Way to Find My Roof Pitch From the Ground?
Getting up on the roof isn't always necessary just to find the pitch. Believe it or not, your smartphone can give you a pretty accurate reading. There are plenty of apps that use your phone's camera and internal sensors to measure the angle of your roofline from a safe distance.
Another tried-and-true method, if you can access a gable end, is to use a tape measure and a level. Just measure a 12-inch horizontal line along the siding or trim, and from there, measure the vertical distance straight up to the bottom of the roof. That vertical number is your "rise," giving you the pitch (e.g., 6 inches of rise is a 6/12 pitch).
Do I Subtract the Area for Vents or Skylights?
This question comes up all the time, and the answer is a hard no. Don't subtract the space taken up by skylights, vents, or chimneys from your total measurement.
It might seem counterintuitive, but you need that extra material to properly cut and fit shingles around those obstacles. Cutting shingles to fit perfectly around a vent pipe or a skylight curb actually generates more waste, not less. Including their footprint in your total ensures you have enough shingles for the job.
Always calculate the gross roof area as if nothing is sticking through it. This simple rule of thumb ensures you have enough material for all the detailed cuts and proper flashing, saving you a trip back to the supplier.
How Is a Hip Roof Calculation Different From a Gable Roof?
While the core math is the same (multiplying the footprint area by your pitch multiplier), the geometry of a hip roof makes the initial measurement a bit different. A simple gable roof is just two big rectangles, which is pretty easy to measure.
A hip roof, however, is typically made of four different planes—two large trapezoids and two smaller triangles at the ends. You can still get a rough estimate by using the building's overall footprint, but for a truly accurate number, you really should measure each of those four sections on its own. This is especially true if the roof has dormers or varying pitches.
For a standard hip roof where the pitch is the same all around, the footprint method plus a solid waste factor will usually get you close enough. The real complexity kicks in when you have intersecting rooflines or other custom features.
Are Online Roof Calculators Accurate Enough to Use?
Online calculators can be a great starting point. They're perfect for getting a quick ballpark figure for your budget. Just plug in your home's footprint and roof pitch, and you'll get an estimate in seconds. But they definitely have their limits.
- They can't handle complexity. Most free online tools are built for simple gable or hip roofs. They get thrown off by things like dormers, valleys, or sections with different slopes.
- The output is only as good as the input. If you put in a wrong measurement for your home's footprint or guess the wrong pitch, the calculator will give you a flawed number.
Think of them as a tool for initial planning, not for placing a final material order. For that, nothing beats doing the math yourself or getting a pro to take a look. If your roof is complex or you're just not confident in your numbers, it's smart to call in an expert. This guide on how to choose a roofing contractor is a great resource for finding someone you can trust to get it right.
If you're looking for a precise and professional approach to your roofing project, Penn Ohio Roofing & Siding Group has over 25 years of experience delivering top-quality results. Contact us for a free, accurate estimate at https://pennohiorc.com.