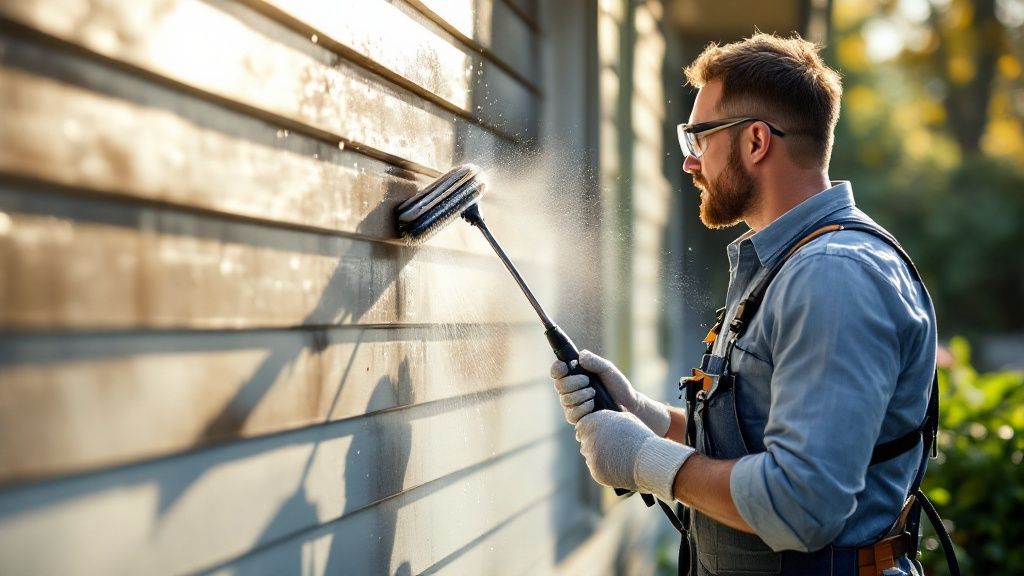
When it comes to cleaning aluminum siding, you don’t need a complicated formula. I’ve found that the best approach almost always boils down to three simple things: a low-pressure water source, a mild detergent, and a soft-bristle brush. This classic combo is all you need to cut through years of dirt and grime without harming the siding's finish. It’s the safest, most effective way to tackle this as a weekend DIY project.
Your Essential Siding Cleaning Toolkit
Before you even think about mixing up your cleaning solution, let’s get your gear in order. Having the right supplies ready to go is what separates a frustrating, messy afternoon from a job you can be proud of. A little prep work here saves a ton of headaches later.
Think of these as your non-negotiables. Getting them all together first means you can get into a good rhythm without stopping.
- Soft-Bristle Brush: This is the star of the show. You need a brush that’s tough on grime but gentle on your siding’s paint. A car-washing brush with a long, extendable handle is perfect for reaching those higher spots without wrestling a ladder.
- Buckets: Grab two. One for your soapy water, and one for clean rinse water. It sounds simple, but using a separate rinse bucket is key to avoiding smearing dirty water all over the spot you just cleaned.
- Garden Hose with a Spray Nozzle: A standard garden hose is all you really need for rinsing. Find a nozzle you can adjust—a wide fan spray is great for general rinsing, while a more focused stream helps knock off stubborn gunk before you start scrubbing.
Pressure Washer or Garden Hose?
This is a question I get all the time. A pressure washer definitely seems like the faster option, but it comes with some serious risks. If you don't know what you're doing, you can do a lot of damage in a very short amount of time.
Cranking the pressure up too high is the biggest mistake people make. Anything over 2,000 PSI can easily dent aluminum siding, strip off the paint, and force water behind the panels where it can cause rot. If you're set on using a pressure washer, keep the pressure between 1,500 and 2,000 PSI and always use a wide-angle tip (like a 25 or 40-degree) to spread out the force.
To help you decide, here’s a quick breakdown of the two methods.
Choosing Your Cleaning Method
| Method | Best For | Pros | Cons |
|---|---|---|---|
| Garden Hose & Brush | Most homeowners, DIY projects, siding with delicate or older paint. | Safe and gentle, low risk of damage, inexpensive, great for detailed cleaning. | More labor-intensive, can be slow on large homes. |
| Pressure Washer | Experienced users, very large homes, heavy grime buildup. | Fast and efficient, less physical scrubbing required. | High risk of denting siding, stripping paint, or forcing water behind panels if used incorrectly. |
Honestly, unless you're a pro, you'll get fantastic—and much safer—results with just a good old-fashioned garden hose and brush.
For the vast majority of homes, a garden hose paired with a quality soft brush offers the best balance of cleaning power and safety. You completely eliminate the risk of damaging your siding.
Personal Protective Equipment
Finally, don’t forget to protect yourself. Even a mild cleaning solution can be rough on your skin and eyes after a few hours of work.
- Safety Glasses: A must-have. You will get splashed, especially when you're working overhead. Protect your eyes.
- Waterproof Gloves: Keep your hands dry and stop the detergent from irritating your skin.
If you’re trying to clean second-story siding without constantly moving a ladder, you might want to look into tools like water fed pole cleaning systems. They can make the job much easier and safer.
And while you’re up there, take a quick look at your gutters and soffits. If they’re clogged or damaged, they could be the source of the staining you’re trying to clean off. Keeping them in good shape is a great way to protect your fresh-looking siding. For more on that, check out our guide to maintaining your home's gutters, soffits, and fascia.
Choosing The Best Cleaning Solution

The cleaning solution you pick is just as crucial as the tools you'll be using. It's tempting to grab the strongest chemical on the shelf, thinking it'll get the job done faster. But that's a classic mistake. Harsh chemicals can strip the finish right off your siding, scorch your landscaping, and even pose health risks.
Your goal is to find a cleaner that’s tough on grime but gentle on your home. For most siding, a simple, homemade solution does the trick beautifully and safely.
A Simple DIY Siding Cleaner Recipe
This is my go-to mixture for a reason. It’s cheap, it’s effective, and it’s safe for your plants and pets when you rinse it off properly.
- In a large bucket, start with 1 gallon of warm water.
- Add about a ¼ cup of mild liquid dish soap. Make sure it's a simple one, without any harsh degreasers or bleach additives.
- Give it a good stir until the soap is completely mixed in.
That’s it. This simple combination works because the soap breaks the surface tension, lifting away dirt so it can be scrubbed and rinsed off. It’s a great reminder that sometimes the simplest approach is the best one. If you're a fan of the DIY route, exploring other natural cleaning solution recipes can give you even more safe and effective options.
Moving Beyond Harsh Chemicals
Years ago, people didn’t think twice about using aggressive cleaners for siding. Trisodium phosphate (TSP) was a popular choice, but we now know better. It’s a skin irritant, and the phosphate runoff is terrible for local waterways and aquatic life. It's simply not worth the risk anymore.
Luckily, modern cleaning products have come a long way. Oxygen-based or peroxide-based cleaners are fantastic alternatives that brighten siding without bleach, effectively cutting through stains from mold, algae, and chalky buildup.
When you're shopping for a commercial cleaner, always check the label. You're looking for two key phrases: "safe for painted surfaces" and "biodegradable." This is your best insurance against damaging your siding's finish or the environment.
If you’re up against those stubborn green and black stains from mold or algae, you'll want to grab a specialized siding cleaner. The best ones use peroxide to kill the organic growth without the corrosive bite of bleach. They do a great job on tough stains while being much kinder to your home's paint and your garden.
A Practical Guide to The Cleaning Process
Alright, you've got your tools lined up and your cleaning solution mixed. Now for the fun part. The key here is to be methodical. A little bit of process turns what looks like a massive chore into a satisfying project, and the right technique is everything if you want a beautiful, streak-free finish without damaging anything.
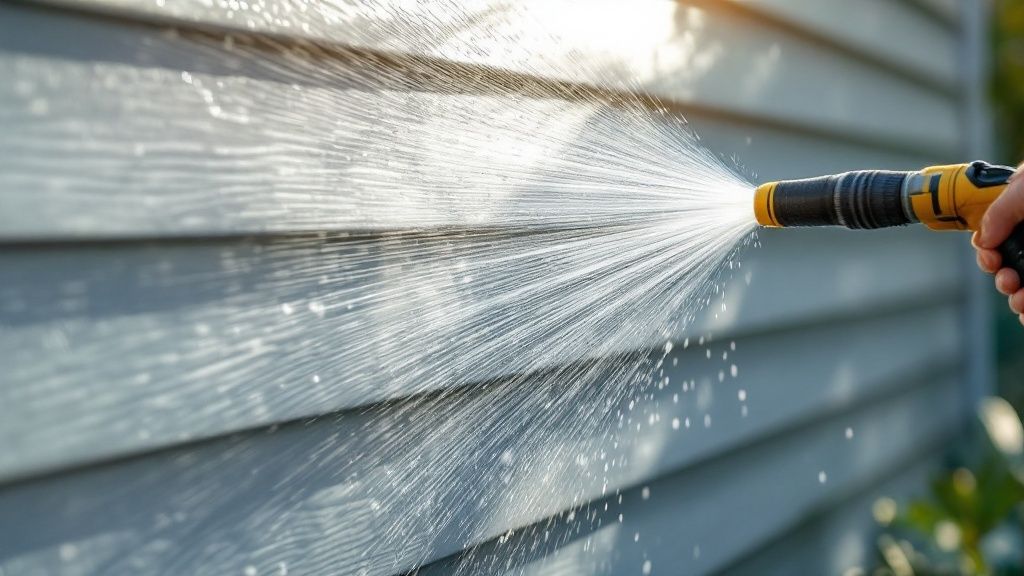
Before you even think about soap, give the siding a good pre-rinse. Just use your garden hose with a regular spray nozzle to knock off the loose stuff—all that surface-level dust, dirt, and stray cobwebs. Getting rid of this top layer first means you won't be grinding that grit into the siding's finish when you start scrubbing later.
Essential Prep Work Before You Begin
Trust me on this: spending a few minutes on prep will save you hours of cleanup and maybe even a costly repair. Don't be tempted to skip these steps before you start spraying cleaner on your house.
- Protect Your Landscaping and Fixtures: Throw some lightweight plastic sheeting over any delicate flowerbeds, shrubs, or gardens right up against the foundation. Do the same for outdoor electrical outlets, light fixtures, and your doorbell to keep water out.
- Seal Up the House: Double-check that all your windows and doors are shut tight. You definitely don’t want soapy water finding its way inside. For older or leaky window frames, a quick border of painter's tape can give you some extra peace of mind.
- Clear Your Workspace: Move all the patio furniture, the grill, planters, and any other decorations away from the siding. This gives you a clear, safe area to work in.
This quick visual guide breaks down how to mix your cleaning solution for the best results.
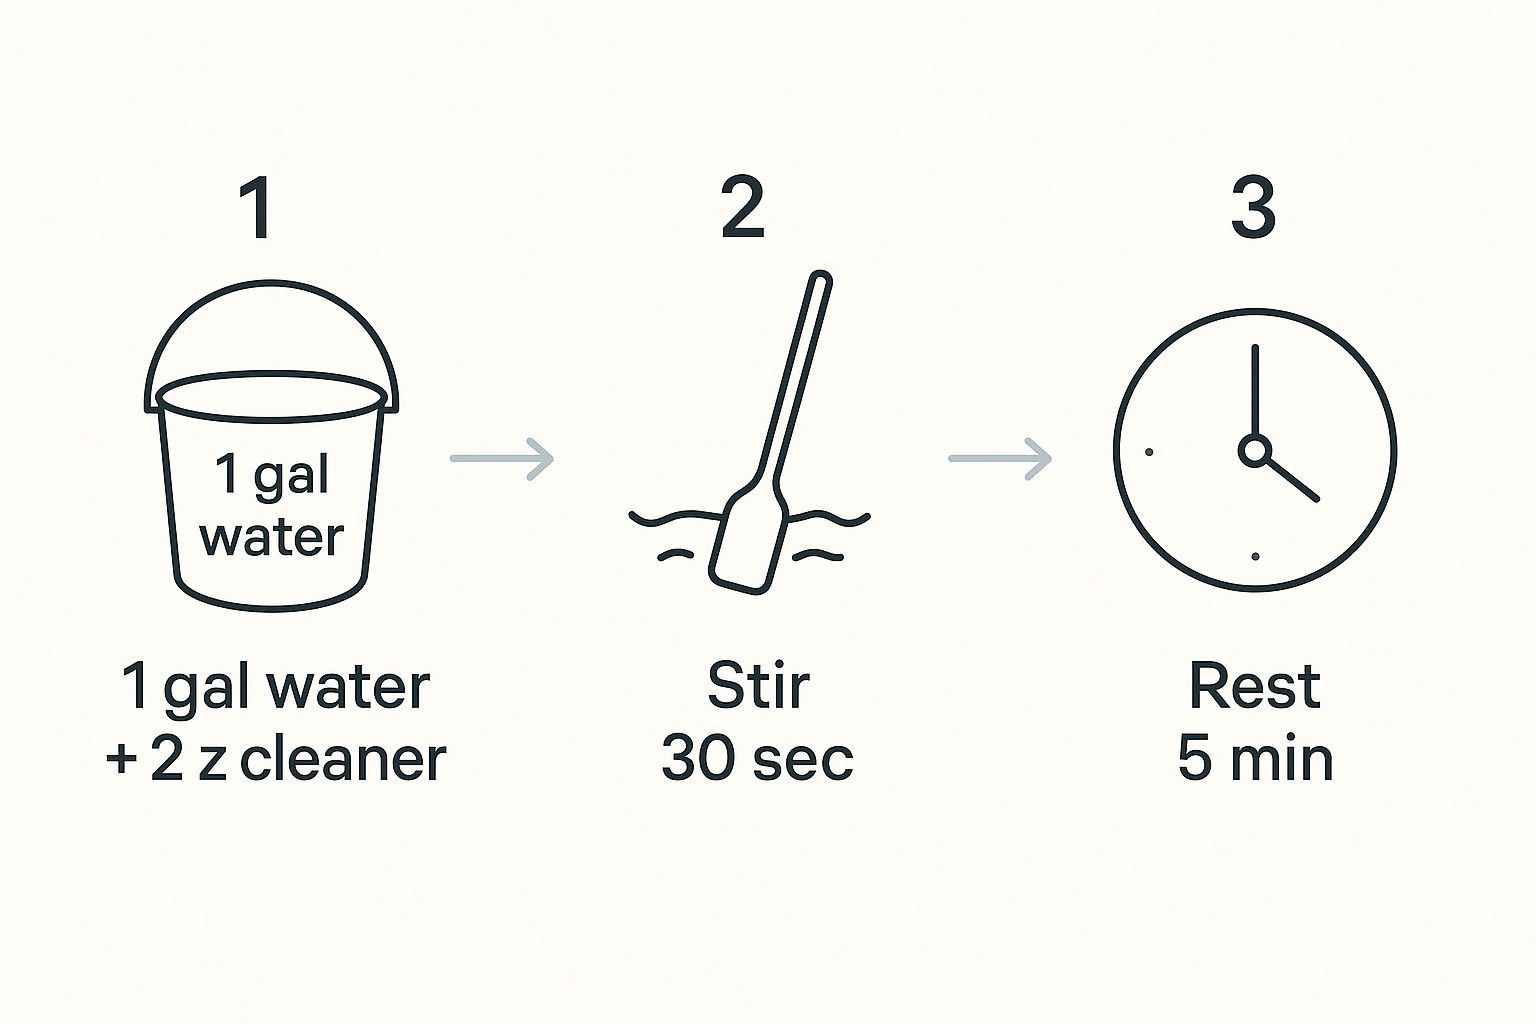
As you can see, getting the mix right and letting it sit for a moment is crucial. This ensures the ingredients are fully activated and ready to tackle the grime.
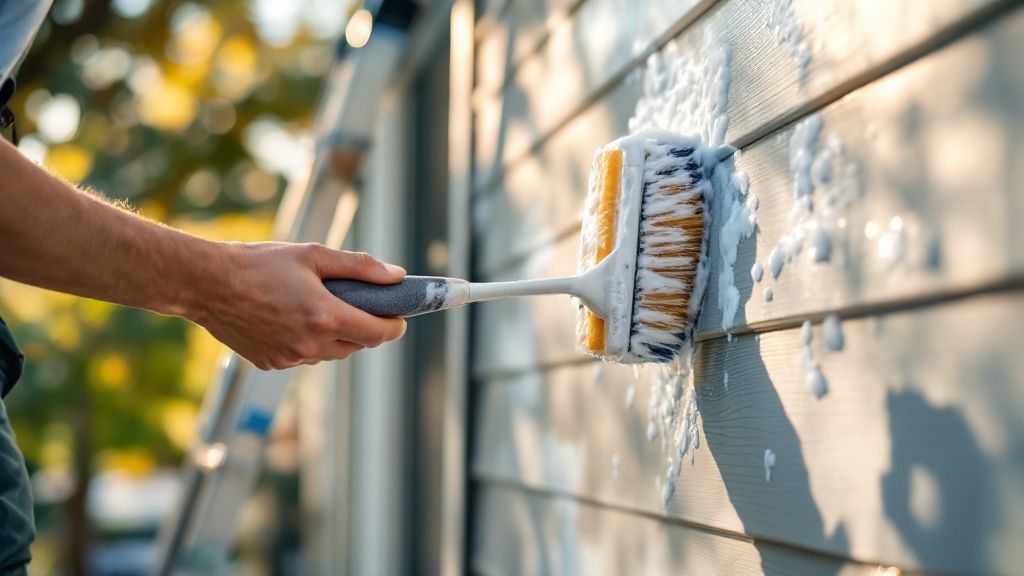
The Correct Application Technique
Now it's time to get the cleaner on the siding. The absolute golden rule for how to clean aluminum siding without leaving ugly drip marks is to work from the bottom up. It sounds backward, I know, but it’s the secret to getting a pro-level finish.
Work in small, manageable sections—think 5 to 10 feet wide at a time. By applying the cleaner from the bottom, you prevent the dirty solution from running down and creating stubborn streaks on the dry siding below. Let the cleaner sit on the surface for a few minutes, but whatever you do, don't let it dry.
If you're using a pressure washer, your technique is what matters most. Stick to low or medium pressure settings and always keep the nozzle 18 to 24 inches away from the siding. Just as important, spray at a downward angle. This pushes the dirt and chemicals down and away from the house, which helps prevent water from getting forced up under the siding panels.
For any stubborn grime, mildew, or mold that the initial wash didn't get, a bit of manual scrubbing with a soft-bristle brush will do the trick.
This is where your soft-bristle brush earns its keep. For those really embedded dirty spots, gently scrub in the same direction as the siding panels (which is usually horizontal). This lifts the dirt without scratching the paint. It's the combination of the cleaning solution and a little elbow grease that really brings the siding back to life. The same logic applies to other parts of your home's exterior, a topic we cover in our guide to professional roof cleaning.
The Final Rinse for a Flawless Finish
Once you've scrubbed a section, it's rinsing time. Now you reverse the process: rinse from the top down. Gravity becomes your friend here, pulling all the soap and loosened grime down and away from the freshly cleaned surfaces.
Don't rush this part. Be really thorough. Any soap residue left behind can dry to a dull film and, ironically, attract more dirt down the road. Make sure the water is running completely clear before you move on to the next section. Just keep repeating that pattern—apply bottom-up, scrub as needed, and rinse top-down—and you'll have the whole house sparkling clean before you know it.
How to Tackle Tough Stains and Common Issues
Even after a good, thorough wash, you might find some stubborn spots still hanging on. Don't worry, that's completely normal. Things like chalky oxidation, green algae, or little rust streaks often need a more focused attack than a general cleaning solution can offer.
Think of it like doing laundry—your regular detergent gets the everyday dirt, but you need a dedicated stain remover for a grass stain or ink spot. The same idea applies here. Different blemishes require different treatments, and knowing what you're up against is half the battle.
Dealing With Chalky Oxidation
One of the most common things you'll see with older aluminum siding is oxidation. It’s what happens when the original paint finish starts to break down from years of sun exposure, leaving a dull, powdery film on the surface. An easy way to check is to wipe a dark-colored cloth across a panel. If you see a chalky white residue, you've got oxidation.
While it can look a bit rough, getting rid of this chalkiness is usually pretty simple. Your standard cleaning solution and a bit of elbow grease with a soft-bristle brush should take it right off. For really heavy buildup, you might just need to go over it a second time.
Expert Tip: Clearing away this chalky layer isn't just about looks. If you ever plan on repainting, it's an absolute must. Fresh paint needs a clean, solid surface to stick to, and painting right over oxidation is a recipe for peeling and chipping later on.
Removing Mold, Mildew, and Algae
See any of those green, black, or grey splotches? That’s almost always some kind of organic growth. You'll typically find it on the shaded, north-facing side of the house where moisture tends to hang around. This isn't just an eyesore; it can trap moisture against your siding and cause problems over the long term.
To really kill off mold and mildew, you need something with a little more punch. For a minor case, a simple mix of one part white vinegar to four parts water can do the trick. If you're dealing with more widespread growth, it's worth grabbing a commercial siding cleaner that's made to kill mold, often using peroxide or similar agents.
Here's how I usually handle it:
- First, spot-treat the problem areas. Spray your cleaning solution directly onto the algae or mildew.
- Let it dwell for about 10–15 minutes. This gives the cleaner time to work and kill the growth at its roots.
- Next, give it a gentle scrub with your soft-bristle brush. This will lift all the dead gunk away from the surface.
- Finally, rinse the whole section thoroughly, working from the top down to make sure no residue gets left behind.
Banishing Rust Stains and Tree Sap
Those reddish-brown streaks are usually from water running off metal hardware—think screws, flashing, or old gutters. Rust can be stubborn, but a mild acid is your friend here. Try making a paste out of baking soda and water, or carefully apply some white vinegar. Let it sit for a few minutes, give it a light scrub, and rinse it away.
For sticky tree sap, you'll want an oil-based approach. A cloth dampened with a bit of mineral spirits or a citrus-based cleaner can dissolve the sap without damaging the paint. Just dab it on, give it a minute to work its magic, and then wipe the sticky residue away before washing the spot with your regular cleaning mix. Using these targeted tricks is how you get your aluminum siding truly clean, no matter what it's up against.
Long-Term Siding Maintenance And Protection
So, you've put in the work and your siding is sparkling clean again. Great! The real trick, though, is keeping it that way. Staying proactive is a whole lot easier than letting grime build up for years and starting from square one.
A little bit of attention throughout the year goes a long way. It protects the finish on your aluminum siding, extends its life, and keeps your home looking sharp.
The best habit you can get into is a regular cleaning schedule. For most homes, a good wash once a year is plenty to keep dirt, pollen, and mildew at bay. But if your house is tucked away in a damp, shady spot where algae loves to grow, you might want to give it a light rinse twice a year just to stay on top of things.
Perform Regular Visual Inspections
Aside from washing, make a habit of walking around your house every few months to give the siding a quick once-over, especially after a big storm rolls through. This simple check can help you spot small issues before they blow up into expensive repairs.
You don’t need a contractor's license to spot trouble. Just keep an eye out for these common culprits:
- Loose or rattling panels that might need to be tightened up.
- Dents or dings from hail, a stray baseball, or an unlucky encounter with the lawnmower.
- Deep scratches that have cut through the paint and exposed the bare metal.
Catching a loose panel or a deep gouge early is a game-changer. Fixing these little things right away protects the whole system and, most importantly, keeps water from sneaking in behind your siding.
Painting for a Fresh Look and Added Protection
Even the toughest aluminum siding starts to show its age after a decade or two. When the original finish gets faded and chalky, a fresh coat of paint can do wonders. It’s not just about curb appeal; it adds a brand-new layer of protection against the elements.
Taking the time to prep and paint your aluminum siding properly can give it a whole new lease on life. It's an excellent way to modernize your home's look while reinforcing its first line of defense. If you're weighing your options for a new look or dealing with significant wear, it's worth exploring the benefits of professional siding installation.
Answering Your Top Siding Care Questions
Even the most detailed guide can't cover every question that pops up mid-project. When it comes to cleaning aluminum siding, a few questions come up again and again. Here are my go-to answers based on years of experience, helping you get the job done right.
Should I Use Bleach on My Aluminum Siding?
I get this one a lot, and my advice is almost always to skip the bleach. While it's true that a diluted bleach solution can kill mold, the risks just aren't worth it. Bleach is notorious for discoloring and damaging the paint finish on aluminum. It can also be brutal on your landscaping, killing grass and plants on contact.
A much better approach is to use an oxygen-based cleaner. These cleaners are made to tackle organic growth like mold and mildew without being so harsh on your siding or the surrounding environment. If you're facing a really stubborn mold problem and feel bleach is your only option, be extremely careful. Never go stronger than a 1:10 ratio (one part bleach to ten parts water), and rinse it off completely the moment you're done.
How Can I Tell if the Chalky Stuff on My Siding Is Oxidation?
There's a really easy way to check for this. Grab a clean, dark rag and wipe it across a dry spot on your siding. If it comes away with a white, powdery residue, you've got oxidation.
This "chalking" is completely normal for older painted aluminum. It’s simply the paint pigments breaking down after years of battling sun and rain. Don't panic—a good wash with a mild detergent and a soft-bristle brush will usually cut right through that dull layer, revealing the vibrant color underneath.
What’s the Best Time of Year to Clean My Siding?
When you clean is just as important as how you clean. For the best results, aim for a mild, overcast day in the spring or fall.
Here’s why that timing is key:
- Dodge the Sun: Working in direct, hot sunlight is a classic mistake. It makes your cleaning solution evaporate way too fast, leaving behind ugly soap streaks before you can even think about rinsing.
- Mind the Wind: A windy day turns your hose or pressure washer into an unpredictable mess. You'll waste cleaner and struggle to get an even application.
- Choose a Calm Day: A temperate, calm day gives you all the control. The cleaner has time to work its magic, and you can rinse it away cleanly for a finish you can be proud of.
Keeping your home's exterior looking its best is an ongoing effort. If you run into issues that go beyond a simple wash, it's time to call in the pros. With extensive experience, our team has been the trusted choice for protecting and beautifying homes in our community. Contact us today for a free estimate and let us put our expertise to work for you.