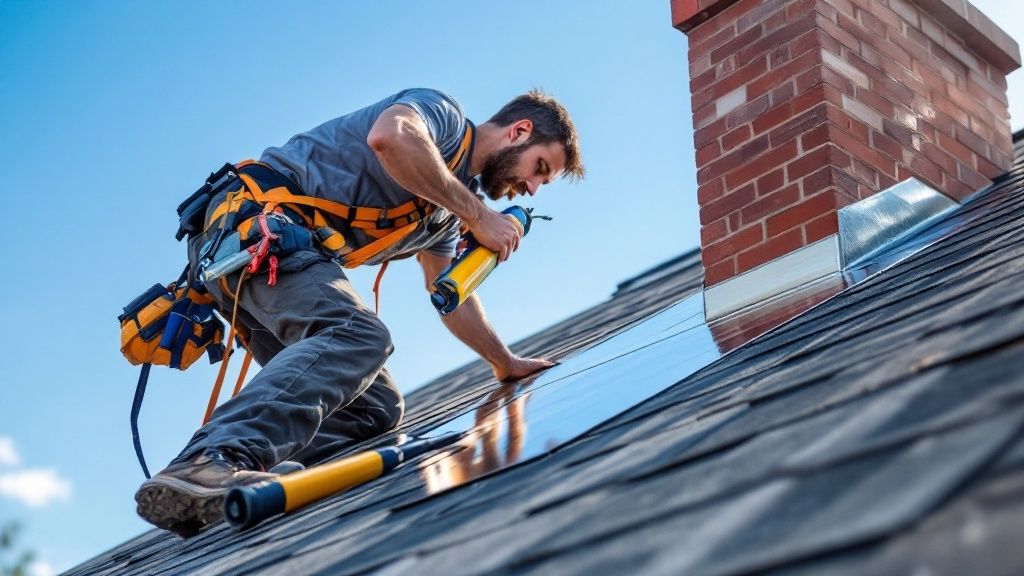
Reflashing a chimney isn't just about slapping on new metal. It's a careful process of stripping away the old, failed material, prepping the roof deck and chimney surface, and then skillfully layering new flashing components to create a watertight seal. This job demands precision and a solid understanding of how water behaves when it hits a roof.
Why Your Chimney Flashing Is Failing
Before you even think about installing new flashing, you need to play detective. Why did the old stuff fail? If you just replace the metal without figuring out the root cause, you’re setting yourself up for a repeat performance. Think of it like putting a bucket under a leak instead of fixing the hole in the roof—it’s a temporary fix, not a solution.
Chimney flashing is more than a single piece of metal; it's a meticulously designed system meant to protect one of the most vulnerable spots on your entire roof. Year after year, it gets hammered by sun, rain, snow, and ice. This constant assault is usually what leads to failure and, eventually, leaks that can cause serious damage to your home’s structure.
Common Causes of Flashing Failure
I've seen it all over the years, but most failures boil down to a few common culprits. Pinpointing the exact cause is the first step toward a repair that will actually last.
- Material Corrosion: Many older homes were built with galvanized steel flashing. It was a good material for its time, but it has a limited shelf life. After 10 to 15 years, that protective zinc coating wears thin, leaving the steel exposed to moisture. The result? Rust, holes, and leaks.
- Sealant Deterioration: That line of caulk or sealant along the top edge of the counter-flashing is a major weak spot. The sun’s UV rays bake it year-round, causing it to become brittle, crack, and eventually pull away from the brick. Once that seal is broken, you’ve created a superhighway for water to get in.
- Poor Initial Installation: Honestly, this is more common than you'd think. Maybe the original roofer skipped the step flashing, didn't overlap the pieces correctly, or drove nails right through the face of the flashing. These kinds of shortcuts create immediate vulnerabilities that invite water in from day one.
Improper or failed flashing is one of the top reasons homeowners call about chimney-related water damage. Those metal sheets are the last line of defense at this critical intersection, and when they fail, both the chimney and the roof structure are at risk.
Spotting the Early Warning Signs
The key is to catch the problem before it turns into a catastrophe. Keep an eye out for the subtle hints that your flashing is on its way out.
That faint, brownish water stain on the ceiling near your fireplace? That's the classic sign of a slow, persistent leak. You might also notice a musty smell or feel dampness in the attic near the chimney. From the outside, look for obvious signs like rust stains on the shingles, visible corrosion on the metal, or clear gaps where the flashing has pulled away from the brick.
A solid grasp of the different parts of the system is crucial. Understanding how a proper seal works is the foundation of a successful repair, so it's also worth looking into these expert waterproofing strategies. By recognizing these common failure points, you can ensure your new flashing installation is a permanent fix, not just another patch job.
Assembling Your Chimney Reflashing Toolkit
Before you even think about setting a ladder against the house, let's talk about gear. Kicking off a chimney reflashing project without having every single tool and material ready is a recipe for disaster. It's the kind of mistake that leads to multiple trips to the hardware store mid-job, often with a storm cloud on the horizon.
Getting everything organized first is the mark of a pro. It’s not just about convenience; it’s about doing the job safely and getting it right the first time. Think of this prep work as the most important step of all—get this right, and everything else falls into place much more smoothly.
The Right Tools for the Job
Working on a roof is no joke. The first and most critical part of your toolkit is your safety equipment. You're dealing with heights and steep angles, so this is where you don't cut corners. From there, you'll need a specific set of hand tools to carefully remove the old, failed flashing and install the new pieces without damaging your roof or the chimney itself.
Here’s a breakdown of what you'll need to have on hand.
Essential Toolkit for Chimney Reflashing
| Category | Item | Purpose |
|---|---|---|
| Safety Gear | Safety Harness & Rope | Essential fall protection for working at height. |
| Extension Ladder | Must be properly rated and set on stable ground. | |
| Heavy-Duty Work Gloves | Protects hands from sharp metal and abrasive mortar. | |
| Safety Glasses | Shields eyes from flying debris during mortar removal. | |
| Hand Tools | Pry Bar / Flat Bar | For gently lifting shingles to access hidden flashing. |
| Masonry Chisel & Hammer | To carefully chip old mortar out of the chimney joints. | |
| Tin Snips (Aviation Snips) | For making clean, precise cuts in the new flashing. | |
| Caulking Gun | Allows for a consistent, waterproof bead of sealant. | |
| Materials | Flashing Material | Galvanized steel, stainless steel, or copper. |
| Roofing Sealant | A high-quality, flexible, exterior-grade polyurethane caulk. | |
| Roofing Nails | Galvanized nails for securing the new flashing. |
Having these specific tools makes all the difference. A thin pry bar, for instance, lets you get under shingles without cracking them, while a good pair of tin snips prevents you from mangling the new flashing with rough cuts.
The name of the game is careful deconstruction, not brute-force demolition. Your goal is to remove the old system while preserving the surrounding shingles and brick. This sets the stage for a clean, watertight installation.
A Word on Materials
Finally, let's talk about the flashing material itself. Your choice here will determine how long your repair lasts.
Galvanized steel is a common, cost-effective option that works well for many homes. You can expect it to last about 10 to 15 years before you need to start worrying about rust. It’s a solid, reliable choice, but it’s not a permanent fix.
If you’re looking for something that will likely outlast you, consider upgrading. Stainless steel and copper are premium materials. Copper, in particular, can last for well over 50 years, developing a beautiful patina over time. The upfront cost is higher, but it's an investment in serious, long-term protection.
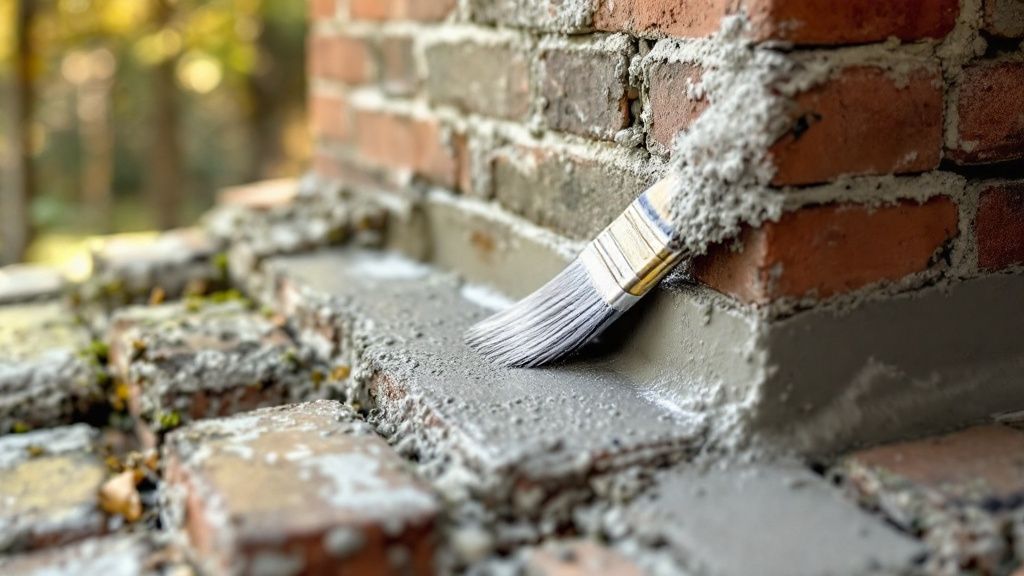
No matter which metal you choose, don't skimp on the sealant. You need a professional-grade polyurethane caulk designed for roofing and outdoor use. It has to remain flexible through scorching summers and freezing winters to keep that final seal completely waterproof.
Removing Old Flashing Without Damaging Your Roof
Alright, this is where patience becomes your most valuable tool. If you rush this part, you're almost guaranteed to create more problems for yourself—think cracked bricks, torn shingles, and a much bigger repair job. We're not doing demolition here; this is more like careful surgery. The whole point is to dismantle the old, failing flashing without harming the chimney or the surrounding roof.
Taking a slow, methodical approach here ensures you have a clean, solid foundation for the new flashing system. It’s the difference between a quick fix and a lasting repair.
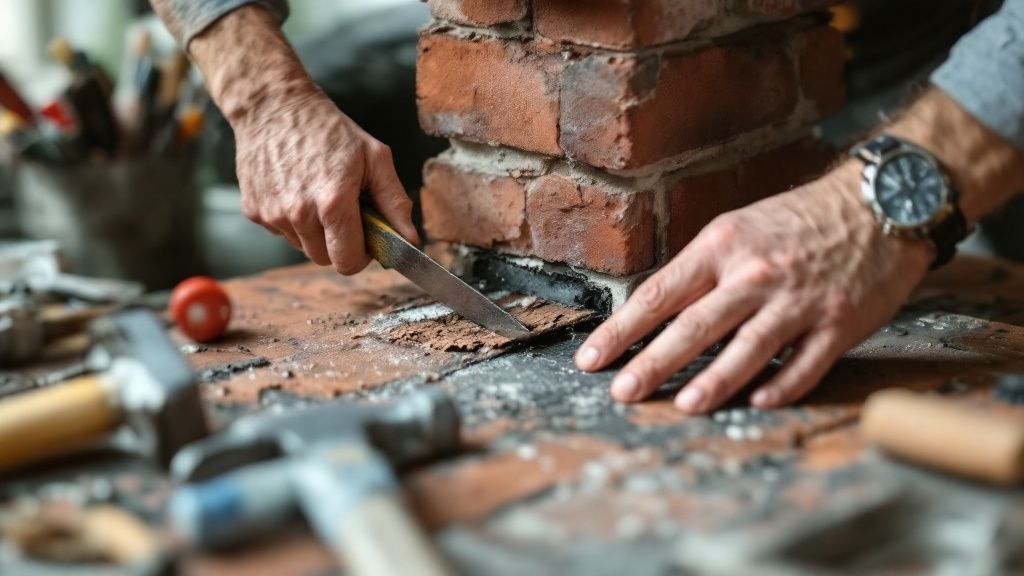
Freeing the Counter Flashing
First up is the counter flashing. These are the pieces of metal set directly into the chimney's mortar joints. They're locked in pretty tight, so you'll need a hammer and a good masonry chisel to persuade them out.
Position the tip of your chisel right at the edge of the mortar joint, angling it just slightly away from the brick itself. Give it a few firm, controlled taps with the hammer. You’re not trying to pulverize the brick, just fracture the mortar holding the flashing. Work your way methodically along the joint until the metal piece wiggles free.
- Pro Tip: Seriously, wear your safety glasses. Mortar chips fly off like tiny, sharp projectiles, and your eyes are not the place for them to land.
- Don't Force It: If a section is being stubborn, resist the urge to whale on it. Instead, chip away a bit more mortar from the sides to relieve the pressure.
Gently Lifting Shingles to Access Step Flashing
Once the counter flashing is out, you can get to the step flashing. These are the individual L-shaped pieces layered in with the shingles along the slope of the roof. To remove them, you have to carefully lift the shingles that are covering them.
A flat pry bar is indispensable for this task. Gently work the bar under the edge of the shingle that's sitting on top of the first piece of step flashing. You only need to lift it enough to see the nail holding the flashing—usually just 1-2 inches is all it takes. Go easy, because prying too hard on older shingles will crack them in a heartbeat.
With the nail exposed, use your pry bar or the back of your hammer to pull it out. The step flashing should now slide right out. Just repeat this delicate dance for each piece as you work your way up the side of the chimney.
Remember, every shingle you save is one less you have to buy and install. This careful work also protects the roof underlayment, which is your roof's last line of defense against water. You don't want to tear or puncture it.
Final Cleanup for a Perfect Surface
The last step in the removal process is also the most important: the cleanup. You need to get rid of every last trace of old roofing cement, stubborn caulk, and forgotten nails from the roof deck and the chimney bricks.
Grab your pry bar or a stiff putty knife and scrape it all clean. A pristine surface is absolutely critical. The new flashing needs to sit perfectly flat, and the new sealant needs a clean base to create that watertight bond. Any gunk left behind is a potential leak waiting to happen.
After scraping, give the whole area a good sweep with a stiff brush. What you want is a completely bare, clean surface around the base of the chimney, ready for the new installation. This meticulous prep work is what makes the difference between a temporary patch and a professional repair that will stand up to the weather for years. To better understand why the layers underneath matter so much, check out our guide on what roof underlayment is and its role in a complete roofing system.
Putting in the New Flashing: A Step-by-Step Breakdown
Alright, the old, leaky flashing is gone and you’ve got a clean slate. Now for the fun part: building the new, watertight system that's going to protect your home for years to come. Installing chimney flashing is a game of layers. Every single piece has a job, and the order you install them in is absolutely critical. Get the sequence right, and you've got a bulletproof seal.
This visual gives you a great overview of the process, showing how each component fits together.
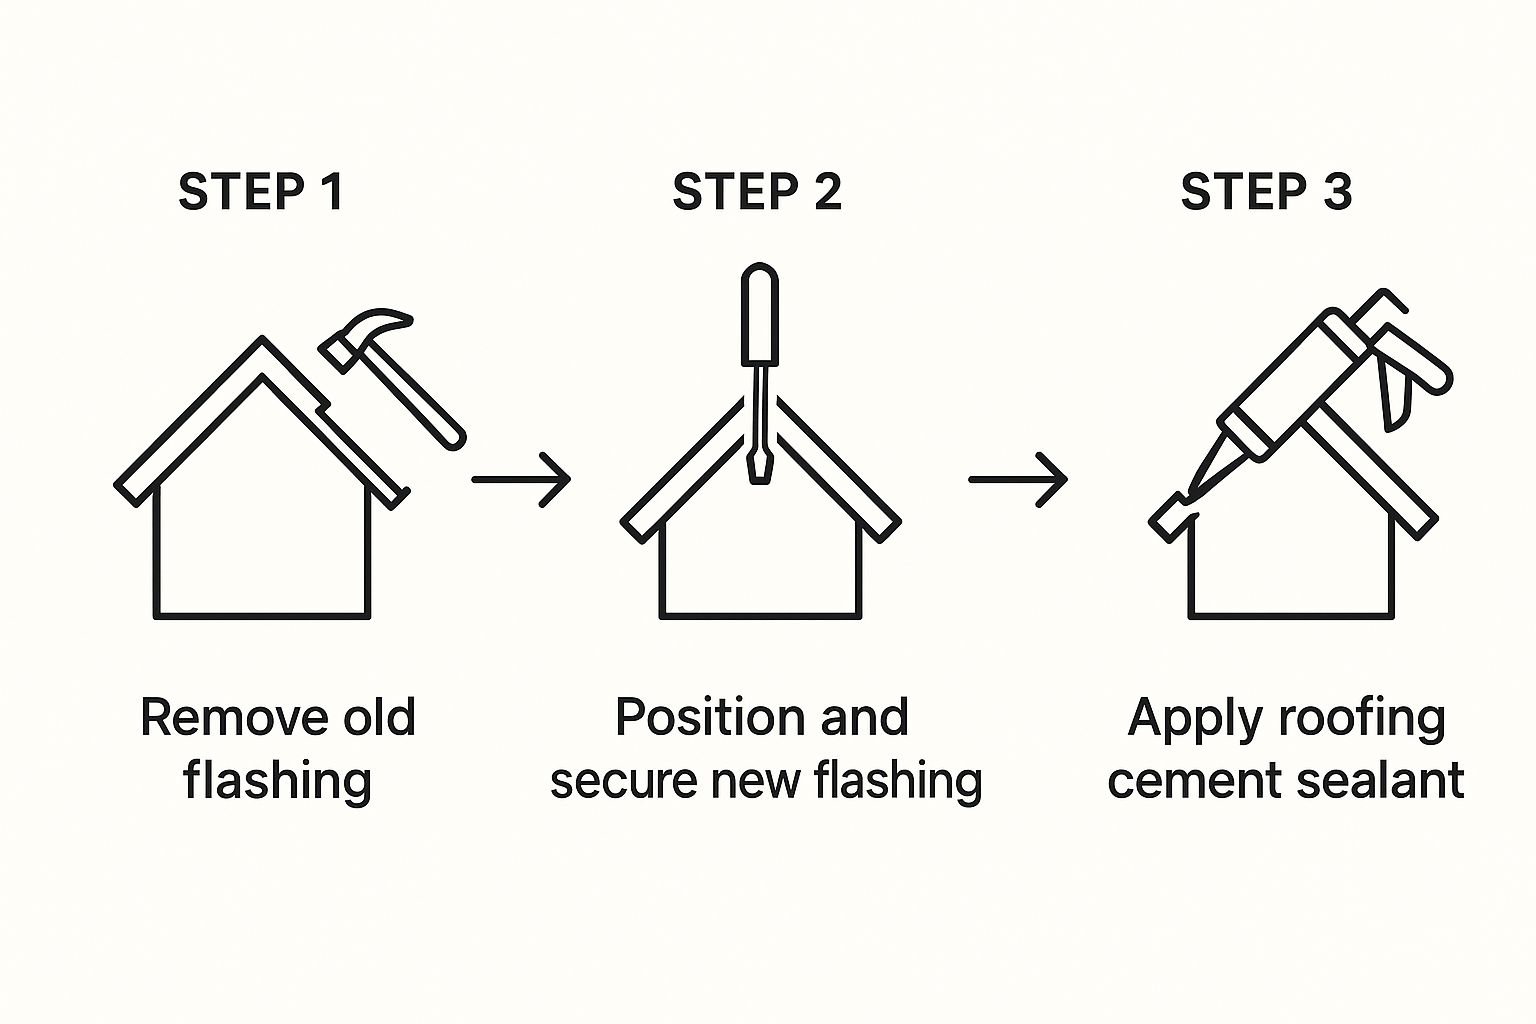
As you can see, it's a logical flow from the bottom up, with each new piece overlapping the last to ensure water is always directed down and away from the chimney.
Start at the Bottom: The Apron Flashing
You always, always start at the lowest point of the chimney—the downslope side. This is where you'll place the front apron flashing. Think of it as the foundation of your flashing system. It's one continuous piece of metal bent to sit flat on the roof sheathing and turn up vertically against the face of the chimney.
Go ahead and tack the bottom edge to the roof deck with a couple of roofing nails. But here’s a pro tip: leave the top edge that’s touching the brick completely free. Don't nail it to the chimney. This piece needs a little room to breathe as things expand and contract with the temperature. The counter flashing will cover it later on.
Work Your Way Up: Weaving in the Step Flashing
Next up are the sides of the chimney. This is where your step flashing comes into play. These are just small, L-shaped pieces of metal that you'll weave into each course of shingles as you go up. The rhythm is simple but non-negotiable for a leak-proof job.
- Start by placing your first piece of step flashing so it laps over the corner of the front apron you just installed.
- Lay the first shingle for that course right on top, making sure it hides the step flashing completely.
- Now, place your next piece of step flashing over that shingle. The key is to make sure it overlaps the piece below it by at least 2 inches.
- Lay the next shingle, covering that piece of flashing.
You’ll just repeat this shingle-flashing-shingle pattern all the way up both sides of the chimney. This layering is the magic that forces water to keep moving down the roof instead of finding a way underneath.
You have to think like a drop of water. Every overlap needs to guide that drop down onto the piece below it. Never give it an opening to sneak underneath. This methodical layering is the entire secret to a seal that lasts.
At the Top: The Back Flashing (or Cricket)
Once you reach the high side of the chimney, it's time for the back flashing. Depending on the chimney's width, this might be a simple "saddle" or a more complex "cricket." Its job is to prevent water, snow, and debris from getting trapped behind the chimney, which is a classic spot for leaks to start. A cricket is like a mini roof that actively diverts everything around the chimney.
Set your back flashing in place, making sure the sides extend over the very top pieces of your step flashing. Nail it to the roof deck, and then simply install shingles over its surface like it's part of the main roof.
The Final Seal: Counter Flashing
The last piece of the puzzle is the counter flashing. This is what you’ll tuck into those mortar joints you painstakingly cleaned out earlier. The most important measurement here is that the bottom edge of your counter flashing must overlap the top edge of your base, step, and back flashing by a minimum of two inches.
After fitting each piece into its joint, you can secure it with small flashing wedges or specialized masonry screws. The final, make-or-break step is to apply a generous bead of a high-quality polyurethane sealant along the top edge where the counter flashing disappears into the mortar. This creates the final, flexible, waterproof barrier that completes the whole system.
The good news is that materials have come a long way. Modern flashing made from stainless steel or aluminum alloys can easily last up to 30 years. Plus, newer innovations like self-adhesive waterproof underlayments can give you an extra layer of protection against any small installation mistakes. It’s always a good idea to see what the latest trends in chimney repair services are to stay on top of these advancements.
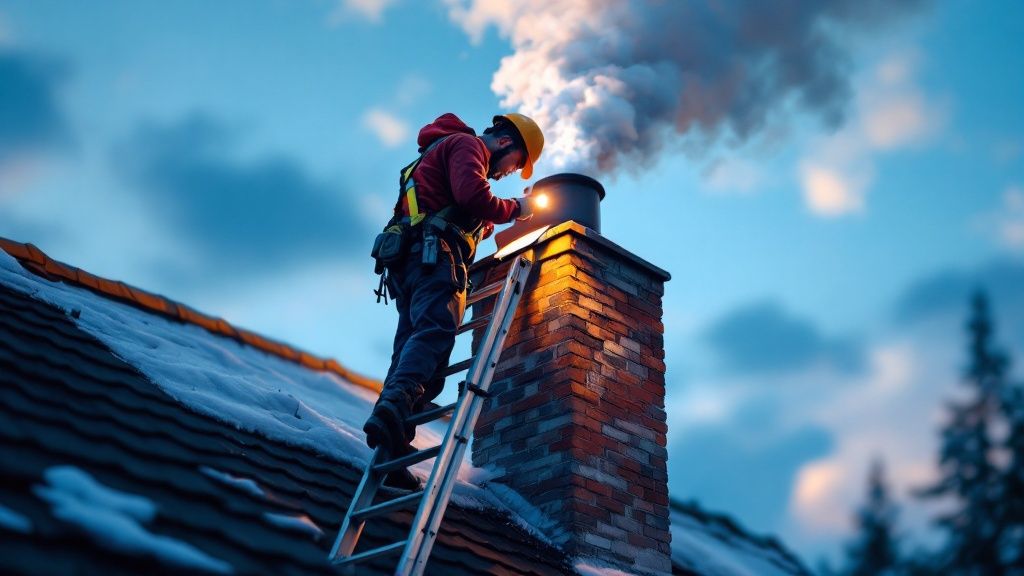
Knowing When a DIY Project Is Out of Your League
There’s a certain pride that comes with fixing things around your own house, but a smart homeowner knows where to draw the line. When you’re staring down a chimney reflashing project, you have to be brutally honest with yourself: is this something I can really handle, or is it time to call in a professional?
This isn’t about admitting defeat. It's about protecting your biggest investment. A botched DIY flashing job can easily turn into thousands of dollars in water damage, making the cost of hiring a pro look like a bargain. One tiny, missed detail can create a slow, silent leak that rots out your roof deck, soaks your attic insulation, and eventually leaves a nasty stain on your living room ceiling.
Red Flags That Mean It's Time to Call a Pro
Some situations just aren't worth the risk. If you run into any of these, it's a clear signal to put down the tools and pick up the phone.
- A Dangerously Steep Roof: Got a roof with a pitch steeper than 6/12? That means for every 12 inches it runs horizontally, it rises 6 inches. Anything steeper dramatically increases your risk of a fall. Professionals have the safety harnesses, specialized ladders, and experience to navigate these angles safely. It’s just not worth the personal risk.
- Crumbling or Damaged Brickwork: The new flashing is only as secure as the chimney it’s attached to. If you see bricks that are flaking (spalling) or mortar joints that are turning to dust, the chimney itself needs a mason's attention first. Slapping new flashing onto a failing structure is a waste of time and money.
- Signs of Structural Rot: As you start tearing off the old shingles and flashing, pay close attention to the wood underneath. If the roof sheathing feels spongy, soft, or looks dark and discolored, you’ve found wood rot. This means a leak has been active for a long time, and that section of the roof needs to be repaired before you can even think about installing new flashing.
Think of it this way: hiring a professional is a fixed cost. You know what you're paying. The potential cost of a failed DIY attempt—from structural repairs to mold remediation—is a massive, unknown financial risk.
There's a reason the market for these skills is so large. The global chimney repair services market, which includes reflashing, was valued at around $2.5 billion in 2023 and is expected to keep growing. This isn't just a random number; it shows that homeowners are realizing that proper chimney maintenance is non-negotiable for a safe, sound home.
In the end, if you decide this job is too big to tackle, the next step is finding the right person to do it. Our guide on how to choose a roofing contractor walks you through everything you need to know to find a qualified expert you can trust.
Got Questions About Reflashing Your Chimney?
Even with a step-by-step guide in hand, you're bound to have a few questions pop up before you start tearing into your roof. It's completely normal. Let's walk through some of the most common things homeowners ask me about chimney reflashing.
How Much Is This Going to Cost Me?
That's the big question, isn't it? The final number really boils down to a few key things: the size of your chimney, how steep your roof is, and what kind of metal you pick. If you hire a pro, you can expect to see quotes anywhere from $400 to over $1,500.
Now, if you're tackling this yourself, your material costs will likely land somewhere between $100 and $300. That covers standard stuff like galvanized steel and all the necessary sealants. If you decide to go with a high-end metal like copper, that number will climb pretty quickly. My advice? If you're hiring out, always get at least three quotes.
What’s the Best Metal for Chimney Flashing?
You're really trying to find the sweet spot between your budget and how long you want the fix to last. There’s a definite pecking order when it comes to performance.
- Copper: This is the gold standard, no question. It's incredibly tough and can easily last over 50 years. It even looks better with age as it develops that classic green patina. The downside? It's by far the most expensive option.
- Stainless Steel: A fantastic runner-up. It’s also built for the long haul and won't rust out on you. Think of it as a premium choice that’s a bit more wallet-friendly than copper.
- Galvanized Steel: This is what you’ll find on most homes, and for good reason. It hits that perfect balance of being affordable and reliable. You should get a solid 10-15 years out of it before it needs a serious look.
- Aluminum: It's cheap and won't rust, which is great. But, it's also a soft metal. I've seen it get easily dented and damaged by hail or even a misplaced boot on the roof.
Think of your flashing material as an investment. Saving a few bucks now on a cheaper metal might feel good, but choosing something like copper could mean you never have to think about that part of your roof again.
How Often Should I Check My Flashing?
Being proactive is the key to avoiding a nasty leak. Once a year, grab a pair of binoculars and give your flashing a quick once-over from the ground. The best time is right after winter has done its worst.
For a more thorough check, I recommend having a professional roofer get up there for a closer look every 3-5 years. They can spot the subtle stuff—like failing sealant or tiny cracks in the metal—that you'd never see from down below. It's also a smart move after any major storm rolls through.
Can I Just Smear Some Caulk on the Old Flashing?
I see this all the time, and it's a tempting shortcut, but please don't do it. Slapping a new layer of sealant over old, failing flashing is just putting a band-aid on a bigger problem. You're not fixing the rusted metal or the piece that has pulled away from the brick.
Worse yet, you can actually trap moisture underneath the new caulk, which just makes the metal corrode faster and can turn a small drip into a real gusher. The only right way to do this is to tear out all the old, compromised flashing and install a brand-new system from scratch. It’s the only way to guarantee a long-term, watertight seal.
If you've looked everything over and decided this project is a little more than you want to handle, that's where the pros come in. Our team at Penn Ohio Roofing & Siding Group has been at this for over 25 years, and we can make sure your chimney is sealed up right.
Feel free to reach out to us for a free, no-pressure estimate on your chimney reflashing project.