Navigating a roof insurance claim is a multi-step process. It starts with documenting the damage, then contacting your insurer, meeting their adjuster, and finally, managing the repairs. Your success really comes down to two things: understanding your policy—especially the difference between Actual Cash Value (ACV) and Replacement Cost Value (RCV)—and providing solid, thorough evidence.
What to Expect from the Modern Claim Process

Filing a roof insurance claim isn't what it used to be. A perfect storm of rising material costs and more frequent severe weather has forced insurance carriers to tighten up how they handle roof coverage. This directly affects how much you'll get paid, so you need to understand the new reality before you even start the claim.
The days of getting a quick, full-replacement check are fading, particularly if your roof has a few years on it. Insurers are now scrutinizing a roof's age and pre-storm condition much more carefully.
Understanding Key Insurance Terms
To get through this without pulling your hair out, you need to speak the language. If you don't grasp these core concepts, that settlement offer from your insurer can be incredibly confusing and frustrating.
Here are the terms that will come up again and again:
- Deductible: This is your share of the cost. It's the amount you pay out of pocket before the insurance company pays a dime. If the repair is $15,000 and your deductible is $2,000, your insurer covers up to $13,000. Simple as that.
- Actual Cash Value (ACV): Think of this as the "used" value of your roof. It's what your roof was worth the moment before it was damaged, factoring in its age and general wear and tear. An older roof will naturally have a lower ACV.
- Replacement Cost Value (RCV): This is the good stuff. An RCV policy covers the full cost to tear off your old roof and replace it with a new one using similar materials, without subtracting for its age.
- Depreciation: This is the big one. It’s the dollar amount your roof has lost in value over time. It's also the fundamental difference between getting an ACV check and an RCV check.
The Shift in Coverage Policies
Insurers are getting creative to limit their exposure to massive claim costs. While RCV used to be the gold standard for most policies, we're seeing a major shift. Many carriers now default to ACV policies or use tiered payment schedules that slash coverage as a roof gets older.
For example, a brand-new roof might get 100% replacement cost, but that coverage could plummet to 60% or less once it hits the 10-year mark. You can read more about these home insurance trends to see just how much things are changing.
This new landscape means you have to be realistic.
Key Takeaway: Never assume your policy will cover a full roof replacement, especially if your roof is over 10-15 years old. The single most important thing you can do is pull out your policy right now and confirm if you have RCV or ACV coverage. Knowing this from the start gives you a realistic baseline for your budget and any negotiations to come.
What to Do the Moment You Discover Roof Damage
Discovering your roof has been battered by a storm can be a shock, but what you do in those first few hours is absolutely crucial. Your immediate actions lay the groundwork for a successful insurance claim, so the focus needs to be on safety, stopping any further damage, and meticulously documenting everything.
First things first: stay off the roof. A damaged roof can be unstable, and climbing up there, especially when it’s wet, is a serious safety risk. Instead, do a full walk-around of your property from the ground. Look for the obvious tell-tale signs: shingles that are missing, cracked, or curled; dented gutters and vents; and an accumulation of shingle granules in your downspouts. These are all red flags.
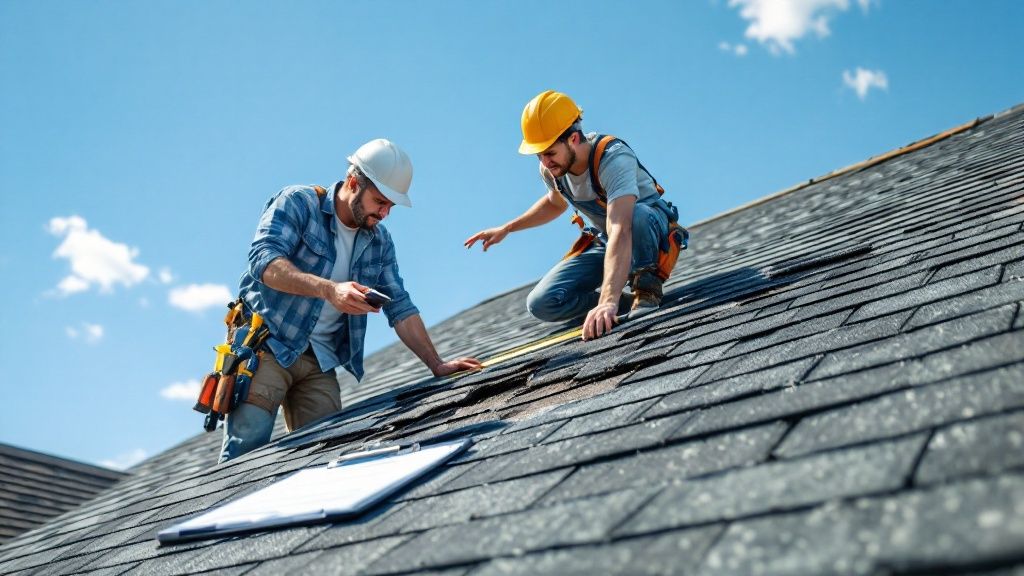
This image highlights the key elements of that initial inspection and documentation process, which is the foundation of your entire claim.
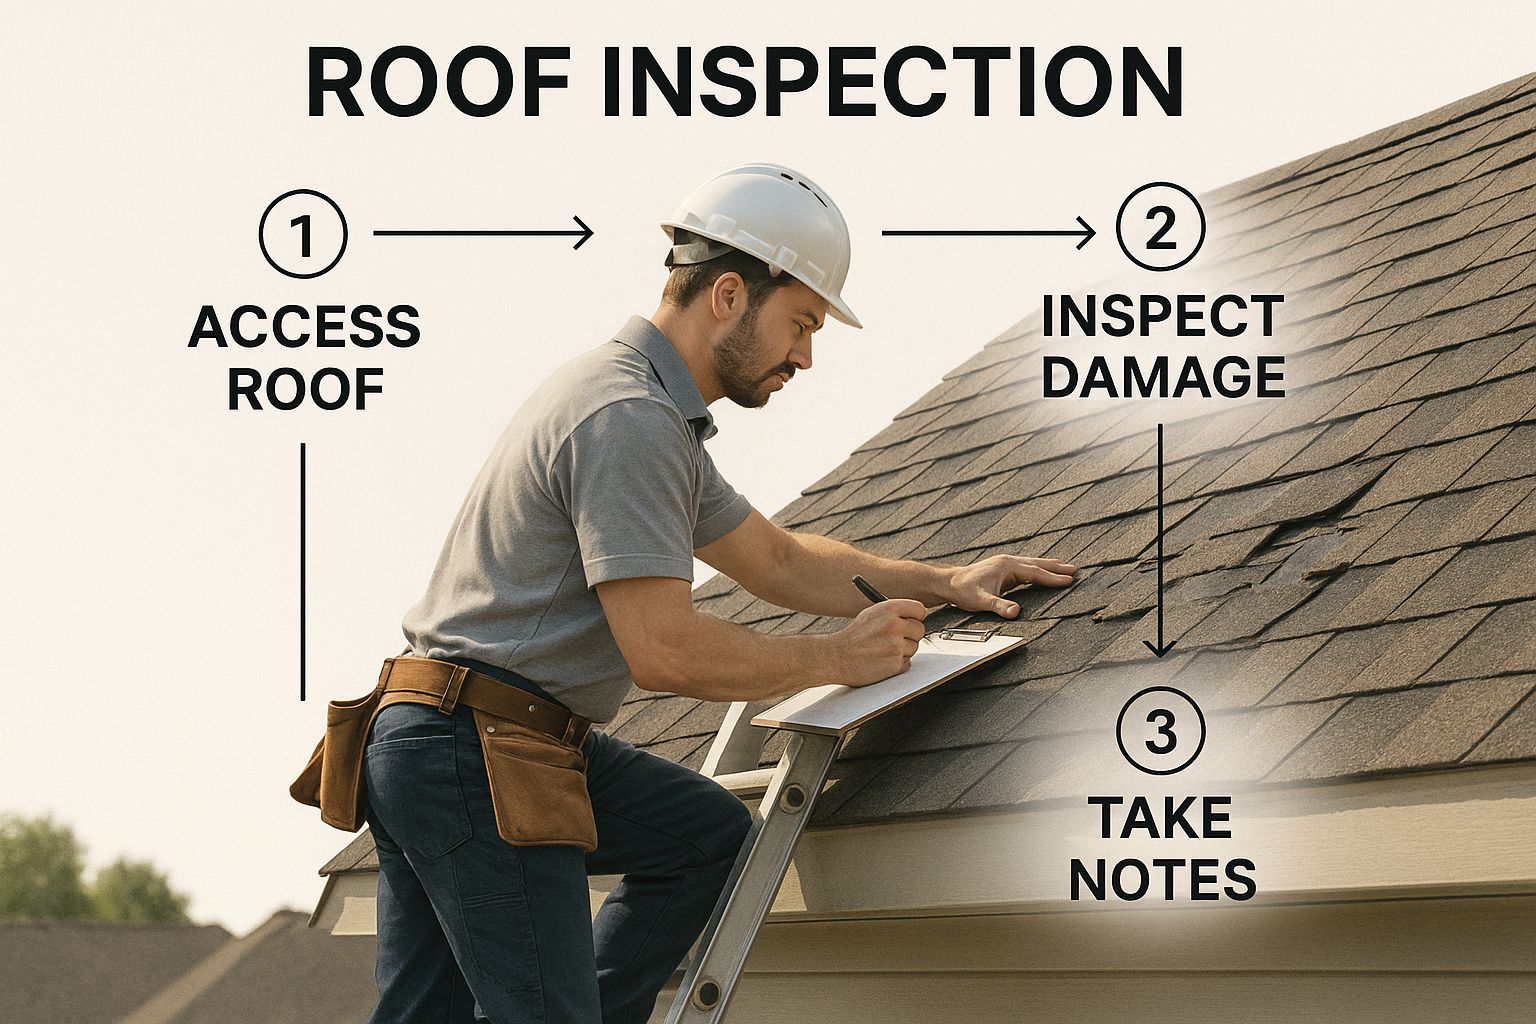
As you can see, a structured approach is essential. Taking the time to be thorough right now means you won't miss small details that could become big issues later on.
Create a Detailed Record of the Damage
Right now, your smartphone is your best friend. Start taking pictures and videos of everything—and I mean everything. You can never have too much visual evidence.
- Go wide: Get photos of all four sides of your house to show the overall scope.
- Zoom in: Capture close-up shots of specific damage—think individual hail dings on shingles, lifted flashing, or cracked vent boots.
- Show the cause: If you can, safely take pictures of the hailstones next to a coin or ruler for scale. Photos of fallen branches also help tell the story.
- Look inside: Don't forget about the interior. Document any ceiling water stains, bubbling paint, or damp walls.
This visual proof is your most powerful asset. Along with the photos, jot down the date and time the storm hit. This log builds a clear, undeniable timeline for the insurance adjuster. It’s one thing to describe the damage; it's another thing entirely to back it up with timestamped photos and detailed notes. Before you start, it’s a good idea to know all the common signs of roof damage so you don't miss anything.
The table below breaks down exactly what you need to document to build a rock-solid case for your claim from the very beginning.
Initial Damage Documentation Checklist
| Action Item | Why It's Important | Pro Tip |
|---|---|---|
| Ground-Level Inspection | Safely identify obvious damage without risking injury on a potentially unstable roof. | Use binoculars to get a closer look at shingles, flashing, and vents from the ground. |
| Take Widescreen Photos | Establishes the overall context of the damage to your property. | Take photos from every corner of your yard to capture all angles of the roof and siding. |
| Capture Close-Up Details | Provides indisputable proof of specific damage points like hail impacts or wind-lifted shingles. | Place a coin or ruler next to hail dings for a clear sense of scale in your photos. |
| Document Interior Damage | Connects the exterior roof damage to its consequences inside your home, proving the leak's source. | Note the time you first noticed the interior leak and how quickly it's spreading. |
| Record the Date and Time | Creates a precise timeline that links the damage directly to a specific weather event. | Check local weather reports to confirm the exact time the storm passed over your address. |
Following these steps methodically ensures your initial report to the insurance company is comprehensive and credible, making it much harder for them to dispute the extent of the damage.
Stop the Damage From Getting Worse
Your homeowner's insurance policy actually requires you to take reasonable steps to prevent further harm to your property. This is called your duty to mitigate, and it’s a big deal. For a damaged roof, this usually involves some quick, temporary fixes.
A simple tarp can be the difference between a straightforward roof repair and a catastrophic interior flood. Stopping a leak immediately prevents a small problem from morphing into a nightmare involving soaked drywall, ruined insulation, and buckled hardwood floors—all of which can seriously complicate and delay your settlement.
If you have a visible leak inside, get a bucket under it right away. More importantly, if it is safe to do so, cover the damaged section of the roof with a heavy-duty tarp to keep rain out. Make sure to save the receipts for the tarp or any other supplies you buy for these temporary repairs; they are almost always reimbursable. If the damage is extensive, you may even need to find emergency storage space to protect your furniture and other belongings. Taking these steps shows your insurer you're acting responsibly, which strengthens your claim right from the start.
Filing Your Claim and Finding the Right Roofer

Alright, you've got your photos and notes in hand. Now it's time to actually kick off the roof insurance claim process. This isn't just about making a phone call; it's about officially presenting your case to the insurance company. A little preparation here goes a long way in making everything that follows much, much smoother.
Before you even think about picking up the phone, get everything organized. Have your policy number, all your photos and videos, and your notes on the storm's date and time laid out in front of you. When you get a claims representative on the line, just stick to the facts and give a clear, straightforward description of what you've found.
Get a Professional Inspection Before the Adjuster Arrives
Here's one of the smartest things you can do: have a trusted local roofer inspect your roof before your insurance adjuster shows up. Think of this as getting your own expert opinion first, which gives you a solid baseline for what a proper repair should look like.
A seasoned roofer knows exactly what to look for. They’ll spot things an adjuster might miss—like subtle creasing on shingles, hidden damage to flashing, or seals around your vents that have been compromised. Getting this professional estimate and detailed scope of work upfront puts you in a much stronger position to negotiate a fair settlement.
You're not alone in this, by the way. Wind and hail damage are behind nearly 50% of all homeowners insurance claims in the country, making roof issues the number one reason people file. This just shows how common this situation is and why knowing the ropes is so important. If you want to dive deeper, you can discover more insights about these roofing industry trends to see the bigger picture.
Vetting and Choosing the Right Roofing Partner
Picking the right contractor is just as critical as the claim itself. You're not just hiring someone to nail down shingles; you're looking for an advocate. The key is to find a roofer who has real, hands-on experience navigating the insurance claims process. They know the lingo, the paperwork, and how to communicate effectively with adjusters.
When you start meeting with potential roofers, here's what to zero in on:
- Insurance and Licensing: Don't just take their word for it. Ask to see proof that they are fully licensed and insured in your state. This is non-negotiable and protects you from any liability if an accident happens on your property.
- Local Reputation: A contractor with deep roots in your community is far more likely to stand behind their work. Check out their online reviews and, more importantly, ask for local references you can actually talk to.
- Claim Experience: Be direct. Ask them how many insurance claims they've managed. A pro who does this regularly will have no problem meeting with your adjuster and walking them through the damage they found.
Pro Tip: Be extremely cautious of anyone who knocks on your door right after a storm. High-pressure tactics or offers to "waive" or "cover" your deductible are massive red flags. These are often signs of a "storm chaser" who might do a shoddy job and be gone before the next rainfall.
Take your time here. This decision is too important to rush. For a more comprehensive checklist, our guide on how to choose a roofing contractor can help you make a confident choice. The right roofer acts as your partner, ensuring every last bit of damage is identified, documented, and properly repaired.
The Adjuster Meeting: Making Your Case
The on-site meeting with the insurance adjuster is probably the single most important moment in your entire claim. How you handle this can make or break your outcome. Don't think of it as a simple inspection; it's a critical presentation where you and your evidence take center stage.
Your main job here is to make sure the adjuster sees everything—and I mean everything. This is exactly why having your roofer present is non-negotiable. A good roofer becomes your advocate, pointing out the kind of damage an adjuster might miss, like subtle hail pings, lifted shingle seals, or compromised flashing around vents.
Setting the Stage for Success
Before that adjuster ever sets foot on your property, get your ducks in a row. Have all your documentation organized in a folder—your photos, videos, the storm log, and the detailed inspection report from your roofer. When you hand over a neat, professional package, it sends a clear signal that you're serious and have done your homework.
When the time comes, walk the property with both your roofer and the adjuster. Let your roofer do the heavy lifting on the technical side, but your presence shows you're invested in a fair outcome. Listen intently and ask smart questions.
A few good ones to have in your back pocket:
- What specific types of damage are you looking for today?
- Can you walk me through how you'll calculate the repair estimate?
- What happens next after you leave today?
- When should I expect to see a copy of your report?
Your roofer can talk shop about shingle gauges and ventilation, but you being there keeps the process grounded and focused.
Crucial Insight: An adjuster's role is to verify a covered loss according to the policy's fine print. Your job, with your roofer's expert help, is to provide undeniable proof that the damage you have fits squarely within that policy. A firm, professional, and collaborative attitude will get you much further than a confrontational one.
What to Expect from a Modern Inspection
Don't be surprised if the adjuster pulls out some high-tech gear. It's pretty common now for carriers to use drones to get a bird's-eye view of the roof. These drones capture incredibly high-resolution images, making it safer and easier to spot damage on steep pitches or hard-to-reach sections.
Behind the scenes, some insurance companies are also using sophisticated analytics. They're adopting new tech that can analyze aerial imagery to automatically detect things like water pooling or missing granules. If you're curious, you can learn more about how these insurance industry technologies work and see how they're impacting claims.
Going Through the Adjuster's Report with a Fine-Tooth Comb
A week or so after the visit, you'll get the adjuster's summary, sometimes called a "scope of work" or "loss statement." This document is the roadmap for your repair. It breaks down every approved repair, the specified materials, and the costs for labor and supplies, all listed as line items.
Sit down with your roofer and go over this report line by line. Put it right next to the estimate your roofer gave you. It's almost guaranteed there will be differences. Maybe the adjuster missed a few damaged vents, underestimated the local cost of labor, or didn't include code-required items like ice and water shield. Finding these discrepancies is the first real step in negotiating a settlement that actually covers the full cost of a proper repair.
Making Sense of Your Settlement and Kicking Off Repairs
That first insurance check in your hand is a great feeling, but don't mistake it for the finish line. Most insurance payouts for roof claims happen in two stages. It’s a system designed to make sure the repair work actually gets done, and knowing how it works is crucial for a smooth process.
The first check you get is for the Actual Cash Value (ACV) of your damaged roof. Think of this as what your roof was worth right before the storm hit, taking its age and condition into account. This money is your seed money to get the project moving.
The second check, the final payment, only comes after the job is complete. This is the Recoverable Depreciation. It's the amount your insurance company held back because of your old roof's age. Once you show them you've replaced it, they release these funds.
How the Two-Payment System Really Works
This ACV and depreciation split is standard practice, but it can catch homeowners off guard. Here’s a breakdown of what to expect.
-
The First Check (ACV): You’ll receive a check for the ACV, but with your deductible subtracted. So, if the ACV is $9,000 and your deductible is $1,000, you should expect a check for $8,000.
-
The Mortgage Company Detour: Heads up—if you have a mortgage, this check will almost certainly be made out to both you and your lender. They have a vested interest in your home's condition, so they have to sign off on it. This can add a few weeks to your timeline, so call your mortgage company right away to find out what paperwork they need.
-
The Final Payment (Recoverable Depreciation): Once the last shingle is nailed down, your roofer will send a final invoice and proof of completion to your insurer. This is the green light for them to release the depreciation funds and close out the financial side of your claim.
Expert Tip: The math has to add up. Your ACV payment + your deductible + your Recoverable Depreciation should equal the total Replacement Cost Value (RCV) your insurer approved. Always run the numbers yourself to make sure nothing was overlooked.
Inking the Deal and Getting to Work
Before you sign on the dotted line, have your roofer sit down with you and compare their contract to the insurance adjuster’s scope of work. They need to match, line by line.
A good roofer's contract will state that the total job cost won't exceed the insurance-approved amount. This leaves you responsible only for your deductible and any upgrades you decide you want. This step is your financial safety net, protecting you from surprise bills later.
This is also the moment to confirm that every single item the insurer is paying for—from the specific shingle brand to the type of nails—is listed in the roofer’s plan. If your home has unique features, it's a good time to review related expenses, like typical flat roof repair costs, if that’s part of your project.
Once the contract is signed and you have the ACV funds, your contractor can finally order the materials and get your project on the schedule. You're now on the home stretch.
Got Questions? We've Got Answers
When you're dealing with a damaged roof, the last thing you need is more confusion. The insurance claim process can feel like a maze, and it's completely normal to have questions, especially if you hit a snag. Let's walk through some of the most common issues homeowners run into and how you can handle them like a pro.
What If My Claim Is Denied or the Offer Is Too Low?
It’s a gut-punch, I know. Getting that denial letter or a settlement offer that barely covers the materials can be incredibly frustrating. But don't give up—this is often just the first step in a negotiation.
Your first move is to get everything in writing. Ask your insurer for a detailed explanation of their decision. You need to see exactly why they denied the claim or came in so low, and then you can cross-reference their reasoning with the fine print in your policy.
Next, it’s time to build your case. This is where having a thorough inspection report from a roofer you trust is worth its weight in gold. A good report can point out code-required upgrades or subtle damage the insurance adjuster might have overlooked. With this new evidence in hand, you can file a formal appeal. It's often a good idea to request a different adjuster for a fresh set of eyes. If you're still at a standstill, bringing in a public adjuster or talking to an attorney who specializes in this stuff are your next best steps.
How Long Is This Whole Process Going to Take?
Ah, the million-dollar question. The honest answer is: it depends. A simple claim in a quiet season might move quickly, but several things can slow it down. The severity of the damage, how swamped your insurance company is, and the availability of local roofers all have a major impact on the timeline.
Typically, an adjuster should be out to inspect the damage within a week or so of you filing the claim. After that, you can usually expect the first check—the Actual Cash Value (ACV)—to show up within a few weeks. But getting from that first phone call all the way to the final payment after the work is complete? That can take anywhere from a few weeks to several months. Be prepared for delays if a major storm just rolled through your area and everyone is in the same boat.
It's a common worry, but a single claim from a big storm is very unlikely to cause a direct rate hike. Insurers typically raise rates across an entire region after a catastrophic event, rather than penalizing one homeowner for what’s considered an 'Act of God.'
Is Filing a Roof Claim Going to Make My Insurance Premium Go Up?
This is probably the biggest fear homeowners have, and the answer isn't a simple yes or no. A single weather-related claim, like one for hail damage, usually won't cause your individual premium to spike.
However, a history of filing multiple claims in a short time frame can absolutely flag you as high-risk. That pattern can lead to higher premiums or, in some cases, your insurer might choose not to renew your policy at all.
This is why you have to be strategic. If you've got minor damage and the repair cost is just a little over your deductible, it might be smarter to just pay for it yourself. Always think about the long-term financial picture before you decide to file a claim.
Navigating a roof insurance claim is a lot less stressful when you have an experienced partner in your corner. We're experts in helping homeowners manage the entire process, from the first inspection to the final nail. We make sure your home is restored with top-quality materials and craftsmanship. If you need help with a claim or a professional roof inspection, contact us for a free estimate.