You notice the stain first. It’s usually a brown ring on the ceiling, sometimes a damp drywall seam, sometimes a drip that only shows up during a hard rain from the west. By the time water appears inside, the leak has often been traveling for a while, and one of the first places I suspect is the roof valley.
A valley is where two roof slopes meet and funnel water into one channel. That makes it one of the hardest-working parts of the roof and one of the easiest places for a small installation mistake, clogged debris, or aging material to turn into a leak. In the Penn-Ohio region, where roofs deal with wind-driven rain, wet leaves, ice, and repeated freeze-thaw cycles, valleys take a beating.
Roof valley repair isn’t always complicated, but it does require judgment. Some leaks need a clean, careful repair. Others are warning signs that the surrounding roof system is too worn for a spot fix to hold. The smart move is knowing which situation you’re in before you start peeling shingles.
Table of Contents
- That Telltale Stain What Your Leaky Roof Valley Is Telling You
- How to Diagnose Your Roof Valley Problem
- Essential Tools and Safety Preparations
- A Step-by-Step Guide to Roof Valley Repair
- DIY vs Pro Repair A Cost and Risk Analysis
- When to Call Penn Ohio Roofing and Siding Group
That Telltale Stain What Your Leaky Roof Valley Is Telling You
A roof valley leak usually starts subtly. Water runs down the valley the way it’s supposed to, hits a weak point, then slips under shingles or flashing and travels sideways before it ever drips into living space. That’s why the ceiling stain doesn’t always sit directly below the problem.
The valley matters because it concentrates runoff. Every roof plane feeding into that channel sends water, grit, and leaf debris to the same place. If the valley is poorly sealed, rusted, packed with debris, or fastened the wrong way, it becomes the path of least resistance for water entry.
For homeowners trying to sort out responsibility, maintenance, and defect questions, it also helps to see how these issues play out in other building-dispute settings. The discussion around roofing warranty issues in NSW is useful because it shows how installation defects and repair quality can become bigger problems than the original leak.
If the stain is fresh, act fast. Water can move into insulation, roof decking, trim, and wall cavities long before the damage looks dramatic. If you’re still trying to pinpoint the source, Penn Ohio has a practical guide on finding a roof leak that helps narrow down where the water is entering.
Practical rule: A valley leak is rarely a “wait until next season” problem. Once water gets under the roofing, every storm makes the repair bigger.
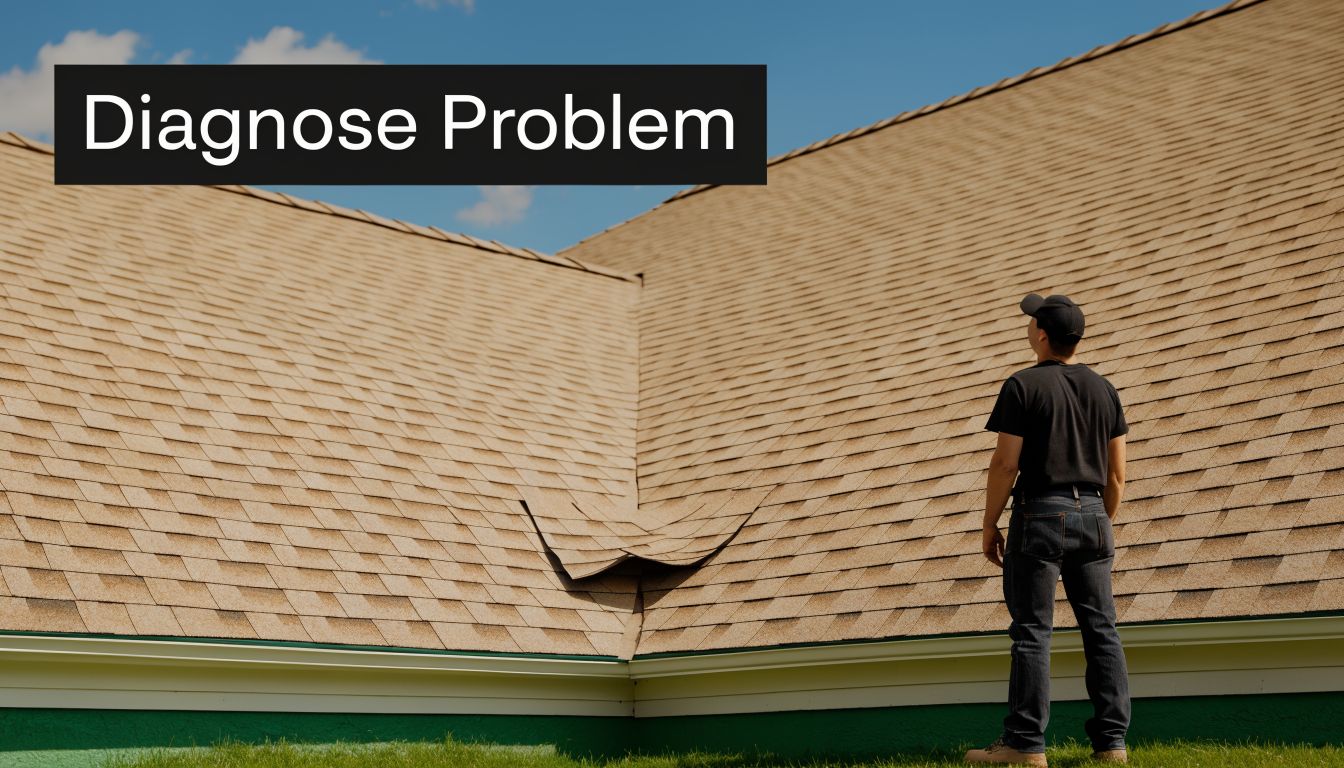
How to Diagnose Your Roof Valley Problem
The first job isn’t repair. It’s diagnosis. A lot of homeowners see a leak near a valley and assume the valley itself is bad, when the actual issue is broken shingles beside it, a flashing defect higher up, or a gutter backup forcing water where it doesn’t belong.
Start from the ground
Use binoculars first. That sounds basic, but it keeps you off a steep roof until you have a reason to climb.
Look for these signs along the valley line:
- Cracked or missing shingles: Pay close attention to the cut edges nearest the valley. Those edges handle constant water flow.
- A bare-looking stripe: If granules have washed away and the shingle surface looks exposed, the valley has been wearing hard.
- Rust, pinholes, or separation in metal: Open valleys can fail when the flashing corrodes or when laps weren’t sealed properly.
- Debris jams: Leaves and twigs hold moisture and redirect water sideways.
- Uneven shingle lines: Misalignment often points to an earlier repair that wasn’t rebuilt correctly.
If you use a ladder, keep it stable and inspect from the eave or just above it. Don’t walk a questionable valley until you know the decking below is solid. Commercial maintenance teams use the same logic in broader inspection programs focused on preventing building roof failures. The principle is simple. Find the weak detail before it becomes a major water path.
A helpful refresher here is understanding what roof flashing is, because many valley leaks are really flashing failures that happen to show up in the valley.
Decide whether the roof is worth repairing
Homeowners often waste money here. Not every valley should be repaired.
According to Fine Homebuilding’s guidance on durable roof valley repair, thirty-year dimensional shingles in good condition are ideal candidates for valley repairs, while old, wafer-thin 20-year shingles are typically not worth repairing because they’re too delicate. The same guidance says a repair is likely temporary if the surrounding shingles are brittle, heavily worn, or the roof already has a history of multiple repairs.
Use that as your filter:
- If the shingles around the valley still flex and seal well, repair can make sense.
- If the tabs crack when lifted, you’re probably forcing a short-term fix onto an old roof.
- If other roof areas show the same wear, the valley leak may just be the first visible failure.
Don’t judge the valley by itself. Judge the valley and the shingles tied into it as one repair area.
Essential Tools and Safety Preparations
A roof valley is a bad place to learn by trial and error. You are working in the channel that carries the most water, often on cut shingles, loose granules, and sheet metal. If your footing is uncertain before you start, stop there and call Penn Ohio Roofing.
Good preparation starts with one decision. Can you move, kneel, and handle tools on this roof without rushing or reaching? If the answer is not a clear yes, the repair is already outside safe DIY range.
Safety setup before tools
Set the ladder on solid ground, extend it high enough to step on and off the roof without climbing sideways, and secure it before you carry anything up. On steeper roofs or taller eaves, use a harness and an anchor rated for roof work. Homeowners skip this step because the repair area looks small. The fall risk does not care how small the repair is.
Wear soft-soled boots with clean tread, gloves, and eye protection. Valley work also deserves dry conditions. Rain, morning frost, loose leaves, and soft shingles in extreme summer heat all raise the odds of a slip or torn shingle.
One more judgment call matters here. If the valley is above a porch roof, over a walkout, or near power lines, the setup gets more complicated fast. That is usually the point where a service call costs less than a mistake.
Tools that make sense for a valley repair
Stage materials on the ground first. Carry up only what you need for the next step so the roof stays clear.
A practical kit usually includes:
- Flat pry bar and hammer: For separating shingles and pulling nails without wrecking sound courses nearby.
- Hook blade or sharp utility knife: For controlled cuts on shingles and membrane.
- Caulk gun with roofing-grade sealant: For sealing specific details, not coating the whole valley.
- Roofing nails or approved fasteners: Match length and type to the shingle system and deck.
- Ice and water membrane or equivalent waterproof underlayment: Valleys need a secondary water barrier under the finish materials.
- Corrosion-resistant valley metal: In practice, many roofers use valley metal in the roughly 14 inch to 18 inch range, and lighter flimsy stock is a poor choice because it kinks easily and telegraphs through the shingles. Match the repair to the existing valley style and local conditions.
- Replacement shingles: Get the same profile if possible. A close color match matters less than getting the exposure and fit right.
If you need a refresher on valley layouts before you buy materials, review this guide on how to shingle a roof valley correctly. It helps you tell whether you are repairing an open metal valley, a closed-cut valley, or a roof where the original installer mixed methods.
Some homeowners shop for affordable 15 degree coil roofing tools. That can speed up installation, but only if you already know where nails belong. In valley work, bad nail placement creates leaks faster than hand nailing ever will.
Small items that prevent big headaches
Bring a trash bucket, a small brush, and a magnetic sweeper for cleanup. Old nails and shingle scraps collect in valleys and gutters, then wash into the exact area you just repaired.
Chalk, a tape measure, and a marker also help more than people expect. Valley repairs fail when cuts wander, metal shifts off center, or nails creep too close to the water line.
If you cannot stage the roof cleanly, stay tied in properly, and identify the valley type before opening it up, do not start tearing shingles out. That is the point to bring in a roofer.
A Step-by-Step Guide to Roof Valley Repair
A valley leak can look small from the attic and still mean the assembly on the roof has failed in more than one place. Before you start pulling shingles, decide which job you are facing. A temporary patch to get through the next storm is one thing. Opening the valley for a repair that will hold through Penn-Ohio freeze-thaw cycles is another.
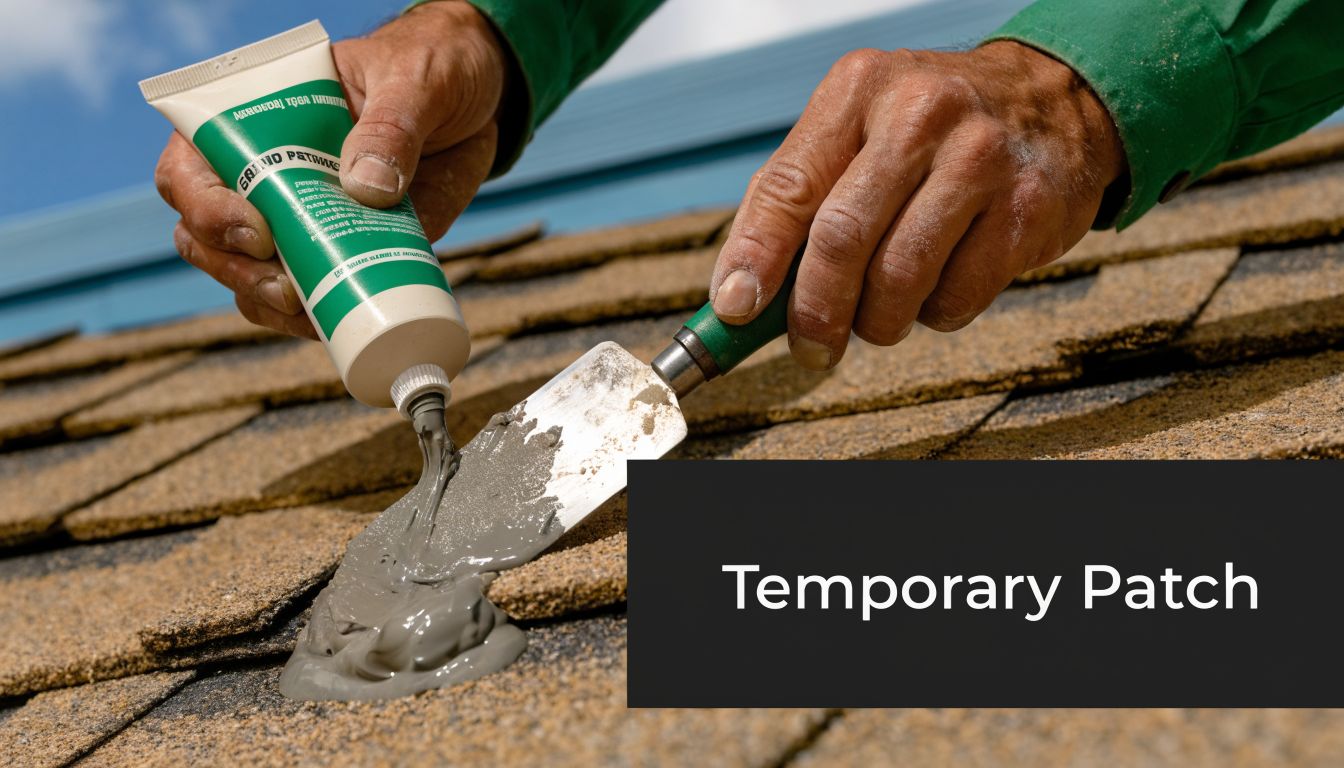
Emergency patch for active leaking
Use a patch only when water is getting in now and dry weather is not an option. The goal is to slow or stop intrusion, not to claim the valley is repaired.
- Clear loose debris by hand or with a soft brush. Do not grind grit into the shingles.
- Dry the area as much as conditions allow. Roofing cement will not bond well over standing water, frost, or wet sludge.
- Apply roofing cement under the lifted, cracked, or split section.
- Press in reinforcing fabric or a patch if the tear is visible.
- Seal the top edge and any exposed fastener heads that belong to the patch.
Stop if water is running under a wide section of shingles, if the valley metal is rusted through, or if the roof surface is slick enough that your footing is questionable. At that point, the safer move is tarp protection and a call to a roofer.
Long-term repair that lasts
A lasting repair starts with the full valley assembly, not a bead of sealant down the middle. Valley leaks usually come from one of four conditions. Damaged shingles, failed underlayment, bad nail placement, or metal flashing that was installed wrong the first time.
Here is the field sequence.
1. Open the area and inspect what is underneath
Remove enough shingles on both sides of the valley to expose sound material above and below the leak. Do not stop at the stain line or the first cracked tab. Water travels.
Look for split shingles, punctures, rust, open laps, and old cement that has hardened and pulled away. Probe the decking with a flat bar or screwdriver. If the wood is soft, dark, delaminated, or crumbling, stop the DIY repair there. Deck replacement changes the job, the safety risk, and the skill required.
2. Strip out failed material completely
Pull damaged shingles, old flashing, and any underlayment that has torn, wrinkled, or lost bond. Leaving one bad layer in place under a new one is how a valley leaks again after the first heavy rain.
This is also the point where homeowners need to make a straight call about brittleness. In cold Penn-Ohio weather, older shingles crack fast when you lift them. If they will not release cleanly, a small repair can turn into a larger slope repair. That is usually the moment to hand it off.
3. Rebuild the waterproof base
Install ice-and-water style membrane centered in the valley and extend it onto both roof planes. Keep the surface flat and fully adhered. Wrinkles, fishmouths, or trapped debris under the membrane create channels for water.
If the roof already has multiple patched layers or uneven decking, do not assume membrane alone will save it. The membrane is backup protection. It does not fix bad framing, rotten wood, or a valley shape that was built wrong.
4. Install the valley metal the right way
Set the metal so water has a clear path from top to eave. Keep fasteners out near the edges, never in the center flow line. That center channel handles concentrated runoff, especially where two large roof planes meet.
Lap sections in the direction water flows. Keep the metal straight. If the metal rocks on old nails, twisted decking, or piled-up debris, pull it back and correct the surface before fastening it.
5. Relay shingles to match the valley type
Many homeowner repairs often go sideways. The cut pattern, nail location, and exposure have to match the valley system already on the roof. If you are not sure whether you have an open valley or a closed-cut layout, review Penn Ohio's guide on how to shingle a roof valley correctly before you reinstall anything.
Keep nails well back from the centerline. Cut shingles cleanly. Do not bury the valley in cement because the cuts look rough. Sloppy cuts and misplaced nails are repair mistakes, not sealant problems.
6. Seal only the details that call for sealant
Use roofing sealant at exposed transitions, approved shingle tabs, or metal laps where the system requires it. Do not butter the whole valley. A valley should shed water cleanly. Heavy smears of cement catch debris, slow drainage, and hide problems you may need to inspect later.
7. Test your decision before you call it done
Check the repair from the roof and from the attic. Make sure courses are lying flat, laps are covered, and no fastener sits where runoff concentrates. Then ask the harder question. If this repair fails in six months, will you know why?
If the answer is no, that is a sign the job should have gone to a pro.
Open closed-cut and woven valley decisions
Valley style affects both performance and repair difficulty.
- Open valley: Metal stays visible. This is easier to inspect later and usually handles heavy runoff well.
- Closed-cut valley: One slope runs through and the other is trimmed back. It looks cleaner from the ground but demands accurate cuts and disciplined nail placement.
- Woven valley: Shingles cross over each other through the valley. It can work on the right roof, but it is unforgiving on thicker shingles and easy to build with humps that trap water.
For many homes in the Penn-Ohio region, open metal valleys are the most serviceable choice because they shed debris better and make future leak checks simpler. Closed-cut valleys can perform well too, especially where the surrounding roof already uses that detail and the shingles are still flexible enough to reset without damage.
Do not switch valley styles in the middle of a repair unless you understand how that change affects exposure, flashing width, and tie-in with the existing roof. Matching the original system is often the safer call. Converting the detail can be the right move, but that is usually professional work, not a weekend patch.
DIY vs Pro Repair A Cost and Risk Analysis
Most homeowners don’t ask whether they’re physically capable of doing roof valley repair. They ask whether the repair will hold, whether it’s worth the money, and whether the risk is acceptable.
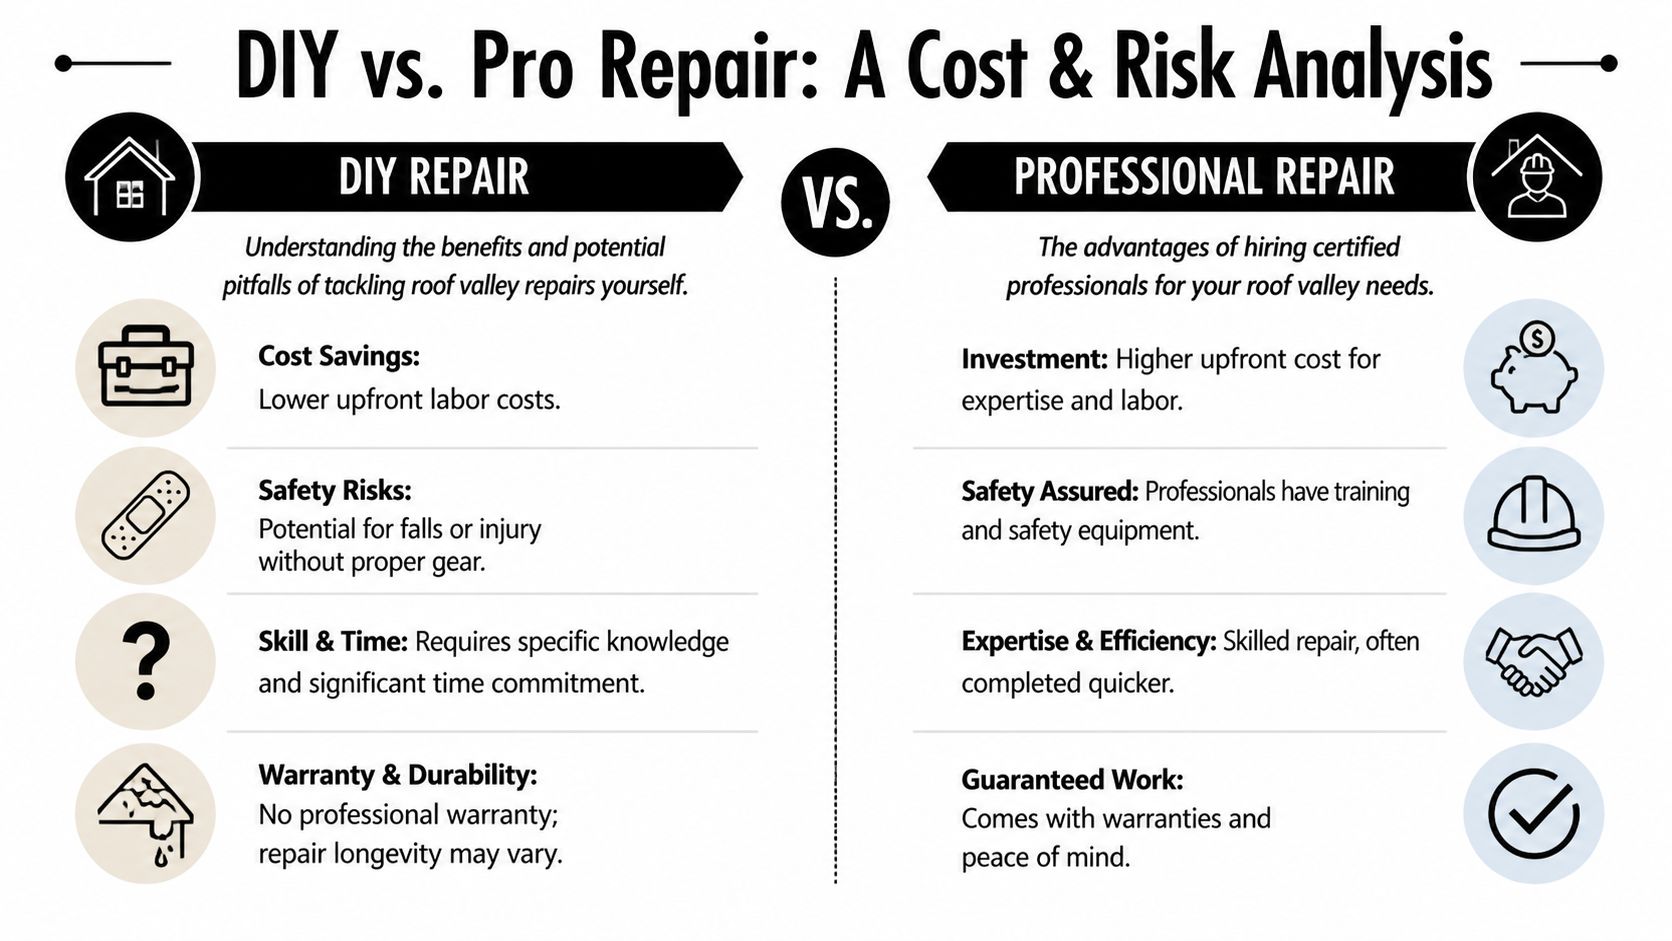
What the money side really looks like
The national average for all roof repairs is $1,150, with most jobs falling between $350 and $1,900, according to Modernize roof repair cost data. That same source says valley resealing and flashing repairs often fall on the lower end of leak-repair pricing, typically between $200 and $2,200.
That’s the good news. Valley repair is often one of the more affordable ways to stop a leak before it grows into decking, insulation, and interior work.
The bad news is that a cheap valley repair only stays cheap if the diagnosis is right. The same verified data also states that poor installation, not age, is the cause of 60% of roof leaks. That matters because a homeowner may patch visible symptoms while missing the original installation defect that keeps feeding the leak.
Here’s the practical trade-off:
- DIY can save labor cost upfront. If you already own safety gear and basic tools, your cash outlay is mostly materials.
- DIY carries higher downside risk. A missed flashing lap, a misplaced nail, or damage to surrounding shingles can turn a small repair into a larger one.
- Professional repair costs more upfront. You’re paying for diagnosis, tear-out judgment, safety setup, and a repair pattern that matches the roof.
- Professional repair is often easier to document. That can matter if you need a formal assessment for a property transaction or an insurance discussion.
If you can’t tell whether the leak came from wear, debris, or faulty installation, you’re not ready to repair it. You’re still in the inspection stage.
Comparison table
| Factor | DIY Repair | Professional Repair (Penn Ohio Roofing) |
|---|---|---|
| Cost | Lower upfront labor expense, but tool purchases and mistakes can erase savings | Higher upfront price, but cost is tied to inspection, labor, materials, and completed repair |
| Safety | Homeowner takes on ladder, slope, and fall risk | Crew handles safety setup and roof access |
| Diagnosis | Easy to focus on the visible leak and miss related failures | Better suited for tracing the actual entry point and checking surrounding roof conditions |
| Repair quality | Depends on your shingle handling, flashing work, and nail placement | Better fit for valley rebuilding, flashing replacement, and matching system details |
| Warranty concerns | DIY work may affect roof warranty coverage | Workmanship documentation is clearer |
| Time | Usually slower, especially for first-time roof work | Typically faster because the sequence is familiar and materials are staged |
A capable homeowner can handle limited roof repairs. But a valley is a concentrated drainage channel. Mistakes there don’t stay local for long.
When to Call Penn Ohio Roofing and Siding Group
Some valley repairs are good homeowner projects. Others aren’t. The line is usually clear once you stop guessing and start looking at the whole roof.

Stop the DIY plan and make the call if you see these signs
Call a roofer if any of the following show up during inspection:
- The decking feels soft: That means water has moved past the surface materials.
- The shingles crack when you lift them: Older brittle shingles don’t reset well.
- The valley leak ties into wider roof wear: If nearby pipe flashings, ridges, or adjacent slopes are failing too, a single repair won’t solve the larger problem.
- The roof is steep or difficult to access: Safety changes the equation fast.
- The leak is active during repeated storms: Temporary patching is no longer enough.
For homeowners in Mercer, Beaver, and Lawrence counties, Penn Ohio Roofing & Siding Group is a family-owned company with over 25 years of experience, a team of licensed, bonded, and insured roofers, 24/7 emergency service, and recognition that includes the GAF Triple Excellence Award, based on the company information provided by the publisher. Those details matter because valley repair is one of those jobs where experience shows up in the little things: how far to open the repair, when to stop saving old shingles, and when a “repair” is really just a short delay before replacement.
If you’re selling a house, managing a commercial building, or preparing documentation for an insurance file, professional inspection is often the cleaner path. You get a direct assessment instead of trial-and-error on the roof.
If your roof valley is leaking, brittle, or showing signs of failed flashing, Penn Ohio Roofing & Siding Group can inspect the problem, explain whether a repair makes sense, and provide a free estimate for the right fix.