
That dreaded drip-drip-drip from the ceiling isn't just an annoyance—it's a full-blown emergency signal from your roof. The moment you spot a leak, the clock starts ticking. What you do in that first hour can make all the difference, preventing a small problem from spiraling into a costly disaster.
That Drip Is a Warning Sign: What to Do Immediately
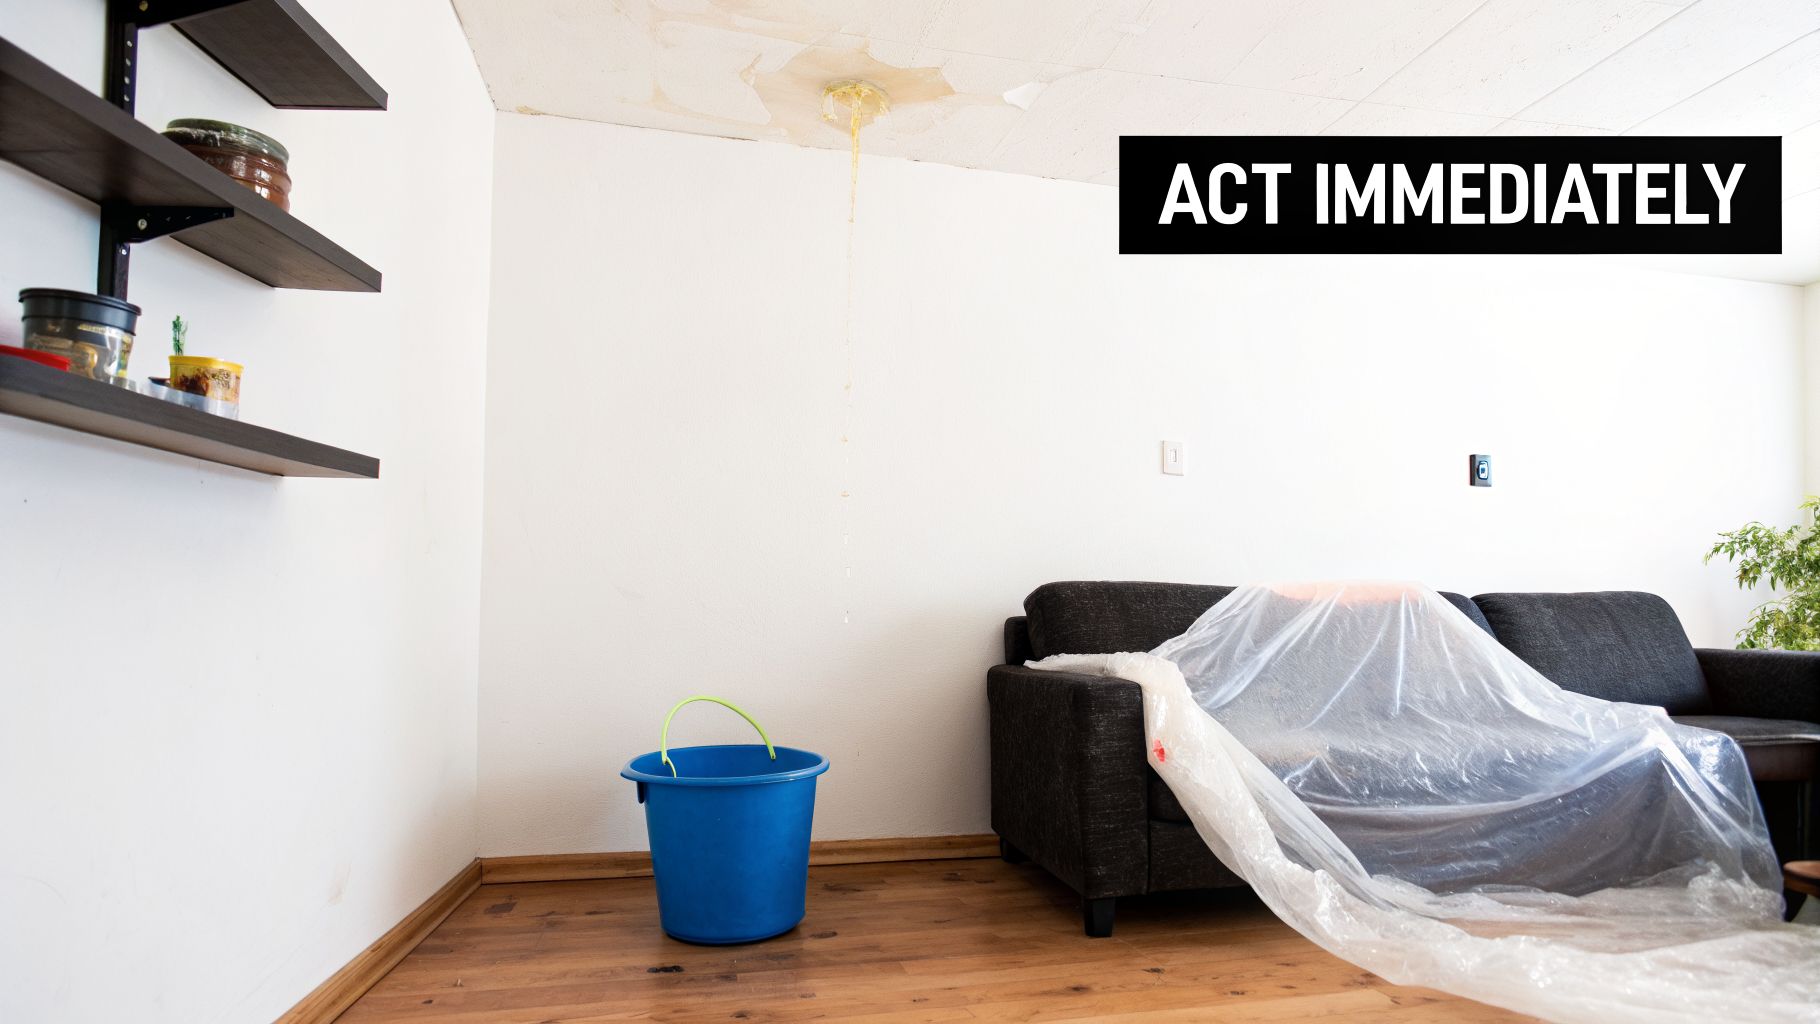
A water stain spreading across your ceiling is a gut-wrenching sight for any homeowner. It’s easy to panic, but a focused, methodical response is your best bet. Acting fast is about more than just saving your drywall; it’s about heading off serious issues like rotted framing, ruined insulation, and dangerous mold growth before they can take hold.
The first drips are your cue to jump into mitigation mode. It’s critical to understand that even a small leak can lead to significant water damage due to rain, often spreading far beyond what you can see.
When you discover a leak, things can feel chaotic. This simple action plan helps you prioritize what to do in those crucial first moments to protect your home and family.
Your Immediate Roof Leak Action Plan
| Priority | Action Item | Why It's Critical |
|---|---|---|
| 1. Contain the Water | Place buckets, trash cans, or storage bins directly under every drip. | This is your first line of defense to protect floors, furniture, and subflooring from immediate water damage. |
| 2. Relieve Ceiling Pressure | If the ceiling is bulging, carefully puncture the center of the bulge with a screwdriver. | This controls the water flow into your bucket and prevents a larger, more destructive ceiling collapse. |
| 3. Clear the Area | Move furniture, electronics, rugs, and any valuables away from the leak. | Water can travel along ceiling joists, so creating a wide, clear zone prevents further property loss. |
| 4. Absorb Ground Water | Use old towels or a mop to soak up any water that has already pooled on the floor. | Minimizing standing water helps prevent damage from seeping into flooring, baseboards, and walls. |
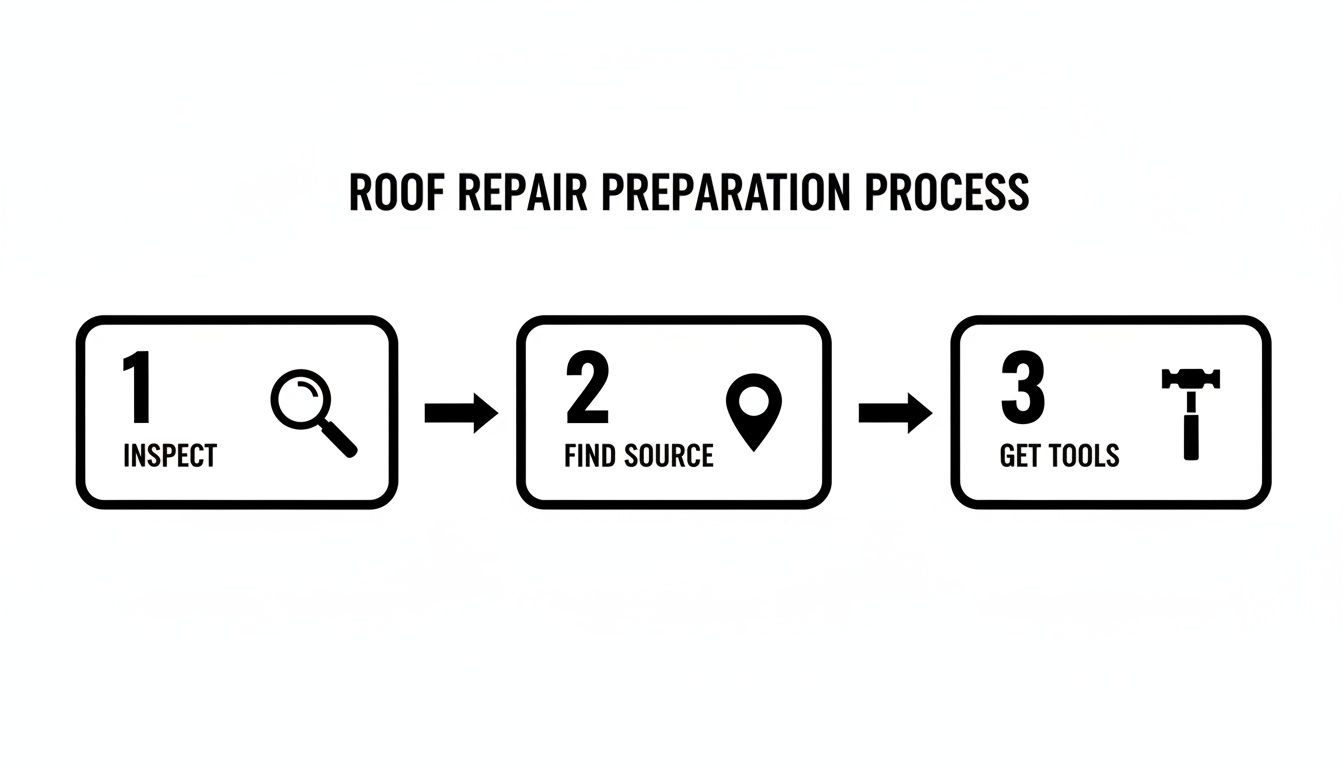
Once you've managed the immediate chaos inside, you can turn your attention to the source of the problem: the hole in your roof.
Your First Line of Defense Inside the Home
After getting a bucket under the leak, start moving things out of the way. Don’t just move the couch directly under the drip—water loves to travel sideways along ceiling joists and can reappear several feet away. Give yourself a wide buffer zone, clearing out furniture, electronics, rugs, and anything else of value.
This isn't just about protecting your stuff. Creating a clear, open space gives you room to work safely and helps you assess the full extent of the problem without tripping over furniture. Think of it as setting the stage for the real repair.
The Emergency Tarp: A Temporary Lifesaver
With the interior under control, the next priority is stopping more water from getting in. A well-placed tarp is an incredibly effective temporary fix, but your safety comes first. Never, ever get on a roof during a storm, in high winds, or if it’s slick with ice or morning dew.
If conditions are safe to climb on the roof, here’s how we handle an emergency tarp patch:
- Find the source of the leak and lay a heavy-duty tarp over it. Make sure the tarp extends at least four feet above the hole, going all the way over the roof's peak. It should also hang several feet over the eaves and sides.
- To anchor it, we wrap the peak-side edge of the tarp around a 2×4. Then, we secure that 2×4 to the opposite side of the roof—the undamaged slope. This clever trick keeps you from driving new holes into the already-compromised roof section.
- Use more 2x4s to weigh down the tarp's remaining edges, pulling it taut against the shingles to prevent wind from getting underneath it.
A tarp is a bandage, not a cure. But it’s a crucial one. It stops the bleeding, buying you the time needed to properly assess the damage and plan a permanent repair without the pressure of an ongoing downpour.
Don't underestimate the urgency. Industry data shows that holes in roofing are responsible for over 60% of all home water damage claims each year. A quick and effective temporary fix can literally save you thousands by preventing secondary damage that isn’t always obvious at first glance.
Assess the Damage and Gather Your Repair Kit
Alright, you've got a bucket under the drip and saved your ceiling from immediate disaster. Now for the tricky part: finding exactly where that water is getting in. Trust me, the stain on your ceiling is rarely right below the actual hole in the roof.
Water is sneaky. It can creep along rafters, sheathing, and insulation before it finally decides to drip. I’ve seen leaks that show up in a first-floor living room but actually start ten feet away near a plumbing vent. You have to play detective.
Pinpointing the Roof Hole's True Location
If you can get into your attic safely, start there. It’s the easiest place to spot the evidence. Grab a good flashlight and look for the tell-tale signs of a leak:
- Insulation that's damp, compressed, or stained
- Dark, streaky water marks on the underside of the roof decking
- Any wet or discolored wood, especially around vents, chimneys, or where roof planes meet
Once you have a general idea of the location from the inside, it's time to head outside. And I can't stress this enough: only get on your roof if you are completely confident you can do it safely. Wait for a dry, clear day, use a sturdy ladder set at the correct angle, and wear proper footwear.
Up on the roof, you're looking for the obvious culprits. Scan for anything that looks out of place, like missing shingles, shingles that are cracked or curled, or any exposed nail heads. Pay close attention to the flashing around chimneys and vents—that’s a common failure point.
Building Your DIY Roof Repair Kit
Found the spot? Great. Now, you need the right gear to fix it. The last thing you want is to be halfway through a repair only to realize you're missing a crucial tool. A well-prepared kit saves you from frustrating trips back down the ladder and to the hardware store.
Please don’t just grab a tube of all-purpose silicone and think you're done. Using the wrong sealant can actually trap water and make the damage even worse over time. You need materials specifically made for roofing.
Your go-to kit should have a few essentials. A pry bar is a must for gently lifting shingles without cracking them. You’ll also need a hammer and galvanized roofing nails—typically 1 ¼ inches long for a standard shingle roof—to secure everything down without worrying about rust.
The real hero of most small repairs is roofing cement. This is a thick, asphalt-based sealant that creates a durable, waterproof patch. Double-check that it's rated for exterior use and is right for your type of roof. Throw in a sharp utility knife and a caulking gun, and you’re ready to work.
Getting this prep work right is how you fix a hole in your roof the first time. It’s no surprise that homeowners are focusing more on maintenance, with the U.S. residential roofing market expected to jump from $10.84 billion in 2023 to $15 billion by 2030. Much of that growth is driven by repairs on aging roofs and damage from increasingly severe weather. You can learn more about the factors driving the roofing industry and see why a little proactive repair work goes a long way.
A Hands-On Guide to Patching Asphalt Shingles
Alright, you've got your gear and you know where the problem is. Now for the real work. Fixing a hole in an asphalt shingle roof is probably the most common repair homeowners tackle themselves, and for good reason—most homes in America are covered in them.
But a solid patch is more than just plugging a hole. It's about weaving a new piece into the existing system so it's completely weatherproof.
The trick is to be gentle. Shingles, especially older ones, get brittle over time. If you get impatient and start ripping at them, you can easily turn a one-shingle job into a multi-shingle nightmare. Let's walk through this the right way.
This just goes to show that the prep work you do on the ground is every bit as important as the repair itself.
Preparing the Repair Area
First thing's first: you need to get that damaged shingle out of there. This part takes a bit of finesse. You'll need to carefully lift the tabs on the shingles in the row directly above the one you're replacing. This exposes the nail heads holding the bad shingle down.
Grab your flat pry bar. Gently work it under the shingle tab, right over a nail, and apply slow, steady pressure. You only need to lift it enough to get your pry bar or a cat's paw on the nail to pull it out. Repeat this for all the nails holding the damaged shingle—usually four to six of them. Once they're all out, the shingle should slide right out.
With the old shingle gone, take a moment to inspect the roof deck below. Scrape off any old, dried-up roofing cement and remove any nail fragments or other debris. You want a perfectly clean, smooth surface for your new shingle.
Installing the New Shingle
Time for the replacement. Hopefully, you have a matching shingle. Here’s a pro tip: if it’s a chilly day, warm the new shingle up a bit. You can use a heat gun on a low setting or just let it sit in the sun. This makes it more pliable and way less likely to crack when you're working with it.
Slide the new shingle into position, making sure it lines up perfectly with the ones next to it. Its top edge should tuck neatly under the row of shingles above.
The nailing pattern is absolutely critical. Get this wrong, and you’re basically inviting wind and water to rip your new patch right off. You’re not just tacking it down; you’re anchoring it against mother nature.
Use 1 ¼-inch galvanized roofing nails—don't skimp on these. Drive a nail about one inch in from each side of the shingle, just underneath the self-sealing tar strip. Then, place two more nails evenly spaced between those two. Make sure you drive them straight and flush. If you drive them too deep, you'll cut the shingle; too shallow, and they'll work their way out.
Sealing the Deal
The last step is making everything watertight. Grab your caulking gun and apply a good, thick bead of roofing cement under the tabs of every shingle you lifted. That means the new one you just installed and the ones in the row above it.
Press each tab down firmly to set it into the cement. For a little extra insurance, I like to put a small dab of cement over each new nail head. This makes sure every single potential entry point for water is sealed tight. You haven't just fixed a hole; you've restored the roof's integrity.
A solid patch is a great skill to have. It'll give you even more confidence for your next repair.
Repairing Holes in Metal and Flat Roofs
While asphalt shingles are king in residential roofing, what happens when you have a metal or flat roof? You can't just slap some roofing cement on there and call it a day. These materials demand a totally different skillset and the right products to avoid making the problem worse.
Let's start with metal. For all their durability, metal roofs can get small punctures, often from hail or a falling branch. The fix for these minor issues is thankfully straightforward. Your best friend here is a specialized metal roof sealant.
First, you need a perfectly clean surface. Use a degreasing cleaner to wipe down the area, then gently rough up the surface around the hole with a wire brush. This gives the sealant something to really grab onto. Apply a good dab of a urethane-based metal sealant, making sure it fully covers the puncture.
If a screw has worked itself loose, don't just tighten it. Pull it out, squirt some sealant into the screw hole, then drive in a new, slightly larger screw with a rubber washer to create a watertight seal.
Handling Larger Metal Roof Damage
For bigger gashes or rusted-out sections, sealant alone won't cut it. You're going to need to patch it with a piece of matching metal.
Make sure your patch extends at least two inches past the damaged area on all sides. Here’s a pro tip: use tin snips to round off the corners of the patch. Sharp corners can snag on debris or get lifted by ice, but rounded corners help prevent this.
Apply a high-quality butyl tape or urethane sealant around the perimeter on the underside of the patch. Press it down firmly over the prepped area. You should see a little bit of sealant squeeze out from all sides—that's how you know you have a complete, solid seal.
Tackling Flat Roof Leaks
Flat and low-slope roofs, common on modern homes and additions, are in a league of their own. These surfaces are usually EPDM rubber, TPO, or modified bitumen. Their number one enemy is ponding water, which can turn a tiny flaw into a major leak in no time.
It's a huge part of the industry—low-slope roof repairs make up nearly 30% of all service calls. According to some recent commercial roofing trends, the market is even projected to hit $81.34 billion by 2032.
Before you even think about patching, you have to know what your roof is made of and clean it with the right solvent. The wrong cleaner can eat away at the membrane.
Crucial Tip: Never, ever use asphalt-based roofing cement on a rubber (EPDM) or TPO roof. The petroleum in asphalt products will literally dissolve the membrane, transforming a small hole into a catastrophic failure.
You'll need a patch from a compatible repair kit or a liquid-applied membrane made specifically for your roof type to get a lasting fix. This complex repair often benefits from a professional touch.
Each roof type has its own playbook for repairs. Understanding the right tools and materials is half the battle.
Repair Methods for Different Roof Types
| Roof Type | Primary Tools | Repair Material | Key Step |
|---|---|---|---|
| Asphalt Shingle | Pry bar, hammer, utility knife, caulk gun | Matching shingles, roofing nails, roofing cement | Sliding the new shingle into place and nailing it securely under the one above. |
| Metal | Wire brush, tin snips, caulk gun | Metal patch, butyl tape or urethane sealant, rubber-washered screws | Scuffing the surface for adhesion and ensuring the patch extends 2" beyond the hole. |
| Flat (EPDM/TPO) | Solvent cleaner, roller, scissors | Compatible patch kit or liquid-applied membrane | Identifying the exact membrane type and using a compatible, non-asphalt-based patch. |
As you can see, a one-size-fits-all approach just doesn't work. Using the correct method is essential for a repair that actually lasts.
Knowing When To Call a Roofing Professional
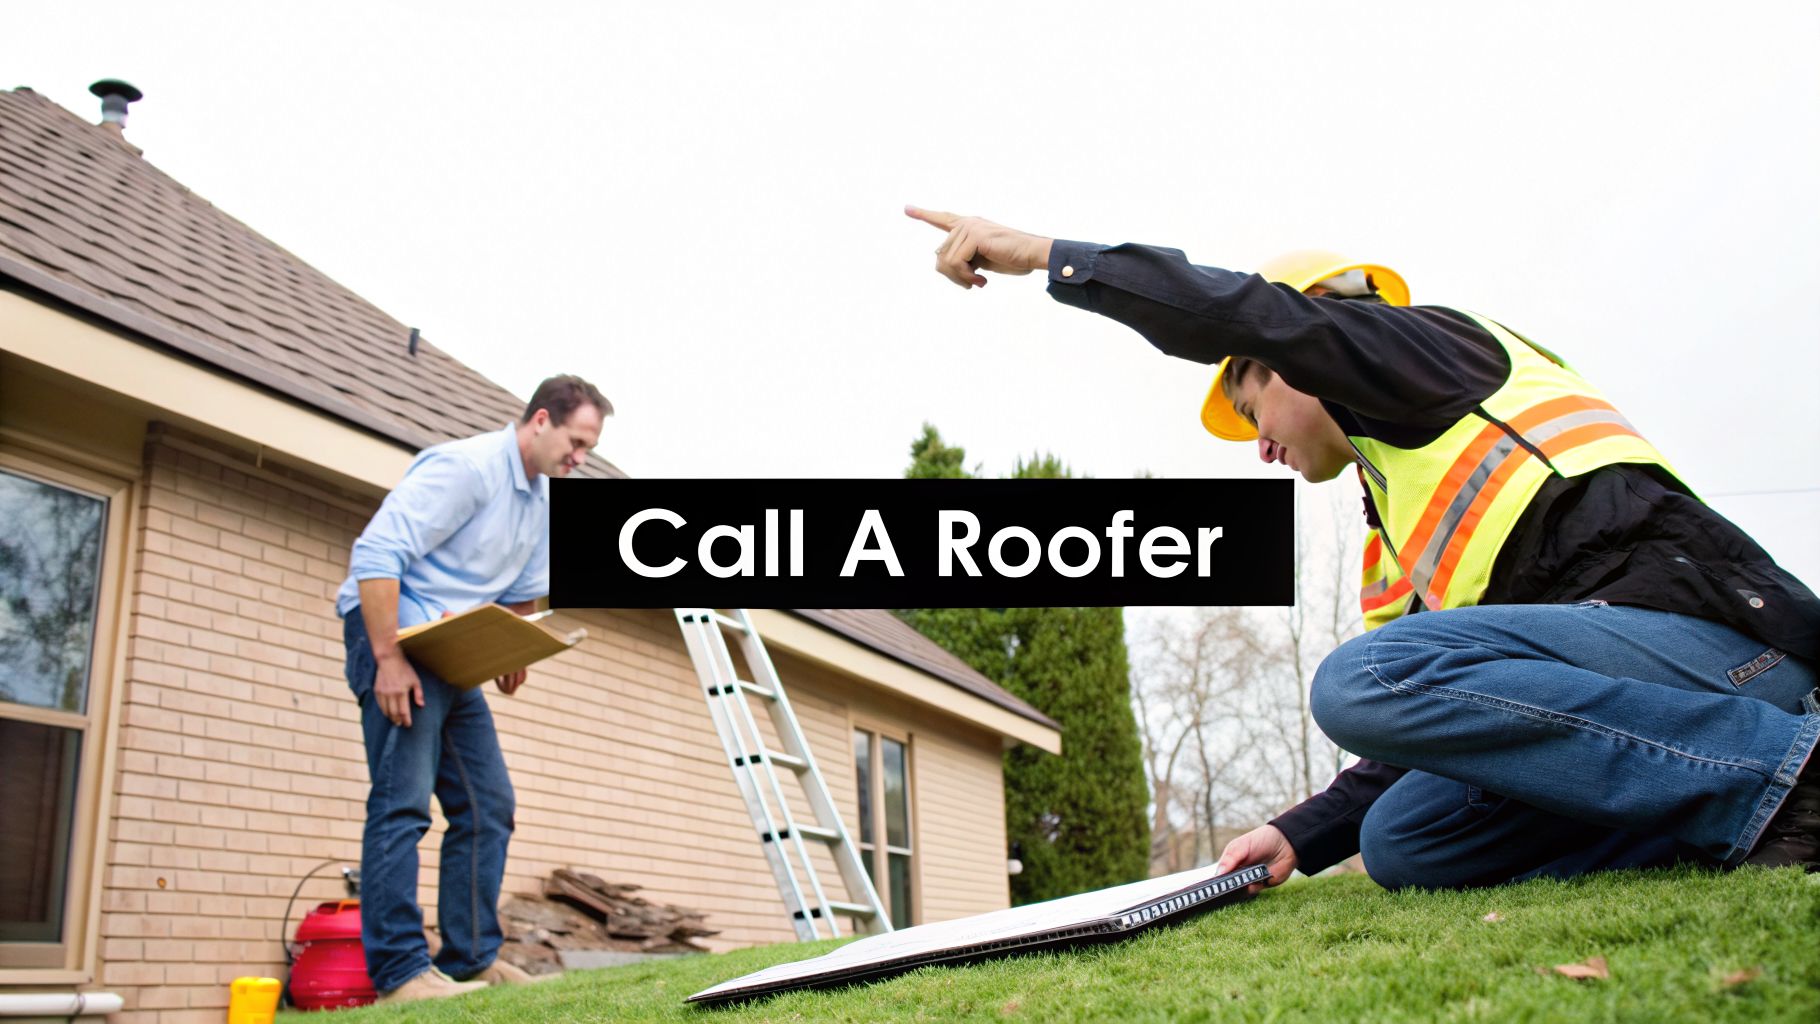
Knowing how to fix a hole in your roof is a great skill, but the real wisdom lies in knowing when not to. A small, easy-to-reach shingle patch might be a straightforward weekend project. But many situations call for an experienced pro.
Deciding to call for help isn't giving up; it’s a smart move to protect your home's value and structural integrity. Pushing forward with a tricky DIY repair can easily make things worse. You could trap moisture, cause wood rot, or end up with a weak patch that fails during the next big storm, leaving you right back where you started.
Red Flags That Signal It's Time for a Pro
Some issues are clear warning signs that the damage runs deeper than what you can see. If you run into any of these, it's time to get off the roof and get on the phone.
- A Spongy or Sagging Roof Deck: Does the roof feel soft, bouncy, or weak when you walk on it? That’s a huge red flag. It points to moisture that has rotted the underlying sheathing. This is a structural problem—slapping a new shingle on top won't fix it.
- Widespread Water Damage: If you're seeing water stains across your attic ceiling or in multiple rooms, you're likely dealing with more than one isolated leak. A professional can play detective, tracing the leak paths back to all their sources.
- Dangerously Steep or High Roofs: Safety always comes first. Period. If your roof has a steep pitch (anything over a 6/12 slope) or is more than one story high, the risk of a serious fall is just too great. Pros have the training and specialized safety equipment, like harnesses and scaffolding, to work safely.
When a Patch Is Just a Band-Aid
Sometimes, that one little hole is just a symptom of a much bigger illness. Have you noticed a lot of shingle granules collecting in your gutters? Or are the shingles across your roof starting to curl, crack, and look brittle? These are classic signs that your roof is nearing the end of its life.
Patching an old, failing roof is like putting a new tire on a rusted-out car—it doesn’t address the core problem.
An expert can give you an honest opinion on whether a simple repair will do the trick or if you're just delaying an inevitable replacement. Understanding the roof repair vs. replacement costs can help you make a financially sound decision for the long run.
If you're on the fence about the scope of the damage, getting a qualified opinion provides peace of mind. Choosing a reputable roofing contractor is the perfect next step to ensure the job gets done right, once and for all.
Your Top Roof Hole Repair Questions, Answered
Even after you've dealt with the immediate leak, a few questions always seem to pop up. It's completely normal. You've just gone through a stressful situation, and you want to be sure you've made the right call.
Let's tackle some of the most common questions we hear from homeowners about fixing a hole in their roof.
How Much Does It Cost To Fix a Hole in a Roof?
This is the big one, and the honest answer is: it depends.
For a small, straightforward DIY fix—say, replacing a single damaged asphalt shingle—you might get away with spending just $30 to $50 on materials like a shingle, some roofing cement, and a handful of nails.
Calling in a professional is a different ballpark. A standard professional patch job typically falls somewhere between $300 and $1,500. The final price tag is influenced by a few key things:
- The size of the hole.
- Its location (a steep, high-up spot is harder to work on).
- Your roofing material. Metal and flat roof repairs often involve more labor and specialized materials.
If the leak has been there for a while and the damage goes deeper—into the decking or structural rafters—the costs can climb from there.
Can I Just Use Flex Seal or Caulk To Fix the Hole?
It's tempting, I know. You see the ads and think a quick spray will solve everything. But please, think of these products as a temporary, emergency-only band-aid. They are not a real roof repair.
Sealants like Flex Seal or household caulk just aren't built for the extreme life of a roof. They get baked by the sun and frozen in the winter, causing them to crack and fail, sometimes within a few months. Even worse, they can trap moisture underneath, leading to wood rot that makes the eventual, proper repair much more expensive.
How Long Will My DIY Roof Patch Actually Last?
This all comes down to the quality of your work and the materials you chose.
If you were meticulous, used the right products for your specific roof type, and got a perfect, watertight seal, that patch could hold strong for years. In some cases, it might even last the rest of your roof's lifespan.
But if the job was rushed, it could fail in the very next downpour. Simple mistakes—like using the wrong sealant, not nailing the shingle correctly, or failing to properly clean the area first—are all it takes for a patch to give way. If you have any doubt about how well your repair will hold up, getting a professional to take a quick look is a very smart move.
If the thought of getting up on the roof feels overwhelming, or you simply want the confidence that comes with a guaranteed, professional-grade fix, we're here to help. The experienced team at Penn Ohio Roofing & Siding Group handles everything from minor patches to major storm damage.
For a free, no-obligation estimate, get in touch with us at Penn Ohio Roofing & Siding Group.