You're probably staring at a framed box with open sky above it, a pile of lumber on the deck, and a question that gets more serious the longer you look at it: can you really cut and set rafters that fit, carry load, and leave you with a straight roof plane?
You can, if you treat rafter work like layout first and carpentry second. That's where many DIY builds go sideways. People focus on the saw, not the geometry. They rush to make a pattern before they've proved the first piece is right. Then one small error gets copied across the whole roof.
I've been around enough roof framing to know the satisfying part comes later. First comes careful measuring, clean marking, and checking your assumptions before you burn through a stack of material. Whether you're building in Sharon, working outside Pittsburgh, or dealing with the weather realities you see around Erie, the process has to stay disciplined. If you're also trying to scope the whole project cost before you commit, this breakdown of a framing budget for custom homes is a useful planning reference.
Table of Contents
- Embarking on Your Roof Framing Project
- Gathering Your Tools and Understanding Rafter Types
- Calculating Rafter Length Pitch and Layout
- Making Accurate Cuts for a Perfect Fit
- Assembling the Roof Frame and Ensuring Stability
- Avoiding Common Mistakes and Handling Complex Roofs
- Safety Codes and When to Call a Professional
Embarking on Your Roof Framing Project
A lot of homeowners think learning how to construct rafters starts with cutting angles. It doesn't. It starts when you decide whether the roof you want is a simple framing job or a roof with enough complexity to punish every shortcut.
On a plain gable, a careful DIYer can do good work. On a roof with hips, valleys, dormers, or changing pitches, the margin for error gets tight fast. That's where people waste lumber, lose time, and end up fighting uneven ridges, twisted planes, and bird's-mouth cuts that don't land where they should.
Practical rule: Don't make your first goal “cut a rafter.” Make your first goal “prove the layout.”
That mindset changes everything. Instead of trusting that a few measurements on paper will magically become a perfect roof, you build one test piece, dry-fit it, check the ridge, seat, overhang, and alignment, then decide whether it deserves to become the template.
If you're framing your own roof, think like a builder, not just a carpenter. A carpenter can make a clean cut. A builder has to make cuts that work together as a system. Rafters aren't individual parts. They become a structure only when each one lands in the right place and shares load properly with the next.
That's the difference between a roof that looks decent from the driveway and one that stays straight over time.
Gathering Your Tools and Understanding Rafter Types
Before you mark the first board, get the site and your tool setup under control. Most rafter mistakes don't come from exotic math. They come from sloppy measuring, weak marking, rushed cuts, and using the wrong piece of lumber for the wrong part of the roof.
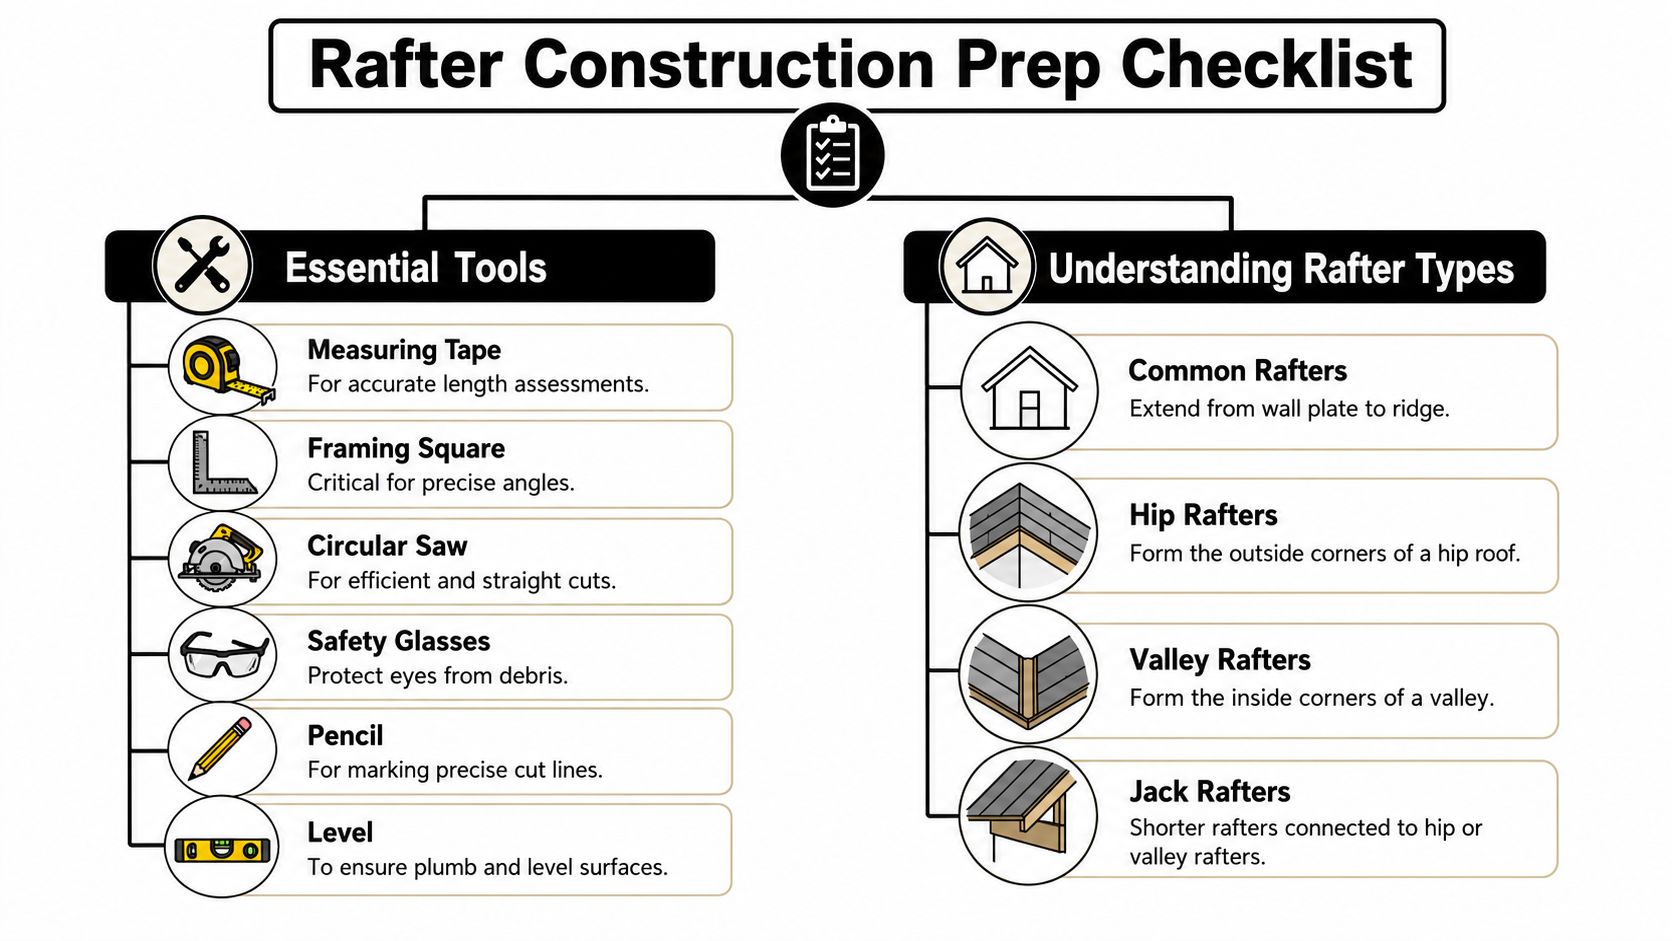
Start with the tools that control accuracy
You don't need a trailer full of specialty gear, but you do need a few basics you can trust.
| Category | Item | Recommendation |
|---|---|---|
| Measuring | Tape measure | Use one with clear markings and a hook that isn't bent |
| Layout | Framing square | Essential for marking plumb cuts and seat cuts accurately |
| Layout | Pencil | Keep it sharp so your cut line stays precise |
| Cutting | Circular saw | Use a sharp blade and finish corners cleanly if needed |
| Checking | Level | Confirm plates, ridge setup, and temporary bracing stay true |
| Safety | Safety glasses | Wear them for every cut and every overhead adjustment |
| Material handling | Sawhorses or stable work surface | Support full-length stock so boards don't sag during layout |
| Fastening | Hammer or nail gun | Use what you control best and can place accurately |
A framing square matters because it lets you repeat the same angle reliably. A tape measure matters because small errors stack. A level matters because a crooked setup will fool you into thinking the rafter is wrong when the support isn't.
Know which rafter does what
Not every rafter in a roof does the same job.
- Common rafters connect the wall plate to the ridge on a standard gable roof. For most DIYers, these are a recommended starting point.
- Hip rafters run on the outside corners of a hip roof. Their layout is more demanding because they receive jack rafters.
- Valley rafters form inside roof intersections. These need careful transfer of layout because errors become obvious fast.
- Jack rafters are shorter members that tie into a hip or valley rafter instead of running full length.
A simple roof lets you repeat work. A complicated roof forces you to think piece by piece. That's why I tell capable DIYers to identify every rafter type before cutting anything. If you can't point at a plan or rough layout and name what each member is doing, you're not ready to cut production pieces.
For homeowners who want help on the roofing side after framing, Penn Ohio Roofing & Siding Group handles residential roof installation and repair work in western Pennsylvania and nearby Ohio service areas. That's relevant when the framing is done and the roof system needs to be finished correctly.
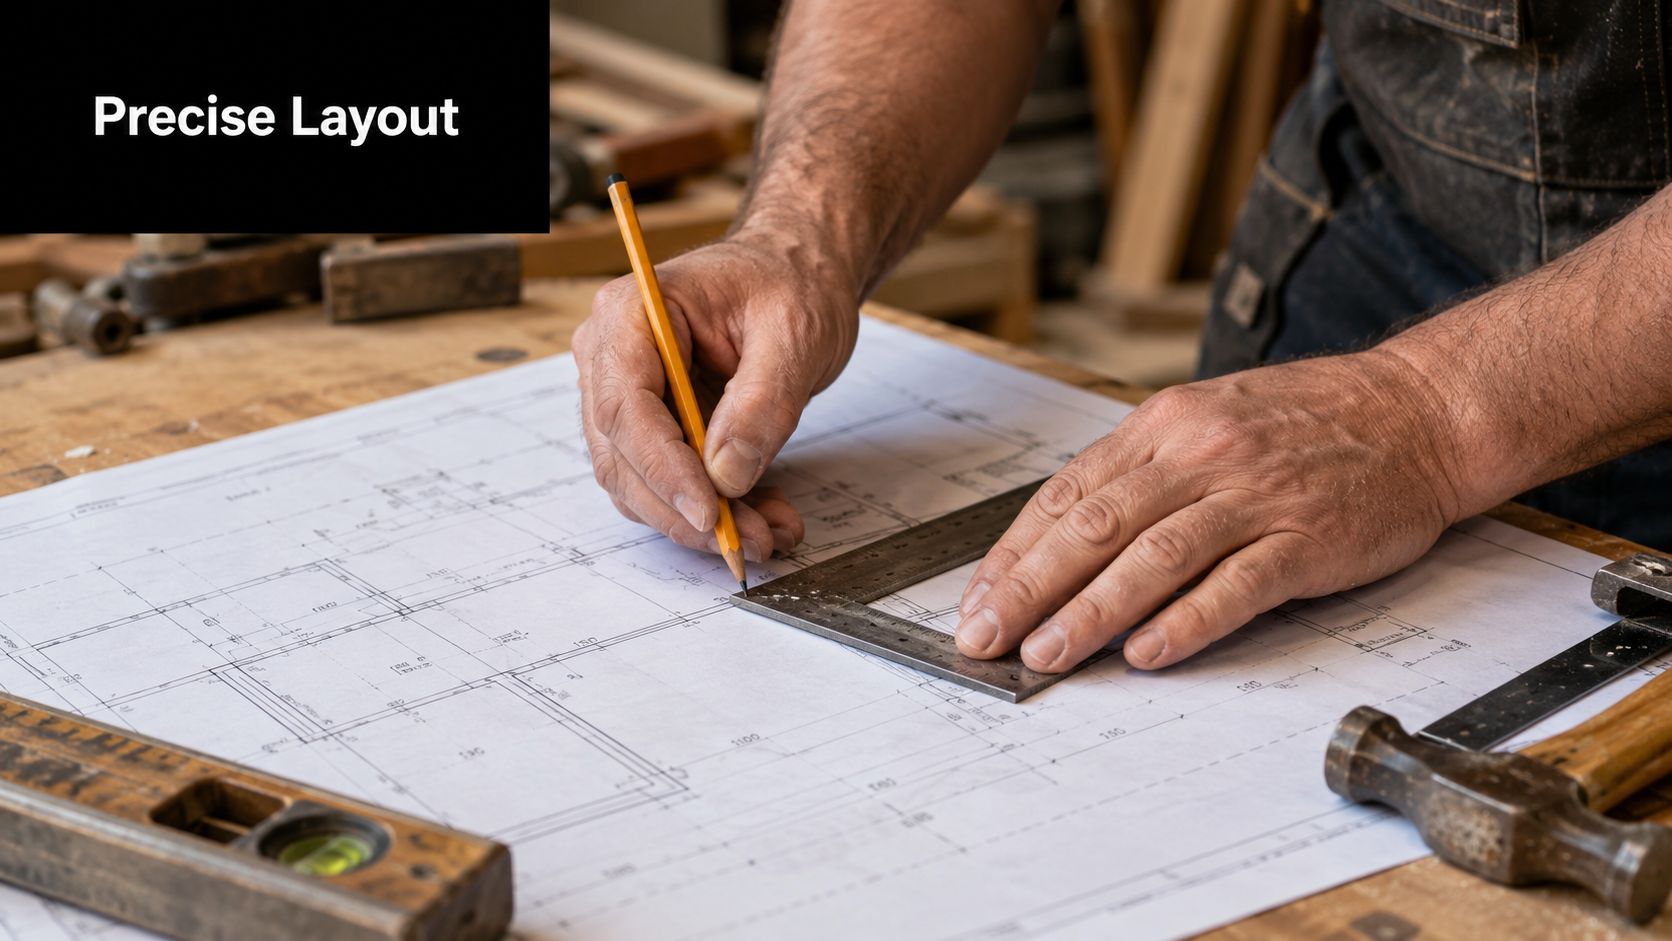
Calculating Rafter Length Pitch and Layout
You find out fast whether your layout is honest when the first rafter goes up and misses the ridge, rocks on the plate, or throws the next piece out of line. By then, bad math is expensive. Get the geometry right on paper and on one full-size layout stick before you cut a stack of lumber.
Start with the roof, not the board
For a common rafter, the layout comes from three numbers: span, run, and pitch. A 6/12 roof rises 6 inches for every 12 inches of horizontal run. On a simple gable, the run is half the total span, measured from the outside of the wall to the centerline of the ridge.
That last part trips people up. If you measure to the far side of the ridge board, or forget to account for how the ridge is framed, every rafter will be off the same amount. Consistent error is still error.
Keep the sequence clean:
- Measure the full building span.
- Divide by two to get the basic run for a gable roof.
- Confirm the pitch from the plans or the existing structure.
- Calculate the rafter line length from run and rise.
- Adjust separately for ridge thickness, seat cut location, and overhang.
Separate numbers save jobs. Line length is not the same as total board length, and board length is not the same as your finished tail.
If you are also estimating sheathing or roofing quantities, this guide on calculating roof area with pitch helps connect the framing layout to material planning.
A simple example, with the right warning attached
Say the building is 30 feet wide with a 6/12 pitch. Your starting run for each common rafter is 15 feet before you deal with ridge deductions or tail details. From there, you work out the sloped line length and then mark the actual cuts from that geometry.
That process sounds straightforward because it is on a plain gable. Real roofs get messy when a dormer dies into a main roof, when one addition settles lower than the original house, or when hips and valleys force you to transfer layout from one plane to another. The math still works, but only if you stay disciplined about what you are measuring.
Write every number down and label it. Run. Rise. Line length. Ridge deduction. Tail length. Seat location.
I have seen plenty of rafters cut wrong by capable people who knew the pitch but mixed cutting dimensions into the basic triangle too early.
Verify the layout before you commit
This is the habit that separates a smooth job from a wasted lumber pile. Lay out one full pattern rafter. Then verify it against the building.
Check the plumb cut at the ridge. Check where the bird's-mouth lands on the plate. Check whether the heel height matches your plan. Pull diagonal measurements across the structure if the building looks suspect, because a roof framed over out-of-square walls can fool you into blaming the rafter for a wall problem.
On more complicated roofs, I like to make a story pole or a full-size plywood pattern for repeated parts. It takes extra time up front. It saves far more time than recutting hip jacks or trying to hide a wandering valley later.
The goal is simple. Prove the layout with one piece before you make ten mistakes the same way.
Making Accurate Cuts for a Perfect Fit
Once the layout is correct, your job changes from calculating to transferring. That's where discipline matters. Good rafters come from crisp marks, proper board orientation, and refusing to freestyle with the saw.
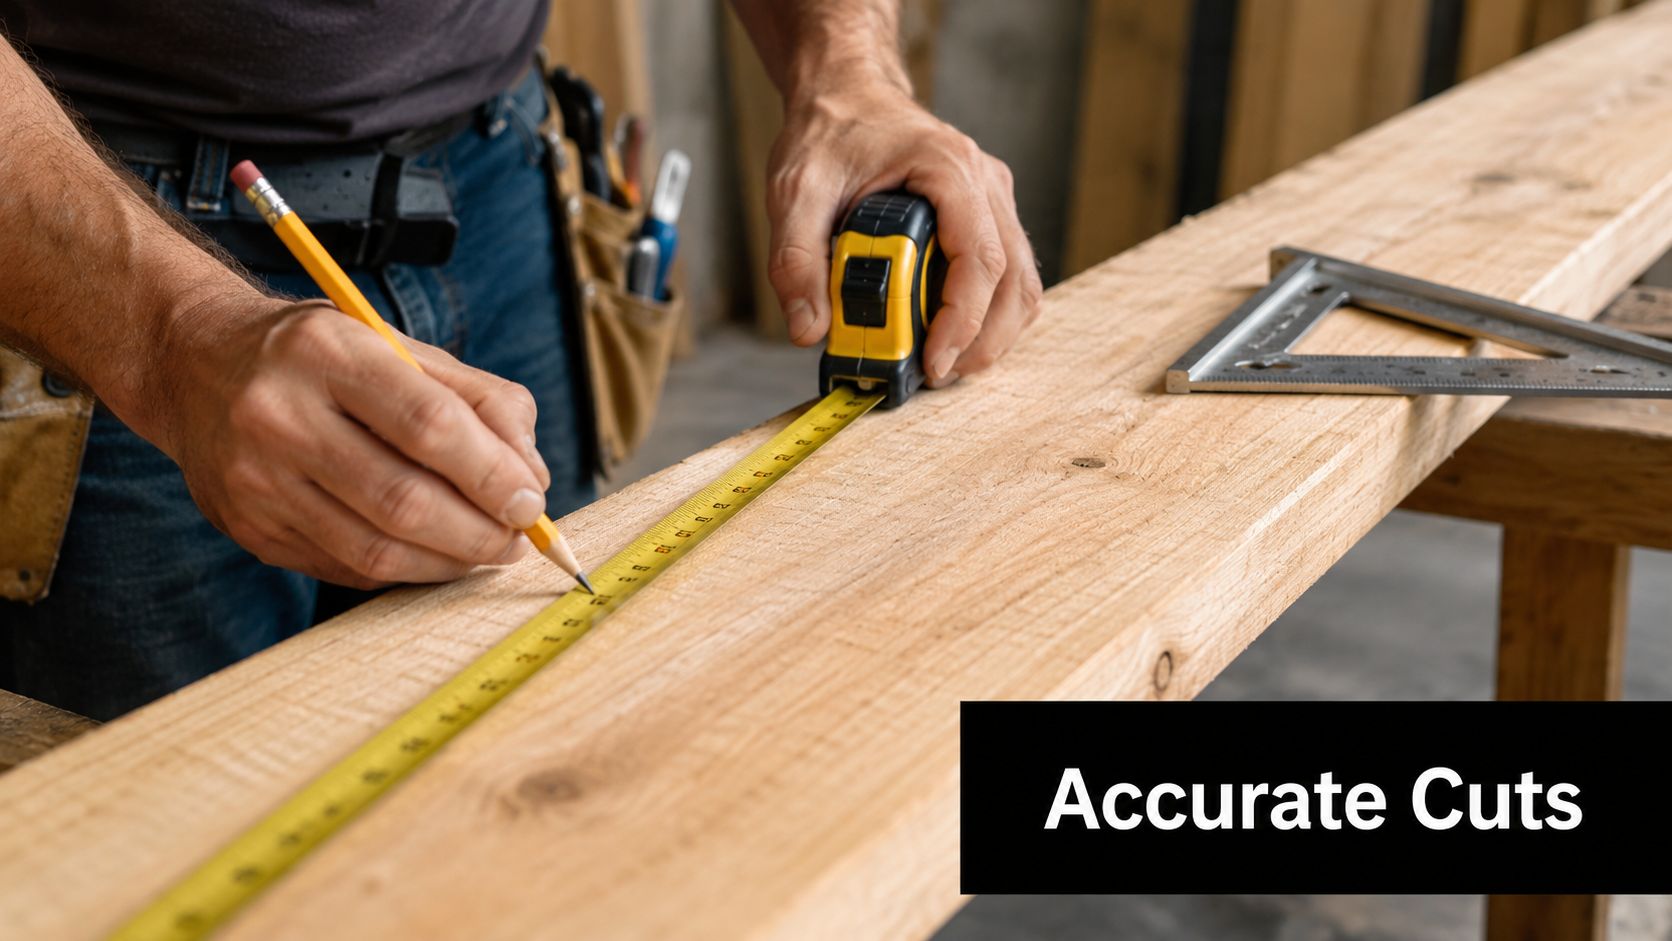
Lay out the first rafter like it matters
A practical method for basic gable rafters is to measure the roof span, derive the run, establish rise and line length, and then use a framing square with stair gauges to mark the plumb cut, the bird's-mouth, and the heel cut, as described in this rafter layout guide.
That method works because it gives you a repeatable path. You're not eyeballing angle after angle. You're setting the square, marking the plumb cut at the ridge end, locating where the rafter bears on the wall, and defining the tail from there.
Use the square on the wide face of the board. Keep the board steady on sawhorses. Mark every line clearly enough that you know which side of the line gets cut off. That sounds basic, but plenty of bad rafters come from a good line and a cut on the wrong side of it.
Cuting the bird's-mouth without weakening the rafter
The bird's-mouth has to do two jobs at once. It has to seat the rafter on the top plate, and it has to preserve the strength of the member. If you cut it too deep, you weaken the rafter right where load transfer matters most.
Two pitfalls called out in the same guidance are worth taking seriously:
- Subtract half the ridge-board thickness from the top plumb cut. If you miss that, your layout shifts and the pair won't meet correctly at the ridge.
- Orient lumber with the crown up. If you ignore the crown, some rafters will hump and others will sag, and your roof plane won't stay even.
Shop-floor advice: If the first rafter fits but looks wrong when sighted from the side, check the crown before you blame the math.
Make your saw cuts cleanly, but don't overcut corners just to save time. Finish carefully if needed so the seat cut and plumb cut stay true. Then dry-fit that first piece. Check the ridge contact, seat bearing, overhang line, and how it lines with the plate marks. Only after that should it become your template.
That's one of the biggest practical lessons in how to construct rafters. Precision on the first piece saves material on every piece after it.
Assembling the Roof Frame and Ensuring Stability
A stack of rafters isn't a roof. The structure starts to behave like a roof only when the ridge is set right, opposing pieces go in as a system, and the whole frame is braced before it has a chance to move.
Set the frame in a balanced sequence
Start by marking rafter locations on the wall plates. Keep spacing consistent and transfer the layout accurately from one side to the other. Then set the ridge board at the correct height and hold it straight and level with temporary support.
After that, install rafters in opposing pairs. That keeps the load balanced while you work and helps the ridge stay where it belongs instead of walking out of line.
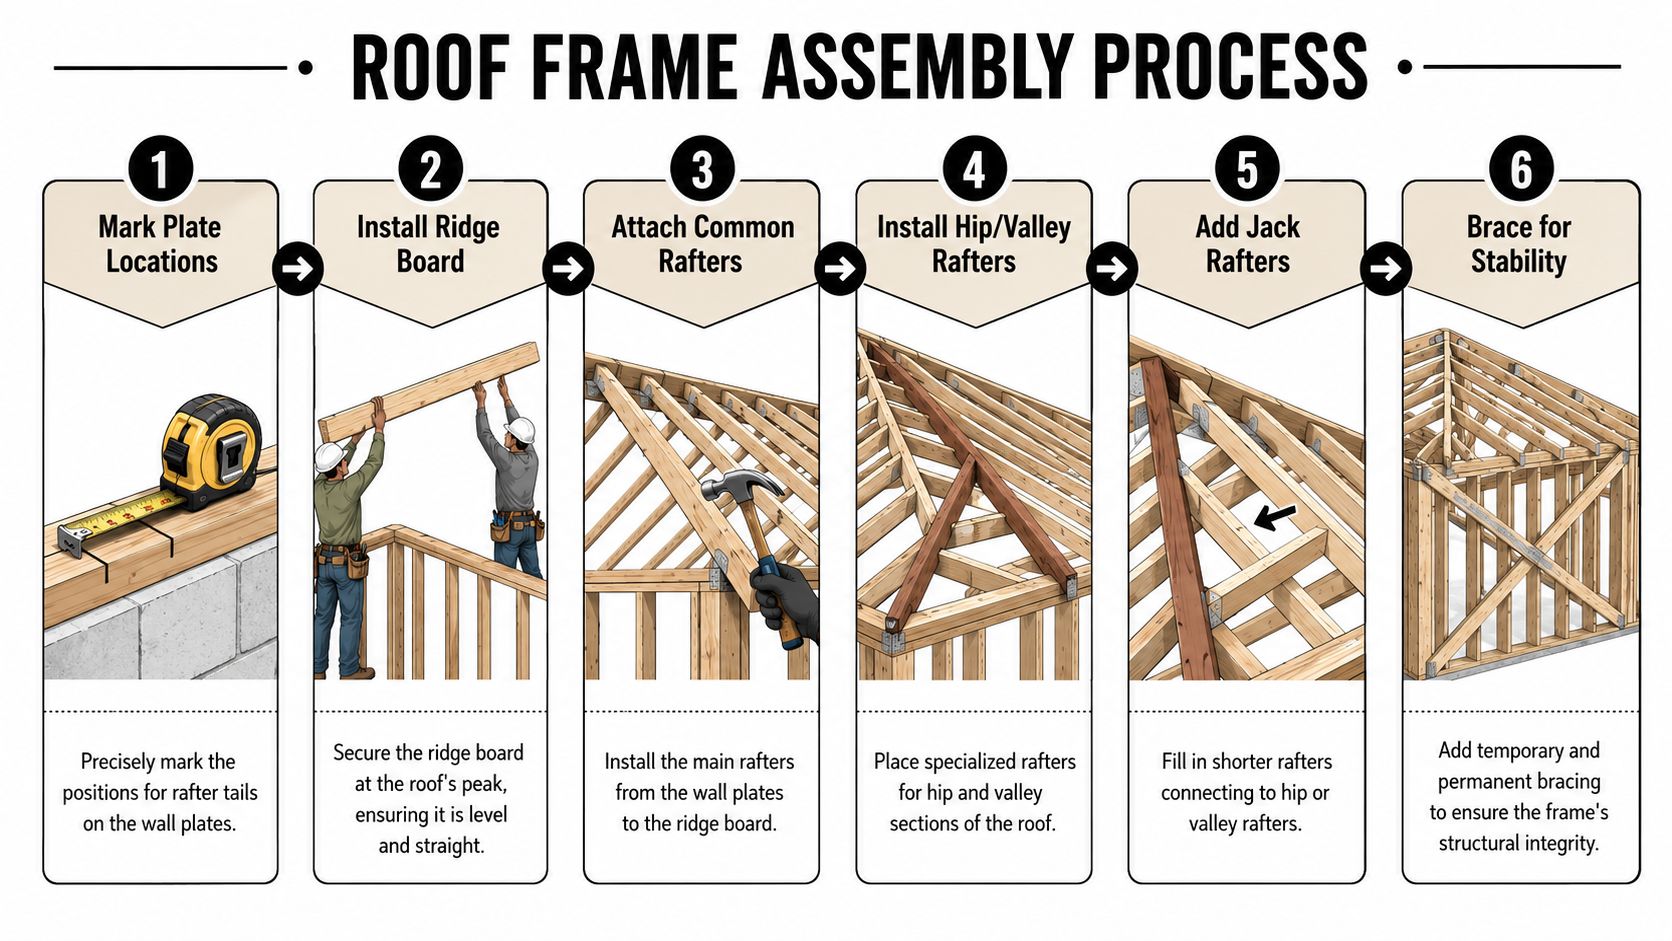
A practical assembly sequence looks like this:
- Mark plate locations so every rafter has a defined landing point.
- Set and support the ridge board before trying to rush rafters into place.
- Install common rafters in pairs to keep the frame balanced.
- Add special rafters only after the main geometry is behaving.
- Tie the system together with bracing before you trust it.
If you're planning the roofing layers that come after the framing, it also helps to understand what roof underlayment does so the whole roof assembly makes sense from framing through dry-in.
Bracing is what keeps the job honest
Temporary bracing isn't optional. It holds the ridge, keeps pairs from rolling, and stops the assembly from drifting out of plumb while you move around on it. Permanent bracing and ties do different work, but they matter just as much.
Collar ties and rafter ties aren't interchangeable in practice. They belong in different locations and control different kinds of movement. What matters most for a DIYer is understanding that the roof needs members that resist spreading and keep the assembly stable under load.
A roof frame can look square from the ground and still be drifting out of plane. Check it while you build, not after sheathing locks in the error.
Nailing also matters. Don't just “hit it enough.” Fasten rafters consistently at the ridge and at the plate, and keep checking alignment as the frame grows. The more pieces you add without checking, the harder correction becomes.
Avoiding Common Mistakes and Handling Complex Roofs
You lay out a full stack of rafters from one template, start cutting, and by the time the first pair goes up you find out the roof is not repeating the way you assumed. That mistake shows up fast on additions, porches, dormers, gambrels, and any roof where one side is doing something different from the other. The expensive part is not the bad cut. It is copying that bad cut eight more times before you stop.
Small layout mistakes cause big fitting problems
On a basic gable, the same handful of errors keep showing up on DIY jobs and rushed framing jobs:
- Reversed plumb cuts put the ridge end on the wrong face of the line.
- Crowns facing different directions leave the roof plane waving after sheathing.
- Rafter spacing that drifts creates trouble at panel edges and fascia lines.
- Bird's-mouth cuts that go too deep weaken the heel and reduce bearing where the load transfers.
- Templates used without proofing turn one bad measurement into a pile of scrap.
None of those problems look dramatic on the ground. They show up when the rafter refuses to sit flat, the tails stop lining up, or the ridge starts looking wrong from one end.
The fix is simple and often skipped. Cut one test piece, dry-fit it, and check all three contact points before you trust it as a pattern. I still do that on roofs that look straightforward, because a small error in rise, seat cut, or plate location gets magnified across the run.
Complex roofs need verification, not guesswork
Standard advice usually stops at common rafters. Real roofs often do not. Hips, valleys, dormer tie-ins, unequal pitches, offset ridges, and barn-style shapes all change the geometry enough that one pattern board may only be right in one location.
That is where capable DIYers get into trouble. The angle may be correct, but the backing, drop, shortening, or landing point is different from member to member. On those roofs, layout has to be proved before production cutting starts.
A practical way to handle it is to slow down and verify in stages:
- Check the building first. Measure both plates, diagonals, ridge location, and wall straightness before trusting your math.
- Lay out from fixed reference points. Use centerlines and actual plate locations, not rough assumptions from the plan.
- Mock up difficult intersections. A scrap pattern or full-size layout on subfloor or plywood can save expensive stock.
- Dry-fit the first special rafter. Hips, valleys, and transition rafters earn a test fit every time.
- Confirm the roof plane. Sight down the top edges and use a stringline so one proud member does not throw off sheathing later.
Barn-style roofs are a good example of where copied gable methods fall apart. If you are working through changing slopes or break points, this guide to barn-style roof framing will help you sort the geometry before you start cutting good lumber into odd-shaped firewood.
One more point gets missed on home projects. Local requirements can affect layout, bearing, ties, and allowable spans, especially on additions and rebuilt roofs. Review understanding local permit rules before you assume your framing plan is acceptable.
Good roof framing is not just about making the saw cuts match the square. It is about proving the roof works in place, with the actual structure you have, before you commit to the full set.
Safety Codes and When to Call a Professional
Rafter framing isn't just about getting the cuts to fit. Modern rafter construction is governed by load analysis and deflection limits. Engineering guidance requires accounting for dead loads, live loads, snow loads, and wind loads, then checking bending moment, shear force, and deflection. That move toward code-based structural design is now standard in major markets, according to this engineering overview of rafter design analysis.
That matters in practice. Snow concerns around Erie, wind exposure near Pittsburgh, and local code enforcement in places like Sharon all affect what's acceptable. Before you build, it also helps to review understanding local permit rules so you know what your municipality may require before framing starts.
If your project is a basic gable and you're comfortable working carefully, you may be able to handle it. If the roof has mixed pitches, unusual spans, structural questions, or anything you can't fully verify, call a qualified professional instead of guessing. Roof framing is one place where confidence without proof gets expensive fast.
If you want a professional set of eyes on a roof framing or roofing project in western Pennsylvania or nearby Ohio, Penn Ohio Roofing & Siding Group can help with roof-related work, repairs, and full replacements. If you're unsure whether your plan is DIY-friendly or needs a contractor, start there and get clarity before you cut material.