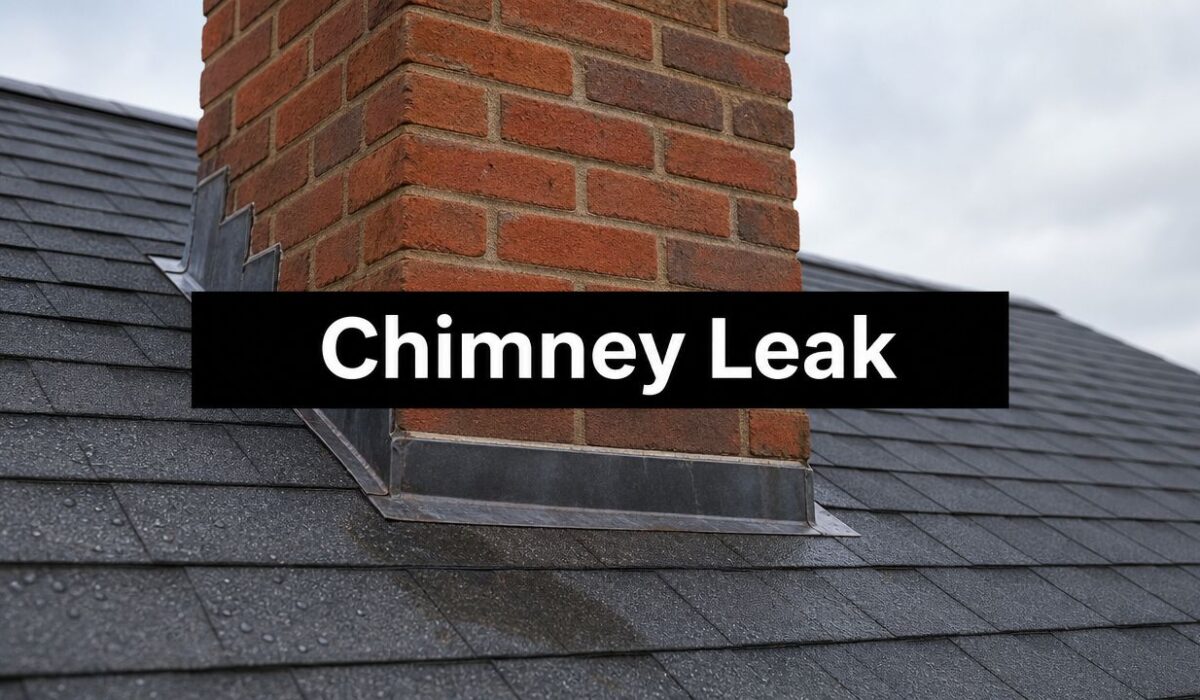
You spot the stain on the ceiling near the chimney after a hard rain, and your mind goes straight to the roof. That instinct is usually sound. Around chimneys, water rarely shows up by accident. It follows joints, laps, mortar gaps, and roofing seams until it finds a place to announce itself indoors.
In Pennsylvania homes, especially older houses around Pittsburgh and Sharon, chimney areas are one of the first places I'd want checked. The reason is simple. A chimney interrupts the roof plane, and every interruption creates edges, corners, and transitions where water can work its way in if the metal details weren't installed correctly or have started to fail.
A lot of homeowners make the same mistake at this point. They assume every leak near a chimney must be bad brick, or they smear caulk where they can reach it and hope for the best. Sometimes that works for a week. Sometimes it doesn't work at all. The better approach is to sort out whether you're dealing with a true chimney flashing leak, a masonry issue, or something else that only looks like one.
Table of Contents
- That Unsettling Water Stain Near Your Chimney
- How to Diagnose the Real Source of the Leak
- A Guide to Safe Inspection and Temporary Repairs
- Understanding Permanent Flashing Replacement
- Chimney Flashing Repair Costs and Timelines
- When You Should Call a Roofing Professional
That Unsettling Water Stain Near Your Chimney
The usual call starts the same way. A homeowner notices a brown ring on drywall near the fireplace, or a damp patch where the ceiling slopes down beside the chimney chase. It may have stayed hidden for months, then suddenly grows after a storm. If you're in a brick home in Pittsburgh or a newer place in Sharon, that moment feels the same. Something is leaking, and you want to know if it's a minor repair or the start of bigger damage.
In roof work, the chimney intersection is always high on the suspect list. Industry reporting cited in roofing publications says about 90% of roof leaks are tied to flashing problems, and chimneys are named as one of the highest-risk penetration points. The same reporting notes that properly installed flashing can last up to 30 years, while poor installation can fail within just a few years, according to roof flashing guidance on common leak points.
That's why a stain near the chimney often points first to the metal transition where roof and masonry meet, not automatically to failed brickwork.
Practical rule: A leak at the base of the chimney is often a roof leak first, until inspection proves otherwise.
If you want a simple explanation of how these metal transition pieces work at all, this overview of roof flashing basics is a useful starting point. And if you've dealt with hidden water problems elsewhere in the house, the logic is similar to the diagnostic mindset behind guidance for Melbourne shower leaks. Water enters in one place, shows up in another, and the visible stain isn't always the true entry point.
How to Diagnose the Real Source of the Leak
Before anyone tears out flashing or starts sealing joints, confirm what's leaking. A lot of money gets wasted on chimney work that never had a flashing problem in the first place.
Many apparent chimney flashing leaks are not roof leaks at all. Water around a chimney can also come from porous masonry, a damaged crown that lets water in from the top, or condensation from vented appliances that drips back and mimics a flashing failure, as noted in this guide to common chimney leak causes.
Here's a visual checklist homeowners can use before they assume the metal is the problem.
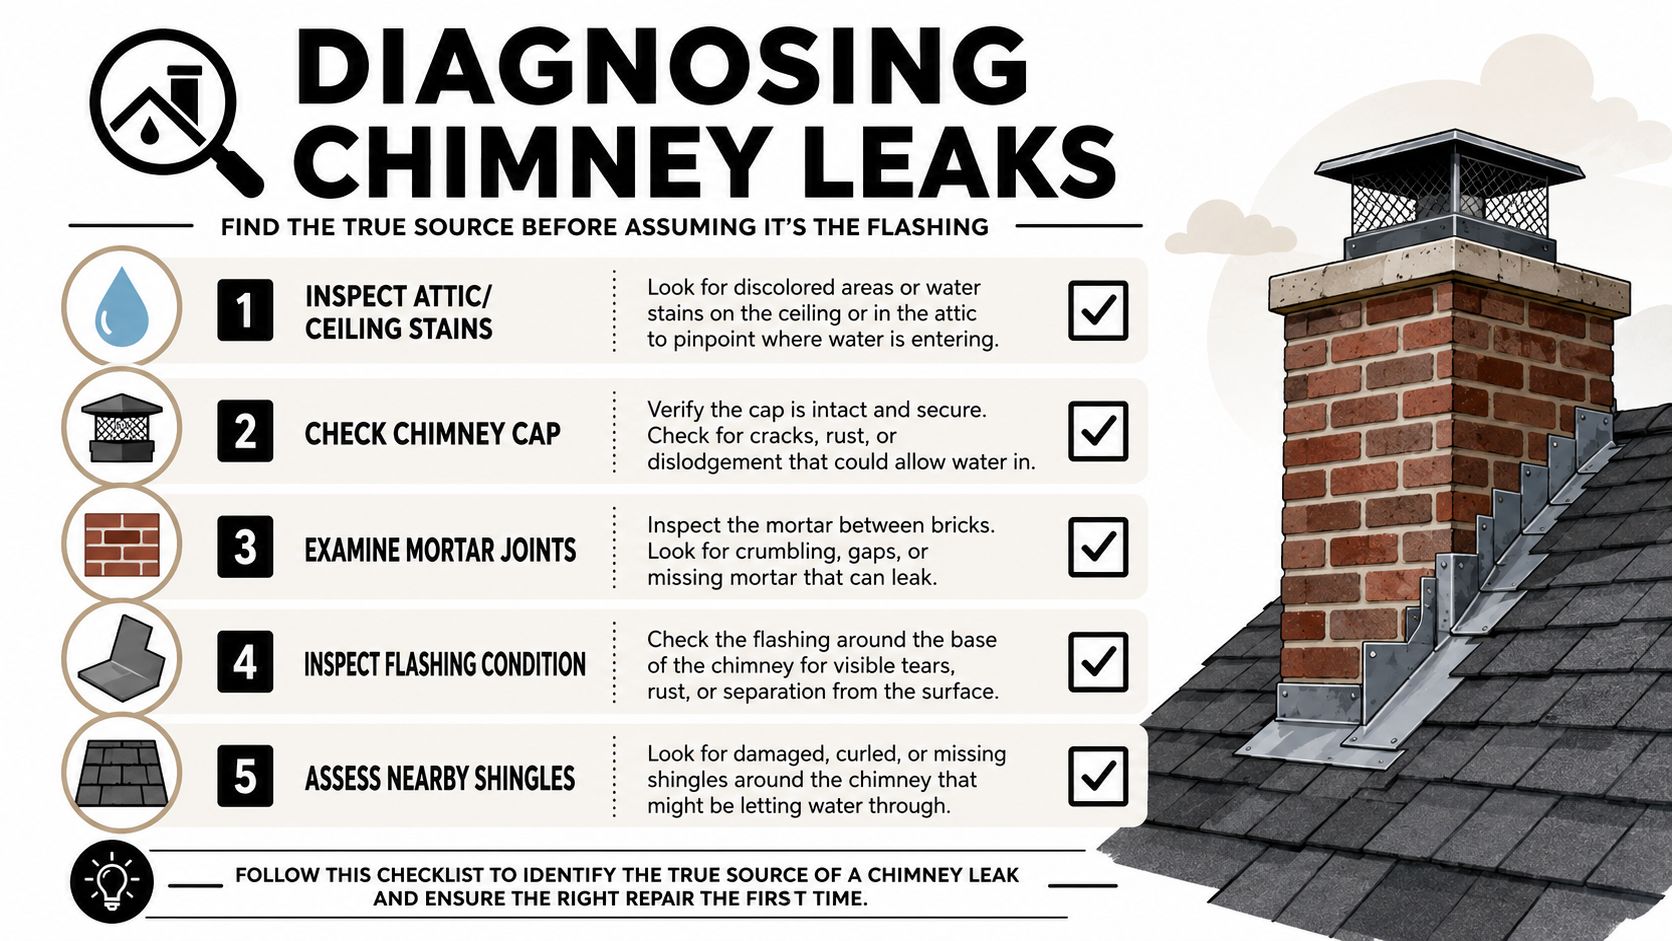
Start with where the water shows up
The location of the stain tells you a lot.
- Near the ceiling line by the chimney base: This often points toward roof-level entry, which keeps flashing high on the list.
- Lower on an interior wall: Water may be traveling through masonry or framing before it appears.
- Inside the firebox or around vent components: That can suggest condensation or top-down chimney entry instead of a roof seam failure.
A careful homeowner can do useful first-pass tracking. This article on how to find a roof leak lays out the same principle roofers use: trace the path, not just the symptom.
Use weather patterns as a clue
Don't just ask whether it leaks. Ask when it leaks.
If the stain gets worse during wind-driven rain, roof flashing becomes more likely. If it appears after long wet periods even without major storms, porous brick or mortar can be involved. If moisture shows up during cold weather when an appliance is running, condensation deserves a closer look.
I tell homeowners to make a simple note after each event:
- What was the weather like
- Where did the moisture appear
- Did it drip, stain, or just feel damp
- Was the fireplace or venting appliance in use
- Did exterior brick look wet or saturated
That kind of log is often more useful than a rushed guess from the yard. The same habit is encouraged in broader home leak work, including Voyager Plumbing's leak guide, because recurring water problems usually reveal a pattern before they reveal a cause.
Check the chimney components in order
Work from top to bottom and from outside to inside.
- Chimney crown and cap: Look for obvious cracking, displacement, or signs that water could be entering from above.
- Brick and mortar joints: If the masonry looks dark, crumbly, or persistently wet, the chimney may be absorbing water.
- Flashing edges: Watch for separation, rust, torn metal, or lifted corners where roof and chimney meet.
- Nearby shingles: A leak can start beside the chimney and still show up near it.
- Attic or ceiling side: Damp insulation, staining on framing, or active drips help narrow down the path.
Don't diagnose a chimney leak by one symptom alone. A stain near the chimney only tells you where water finished its trip.
That's especially true in Erie and other parts of western Pennsylvania where storms can drive rain sideways and winter conditions can blur the line between roof leakage, masonry absorption, and condensation.
A Guide to Safe Inspection and Temporary Repairs
Once you've narrowed it down to a likely flashing issue, the next temptation is to get on the roof with a tube of sealant and fix it fast. Sometimes a short-term patch makes sense. The key phrase is short-term.
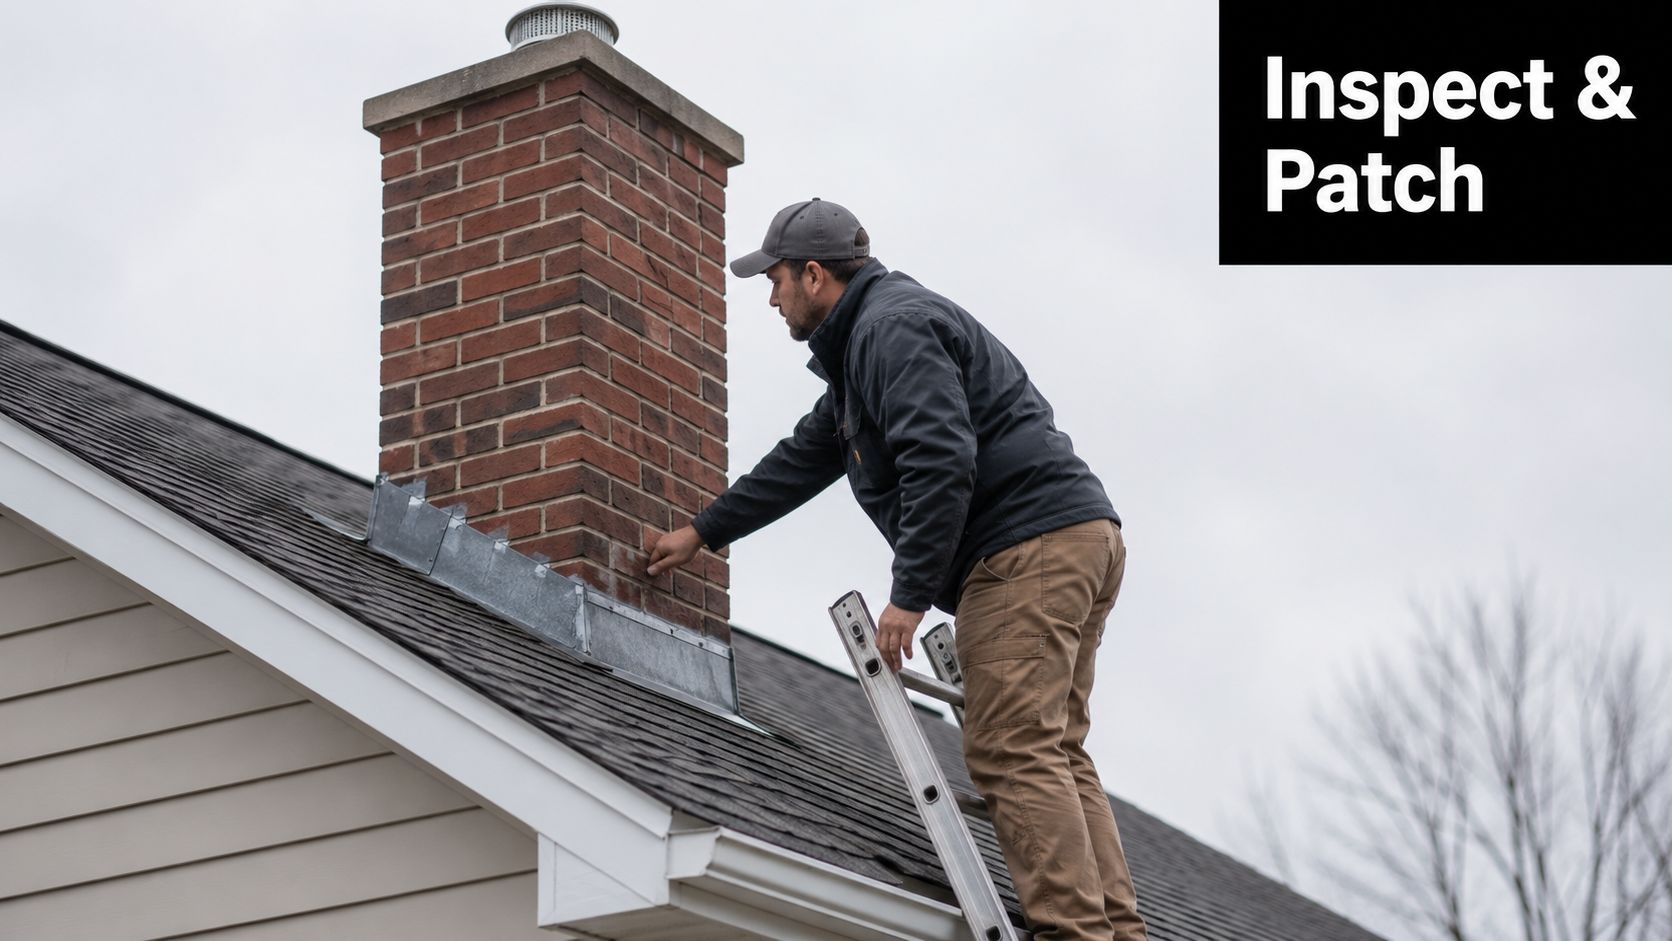
Stay on the ground unless conditions are right
A safe inspection starts before you touch a ladder. Don't get on the roof if it's wet, icy, windy, or steep enough that you feel uncertain standing on it. Chimney repairs happen near one of the trickiest roof areas, where footing changes and attention gets pulled toward the masonry.
From the ground, use binoculars or a zoomed phone camera to look for:
- Lifted metal edges: Flashing that's pulling away from brick or shingles
- Rust or corrosion: Metal that may have thinned or opened at seams
- Cracked sealant lines: A clue that someone already tried a surface repair
- Loose shingles nearby: Damage around the chimney can feed water into the same area
- Open corners: These are common trouble spots around chimney bases
If you do use a ladder, keep the task limited to a close visual check unless you're experienced working on roofs.
What a temporary patch can and can't do
A temporary repair is mainly about reducing interior damage while you schedule a proper fix. It isn't a substitute for rebuilding a failed flashing system.
If a small area is visibly open and you can safely reach it, a temporary patch usually involves cleaning debris away, drying the area as much as possible, applying roofing cement to the specific opening, and reinforcing it with flashing tape if the surface allows. Keep the repair localized. Smearing sealant across every seam usually creates a mess that hides the underlying defect.
A practical temporary approach looks like this:
- Protect the interior first: Move furniture, catch drips, and document stains.
- Clear leaves and grit: Debris holds moisture and keeps patch materials from bonding.
- Target the defect: Patch the visible gap, lifted edge, or cracked seam, not the whole chimney.
- Watch the next storm: If the leak continues, stop patching and move to full diagnosis or replacement.
Industry guidance is blunt on this point. Temporary repairs that rely on caulk or sealant are vulnerable to weather. Repeated freeze-thaw cycles, heavy snowmelt, and wind-driven rain can push water under patches or into hairline openings, which is why a properly integrated metal system outperforms a sealant-only fix, according to this analysis of chimney flashing leak repairs.
A patch can buy time. It usually doesn't buy certainty.
That matters in Pennsylvania winters. In Sharon, Pittsburgh, and Erie, the same patched joint may hold during a light shower and fail during thawing snow or sideways rain. Manage your expectations accordingly.
Understanding Permanent Flashing Replacement
A permanent flashing replacement fixes the water path at the chimney. That matters because many homeowners spend money on flashing while the underlying issue is cracked crown concrete, open mortar joints, or brick that is soaking up water and releasing it inside.
Before a crew replaces metal, they should confirm the leak is at the roof-to-chimney joint. In Sharon and Pittsburgh, I've seen plenty of chimneys blamed for flashing leaks when the chimney crown was split or the brick was holding moisture after repeated freeze-thaw cycles. New flashing will not solve that. It only solves water entering where the roof and chimney meet.
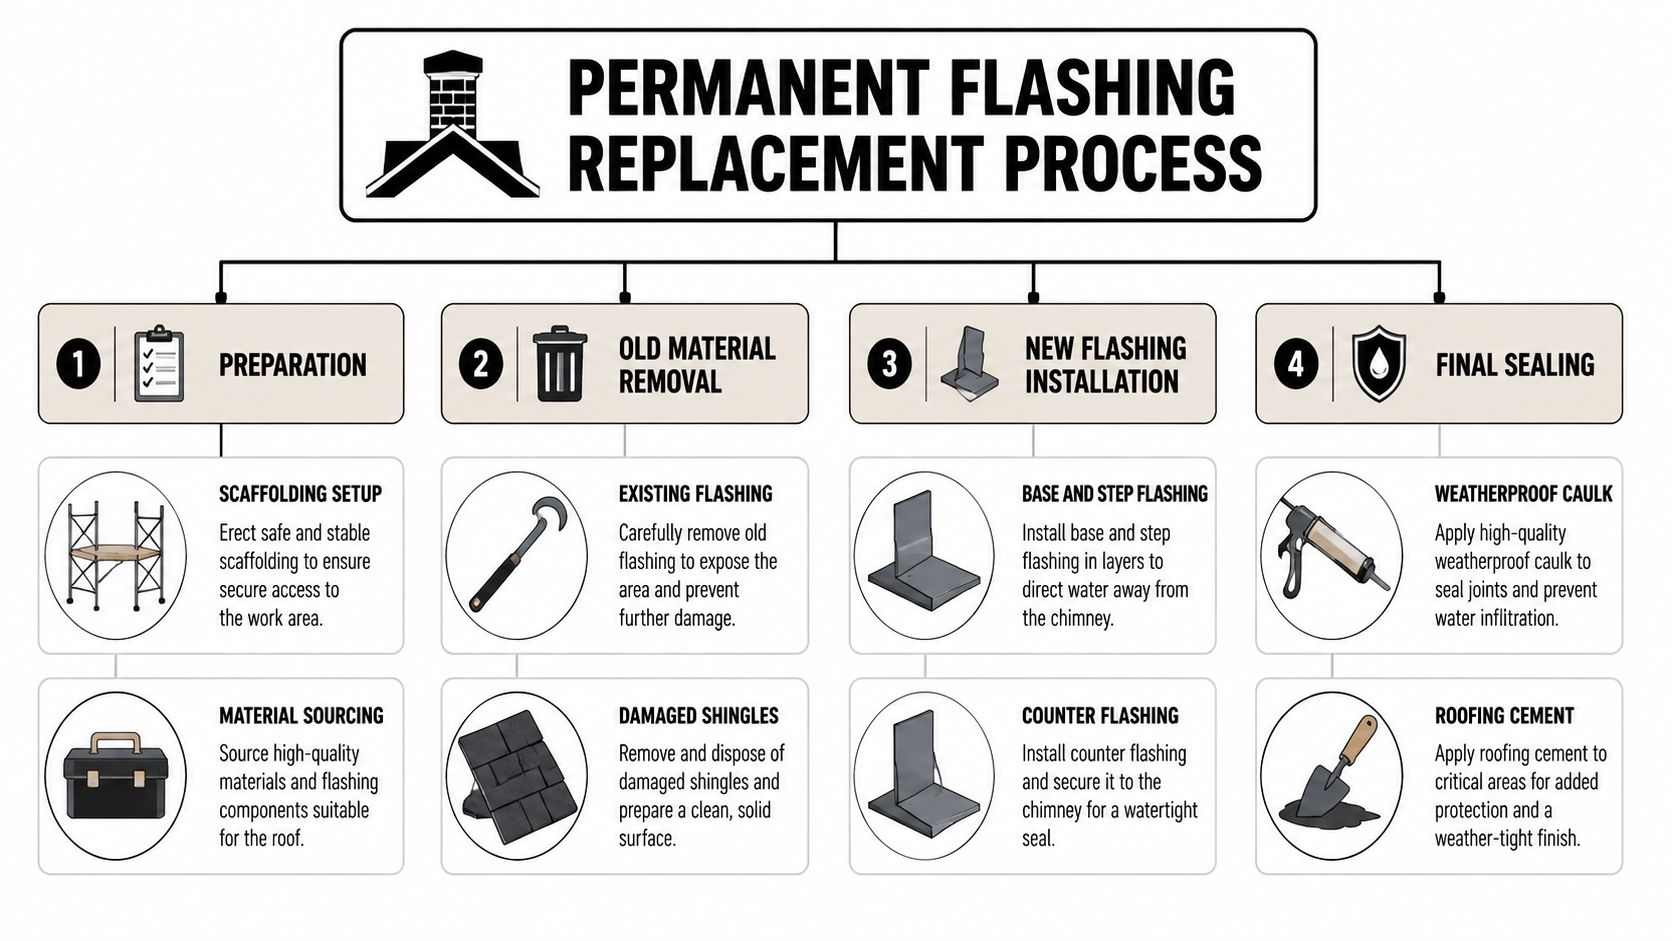
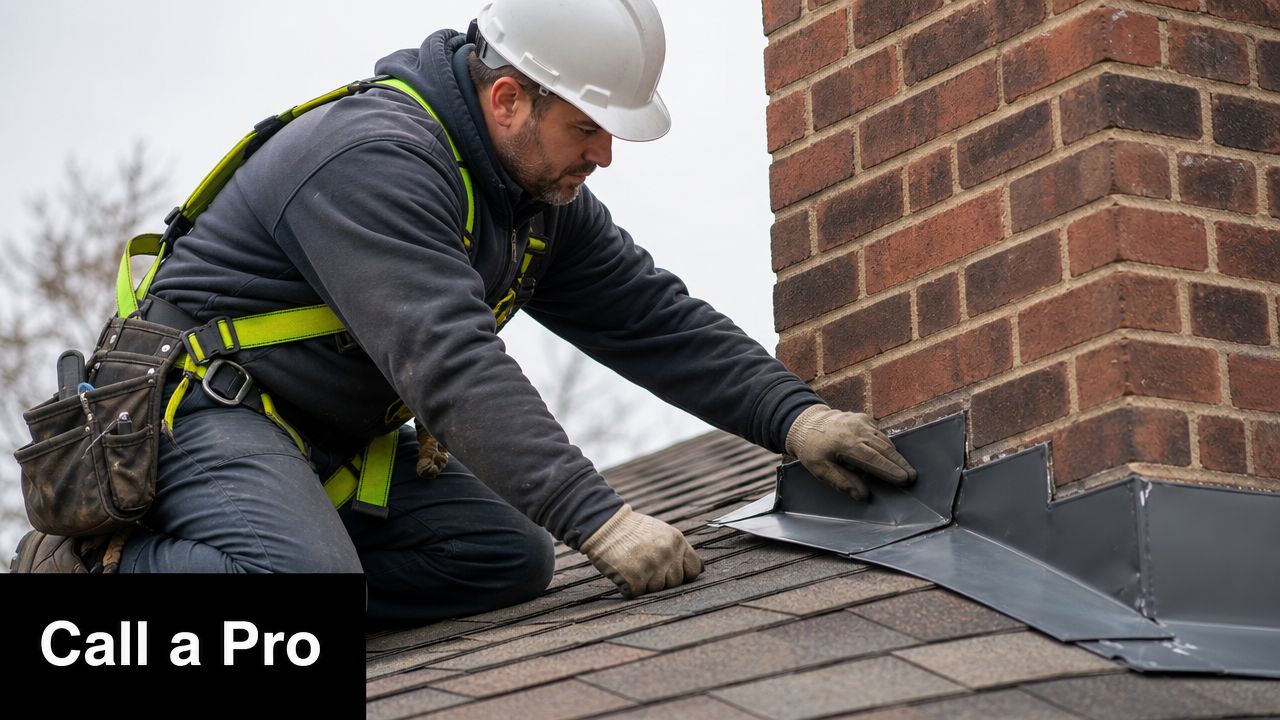
How the flashing system actually works
A proper chimney flashing assembly uses separate pieces that work together. The visible metal is only part of the system.
- Base flashing handles the transition from roof surface to chimney.
- Step flashing is woven with each shingle course along the sides so water keeps shedding down the roof.
- Counter-flashing covers the top edge of the lower flashing pieces and is cut into a mortar joint or reglet in the chimney.
That last detail is where a lot of bad repairs fail. Surface-gluing metal to brick with sealant may look fine for a season, but it does not hold up like counter-flashing that is mechanically set into the masonry.
A real replacement usually means removing shingles around the chimney, pulling out old cement and failed metal, checking the roof deck for rot, and rebuilding the assembly in the right order. If the surrounding shingles are brittle or near the end of their life, there is a trade-off. Reusing them can save money up front, but it raises the odds of breakage during the repair and can leave a weak tie-in around otherwise new flashing.
Why material choice and scope matter
Material affects service life, movement, and repairability. Lead, aluminum, and steel all behave differently, and the best choice depends on roof type, local weather, and budget. In western Pennsylvania, snow load and freeze-thaw stress make those differences show up faster than many homeowners expect.
The bigger issue is scope. If the chimney has loose mortar, a damaged crown, or saturated brick, flashing replacement may need to be paired with masonry work. Otherwise, the leak may keep showing up in the same ceiling area and look like the new flashing failed when water is entering higher up.
Penn Ohio Roofing & Siding Group handles damaged roof or chimney flashing as part of roof repair service. Homeowners comparing bids should focus less on the label and more on what the contractor is replacing, how the counter-flashing is being set, and whether the shingles around the chimney are being rebuilt correctly. This overview of flashing repair cost factors can help you see how scope changes the job.
Good flashing depends on shaped metal, proper overlap, and correct tie-in to both the roof and the chimney. Sealant is only a supporting part of the repair.
Chimney Flashing Repair Costs and Timelines
Homeowners usually want a number right away. The honest answer is that chimney flashing repair costs vary a lot by roof access, chimney size, material choice, and whether hidden damage shows up once the old metal comes off.
If someone quotes a chimney repair without asking about roof pitch, flashing type, surrounding shingle condition, or masonry condition, that's not much of an evaluation. A simple temporary patch can often be done quickly. A full replacement may take longer because the crew has to remove material carefully, inspect the deck, rebuild the flashing layers, and sometimes coordinate minor masonry work.
What affects the price
Several factors drive the final bill:
- Roof steepness and access: A hard-to-reach chimney slows everything down.
- Material selection: Lead, aluminum, zinc, and other options don't age the same way.
- Chimney geometry: Wider or more complex shapes require more cutting and detailing.
- Condition below the flashing: Rotten decking or deteriorated mortar adds repair steps.
- Weather timing: Emergency scheduling in wet conditions is different from planned dry-weather work.
If you want a broader look at what contractors consider when pricing this type of work, this page on flashing repair cost factors is worth reviewing.
Chimney Flashing Repair Cost and Timeline Comparison
| Repair Type | Estimated Cost | Estimated Timeline | Durability |
|---|---|---|---|
| DIY temporary patch | Varies by materials and access | Often an afternoon if conditions are safe | Short-term only |
| Professional spot repair | Varies by defect location and surrounding roof condition | Commonly completed within a short service visit or part of a larger repair day | Moderate if the issue is localized |
| Full flashing replacement | Varies by chimney size, roof pitch, material, and hidden damage | Usually longer than a patch because old material removal, installation, and testing take time | Long-term when installed correctly |
| Flashing replacement with related masonry or deck repair | Higher than flashing-only work because multiple systems need attention | Often extends beyond a simple one-day patch approach | Best option when water has damaged surrounding components |
For homes in Erie or greater Pittsburgh, labor conditions, access, and weather windows can shift timing. That's why I'd rather see a clear written scope than a fast verbal estimate.
When You Should Call a Roofing Professional
A lot of homeowners wait too long here because the leak seems small. The stain is limited to one ceiling corner, the drip only shows up during hard rain, and a bead of caulk feels like a reasonable next step. Sometimes that buys a little time. Just as often, it sends you after the wrong fix because the actual issue is not the flashing at all.
Signs the job is past a simple patch
Call a roofer if the leak source is unclear or if you see signs that more than one system is failing. Around chimneys, that is common. I see homeowners focus on exposed metal when the actual cause is cracked crown wash, open mortar joints, missing step flashing under shingles, or water soaking through old brick and showing up in the same area indoors.
These conditions usually mean the job needs professional diagnosis and repair:
- Soft decking or sagging near the chimney: Water may have been getting under the roofing for a while.
- Loose, bent, or rusted flashing: Metal in that condition usually needs replacement, not more sealant.
- Deteriorated mortar joints or unstable brick surfaces: Counter-flashing needs sound masonry to hold properly.
- Leaks that return after patching: Repeated callbacks usually point to a misdiagnosed source.
- Water showing up away from the chimney opening: Water can travel along framing and make the leak look like something it is not.
- Steep, high, icy, or slippery roof conditions: Safety is reason enough to stop and bring in a crew.
This comes up often on older homes in Sharon and across Pittsburgh, where freeze-thaw cycles, aging masonry, and layered roof repairs create mixed leak paths that are hard to sort out from the ground.
Why professional detail work matters
A good roofer does more than replace metal. The inspection should separate a true flashing failure from nearby problems that mimic one. That means checking the roof-to-chimney connection, the shingle tie-in, the chimney crown, the brick and mortar, and the attic or decking below if access allows. If the diagnosis is wrong, the repair budget goes to the wrong trade and the leak comes back.
Professional flashing work also depends on careful fit and sequencing. Counter-flashing has to be cut into mortar joints correctly, base and step flashing need to shed water in the right order, and corner transitions have to stay watertight through expansion and winter movement. Poor overlap, face-nailed shortcuts, and surface-applied sealant repairs fail fast in western Pennsylvania weather.
If the repair involves cut-in counter-flashing, shingle removal, chimney mortar work, or any hidden deck damage, bring in a professional crew.
You also want a contractor who is licensed, bonded, and insured. Chimney areas combine fall risk, sharp metal, unstable footing, and hidden water damage. Documentation matters too, especially when the roofer finds that the leak is partly a masonry issue and not just a roofing issue.
If you're dealing with a chimney flashing leak in Sharon, Pittsburgh, Erie, or nearby Pennsylvania communities, Penn Ohio Roofing & Siding Group can inspect the roof-to-chimney connection, identify whether the leak is flashing-related, and handle roof repair work when damaged flashing is part of the problem.