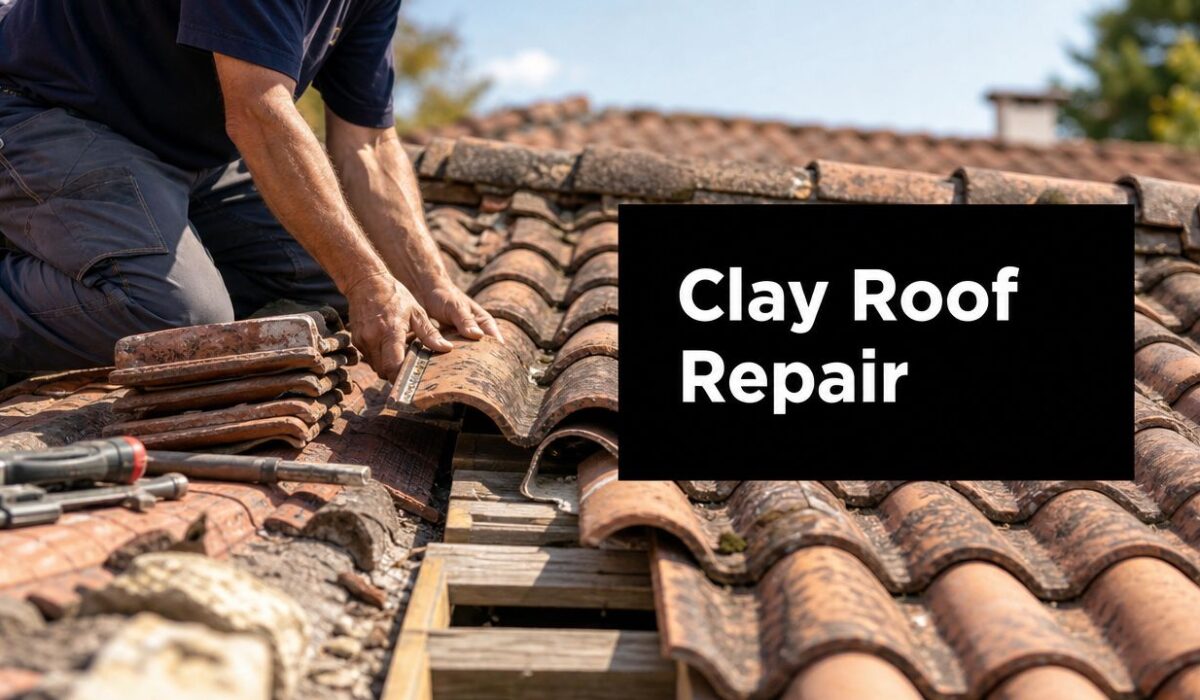
A ceiling stain usually gets your attention fast. You notice it after a hard rain, look up, and assume one cracked clay tile must be the whole problem. Sometimes that's true. Often it isn't.
That's what makes clay tile roof repair different from patching a basic shingle roof. Clay tile roofs are durable, attractive, and built to last a very long time, but a leak can come from more than the tile you can see. The tile sheds water. The system below it, especially the underlayment and flashing, is what usually decides whether water stays out. If you're dealing with storm-related damage, a local overview like this guide to Marion County storm damage roof repair can also help you think through how wind and debris affect different roof systems.
Clay tile roofs can last 75 to 100 years or more according to Legacy Roofing's tile lifespan overview. That long service life changes the way repairs should be handled. The goal usually isn't to rush into replacement. It's to protect a roof that may still have decades of life left if the repair is done correctly.
Before you focus on the visible tile, it helps to understand the layer below it. If you want a simple overview of what that water-shedding layer does, this explanation of roof underlayment is worth reading first.
Table of Contents
- Your Clay Tile Roof's First Line of Defense
- Identifying the Real Source of the Leak
- Gathering Your Gear and Safety Plan
- The Process of Replacing a Damaged Tile
- Proactive Maintenance and Emergency Patching
- Deciding Between DIY Repair and Professional Service
- Frequently Asked Questions About Clay Tile Repair
Your Clay Tile Roof's First Line of Defense
A homeowner spots a ceiling stain after a storm, sees one cracked tile from the driveway, and assumes the fix is obvious. On a clay tile roof, that assumption is where expensive mistakes start.
The tile is the outer shedding surface. It blocks sun, takes the weather, and directs most water downslope. The part that keeps the deck dry is the system underneath it, especially the roof underlayment beneath clay tile. If that layer is worn, torn, or exposed by movement at a valley or flashing, replacing one visible tile may do nothing to stop the leak.
That is why good repair work starts with the full assembly, not the cracked piece alone.
Clay tile roofs last a long time, but they punish rough handling. Step in the wrong place, pry too aggressively, or disturb the surrounding pattern, and one repair can turn into several. I have seen roofs where the original leak was minor, then spread because someone broke adjacent tiles or shifted the water path while trying to save money on a quick swap.
Why this matters before any repair
A clay roof works as a layered system. Field tiles, ridge pieces, flashings, fasteners, battens in some assemblies, and the waterproof layer below all have a job. Water can enter at one weak point and show up somewhere else inside the house, which is why interior staining rarely gives you a straight line to the actual failure.
Storms make that harder to read. Wind can lift tiles without fully breaking them. Debris can crack a corner and also damage flashing nearby. In areas that see severe weather, reviewing the pattern of damage from a Marion County storm damage roof repair perspective helps homeowners understand why a roof needs more than a tile count after a bad event.
What a careful assessment looks for
Before any tile comes off, the goal is to protect the roof's water-shedding pattern and identify what failed. The key questions are:
- Is the tile the failure, or the clue? A broken tile may only be the first visible sign of underlayment wear or flashing trouble.
- Has anything shifted out of pattern? Small movement at hips, ridges, sidewalls, and valleys can open a path for water.
- Will removal create more damage? Older clay becomes brittle, and careless access often breaks sound tiles around the repair area.
- Is the roof still doing its job overall? One isolated impact break is a different situation from broad underlayment aging across an older slope.
That distinction saves money. It also helps homeowners decide early whether this is a controlled tile replacement or the start of a larger repair that should be handled by a roofer with tile-roof experience.
Identifying the Real Source of the Leak
A lot of failed clay tile roof repair work starts with the wrong diagnosis. Homeowners replace the broken tile they can see, then the ceiling stains again after the next storm. The reason is simple. The visible tile isn't always where the leak begins.
A common question is why a clay roof leaks when the tiles still look fine. The answer often sits below the surface. The waterproofing layer is the underlayment beneath the tiles, and if that layer has aged or failed, replacing a tile alone won't solve the leak, as explained in this tile roof repair guide. If you need a broader leak-tracing checklist, this guide for homeowners with LA roof leaks is useful for thinking through interior and exterior clues.
Start from the ground
Don't climb first. Look first.
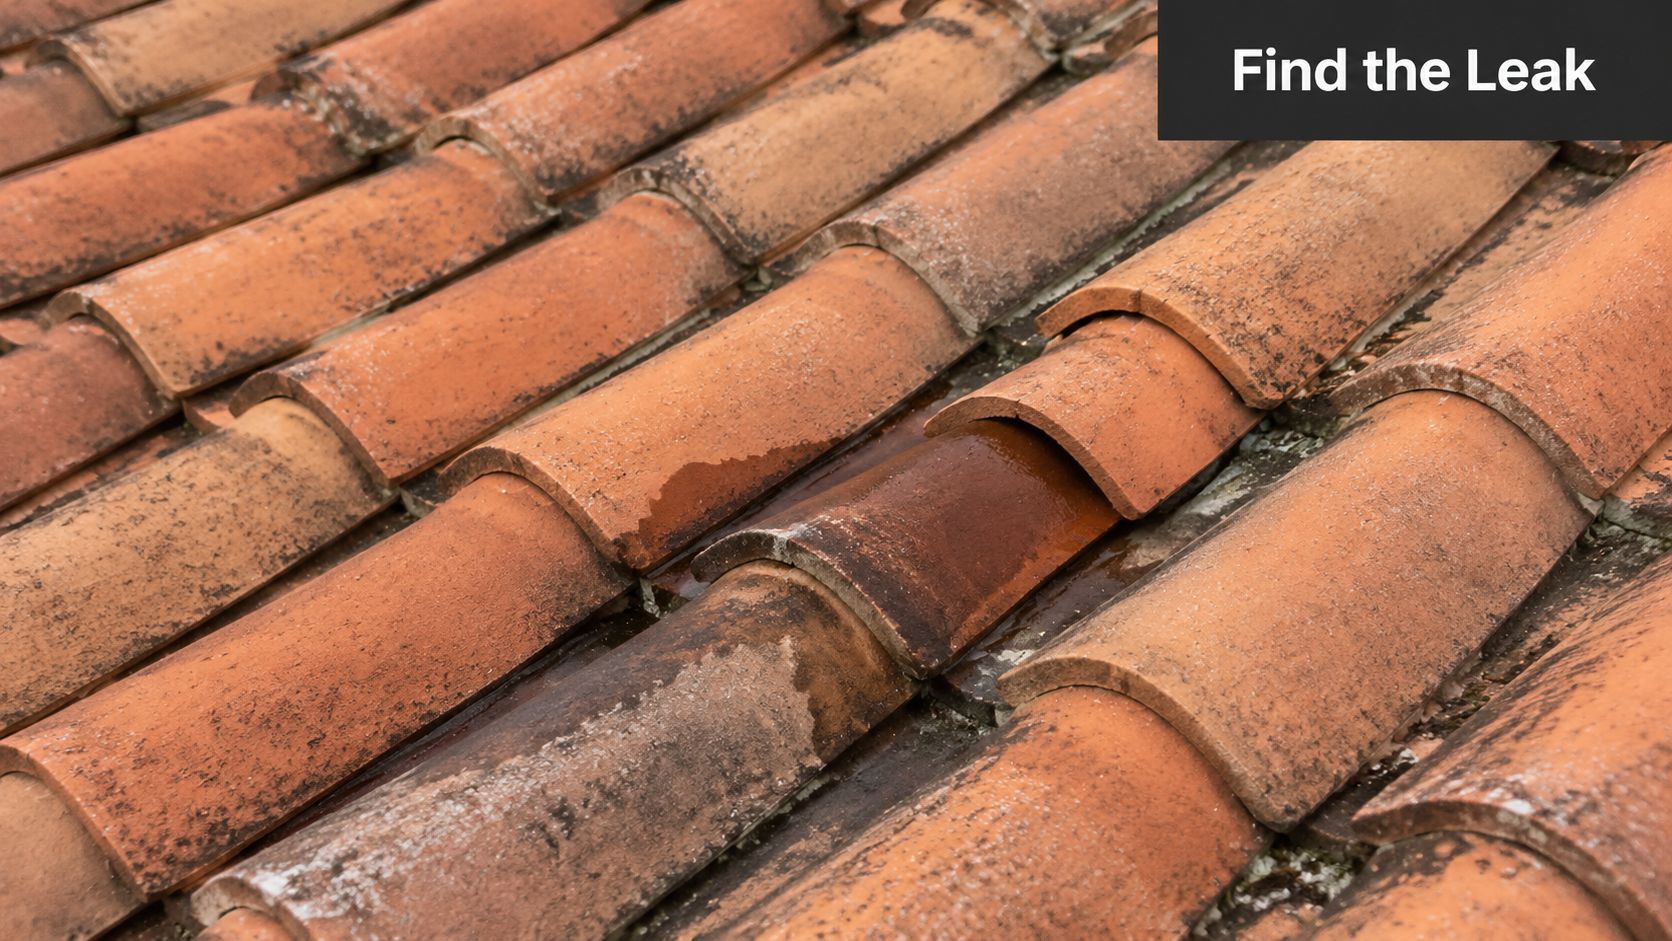
Use binoculars from several angles and check for these signs:
- Slipped or out-of-plane tiles: One tile sitting higher or lower than the surrounding field can expose the overlap.
- Fresh impact damage: Look for chips, shattered corners, or displaced ridge pieces after wind or falling debris.
- Cracked mortar at ridges or hips: Mortar failure can let water move into places it shouldn't.
- Trouble at penetrations: Vents, chimneys, and skylight transitions deserve extra attention because flashing failures often show up there first.
A visual scan from the ground won't confirm underlayment damage, but it can narrow the search zone and keep you from stepping onto a roof before you know where the risk is.
Check the attic before touching the roof
Interior evidence is often more honest than the roof surface.
Go into the attic with a bright flashlight and inspect during or soon after rain if it's safe to do so. Look for:
- Darkened roof decking
- Wet insulation
- Staining near nails or fasteners
- Moisture trails around penetrations or valleys
- Mold or musty smell near the leak path
This is also a good point to review a practical walkthrough on finding a roof leak so you can compare attic signs with what you're seeing overhead.
Water often travels along framing, under battens, or down the underside of the deck before it shows up on a ceiling. The drip point is rarely the entry point.
If the attic evidence lines up under a vent, chimney, valley, or roof transition, the leak may be a flashing or underlayment problem rather than a failed field tile.
Know what inspection can and can't tell you
A surface check can identify obvious tile damage. It can't fully confirm the condition of the system below without selective removal. That matters because many leaks on tile roofs come from hidden components.
Use this simple diagnostic split:
| Clue | More likely cause |
|---|---|
| One visible broken tile and no attic spread | Localized tile damage |
| Staining around vent or chimney | Flashing issue |
| Leak with intact visible tiles | Underlayment failure |
| Repeated leaks in the same zone after tile replacement | Hidden system problem |
That's the point where the repair decision gets clearer. If the roof is only showing one isolated problem, a targeted fix may work. If the clues don't match the surface damage, stop assuming the tile is the whole story.
Gathering Your Gear and Safety Plan
Most DIY clay tile roof repair mistakes happen before the first tile moves. The wrong ladder angle, the wrong shoes, one hand full of tools, or a rushed step onto a brittle tile can turn a manageable repair into a larger one.
What you need before you touch a tile
Clay roofs call for patience and the right hand tools, not brute force.
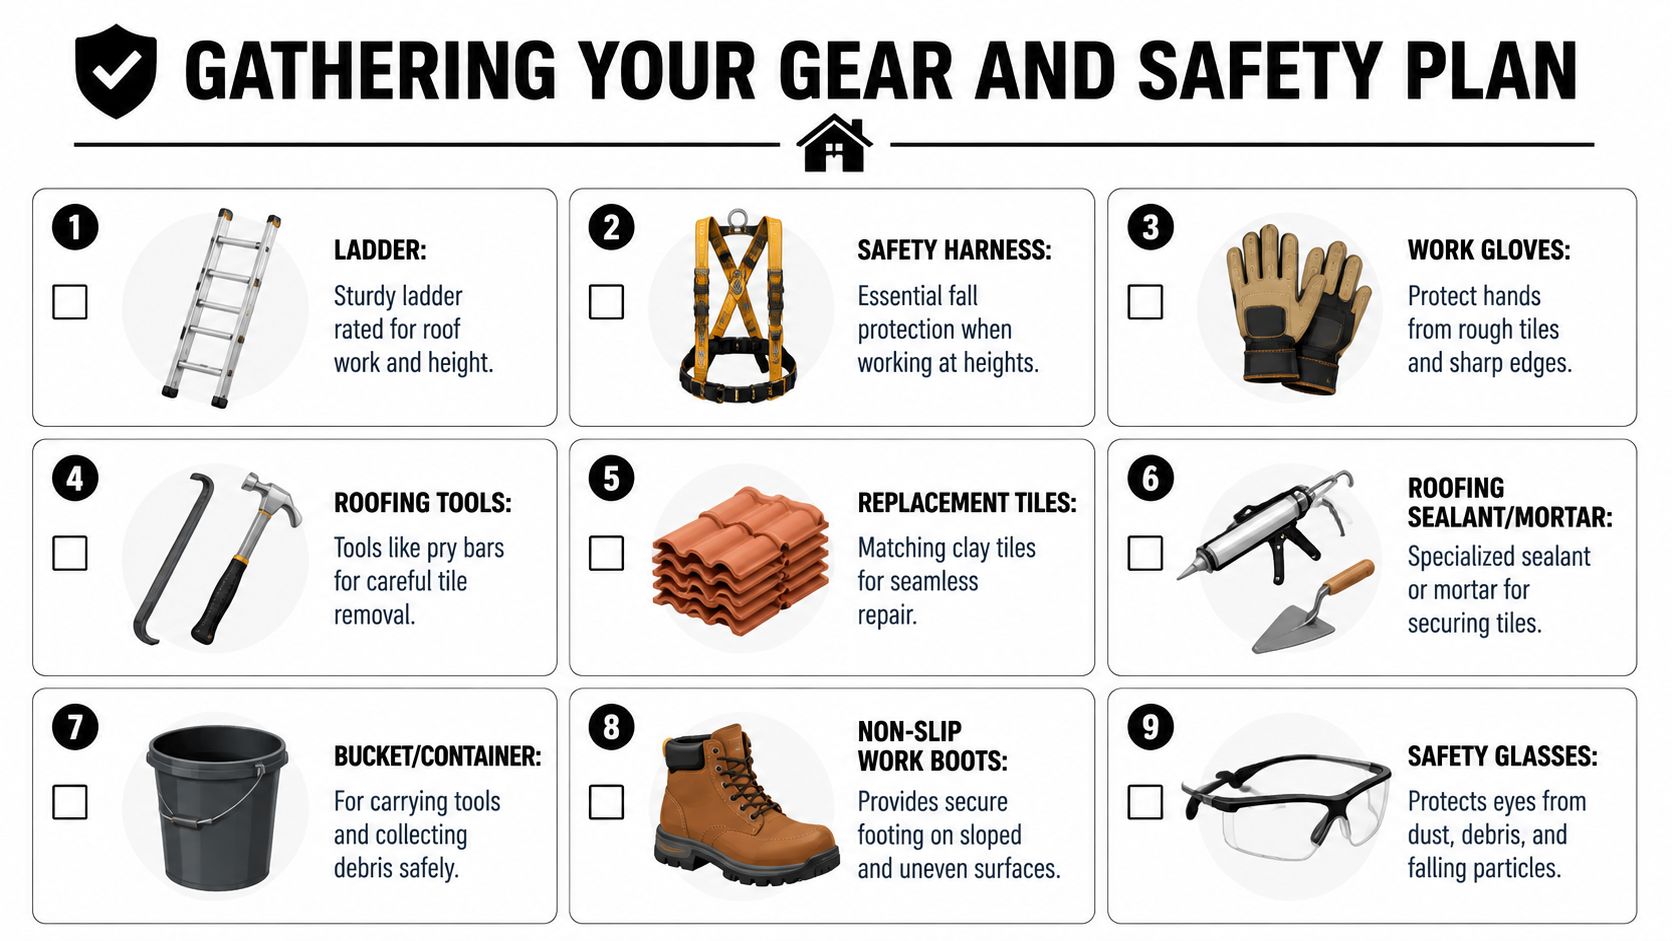
A useful setup often includes:
- Extension ladder: Choose a ladder rated for roof work and set it on stable ground.
- Fall protection harness: If you're working on a slope, this is not optional.
- Work gloves and safety glasses: Clay edges, old fasteners, and debris can cut hands and injure eyes quickly.
- Pry tools for gentle removal: A flat bar or similar roofing tool helps lift adjacent pieces carefully.
- Matching replacement tile: Close enough usually isn't good enough on an exposed tile field.
- Sealant or mortar suited to the repair method: The product has to match the tile profile and repair condition.
- Bucket or container: Carrying loose tools by hand while climbing is how accidents start.
- Non-slip boots: Smooth soles and clay tile do not mix.
If debris from trees or storms is part of the problem, this guide on roof debris removal helps you think through cleanup without causing more breakage.
The safety setup matters more than the repair
Clay tile is not a forgiving walking surface. It can be slick, brittle, and uneven, especially on older roofs. Even when the tile survives, careless foot placement can shift pieces and break the weathering pattern underneath.
Build your plan around these rules:
- Work with a partner: One person should stay on the ground to steady the ladder, pass tools, and respond if something goes wrong.
- Limit roof traffic: Every extra trip across the roof adds risk to both you and the tile field.
- Stage materials first: Don't climb up, realize you forgot something, and climb down repeatedly.
- Avoid wet conditions: A repair done on a damp clay roof is asking for a slip.
On clay tile, safety and craftsmanship are tied together. A roofer who moves carelessly usually creates new damage before finishing the original repair.
If the roof is steep, the leak zone is high, or the tile feels fragile under minimal contact, that's usually the point where a homeowner should stop and hand the work off.
The Process of Replacing a Damaged Tile
A homeowner often sees one cracked tile and assumes that is the whole problem. Sometimes it is. Sometimes the broken tile is only where the leak became visible, while the underlying failure sits underneath in torn underlayment, a split flashing edge, or a fastening point that started letting water travel.
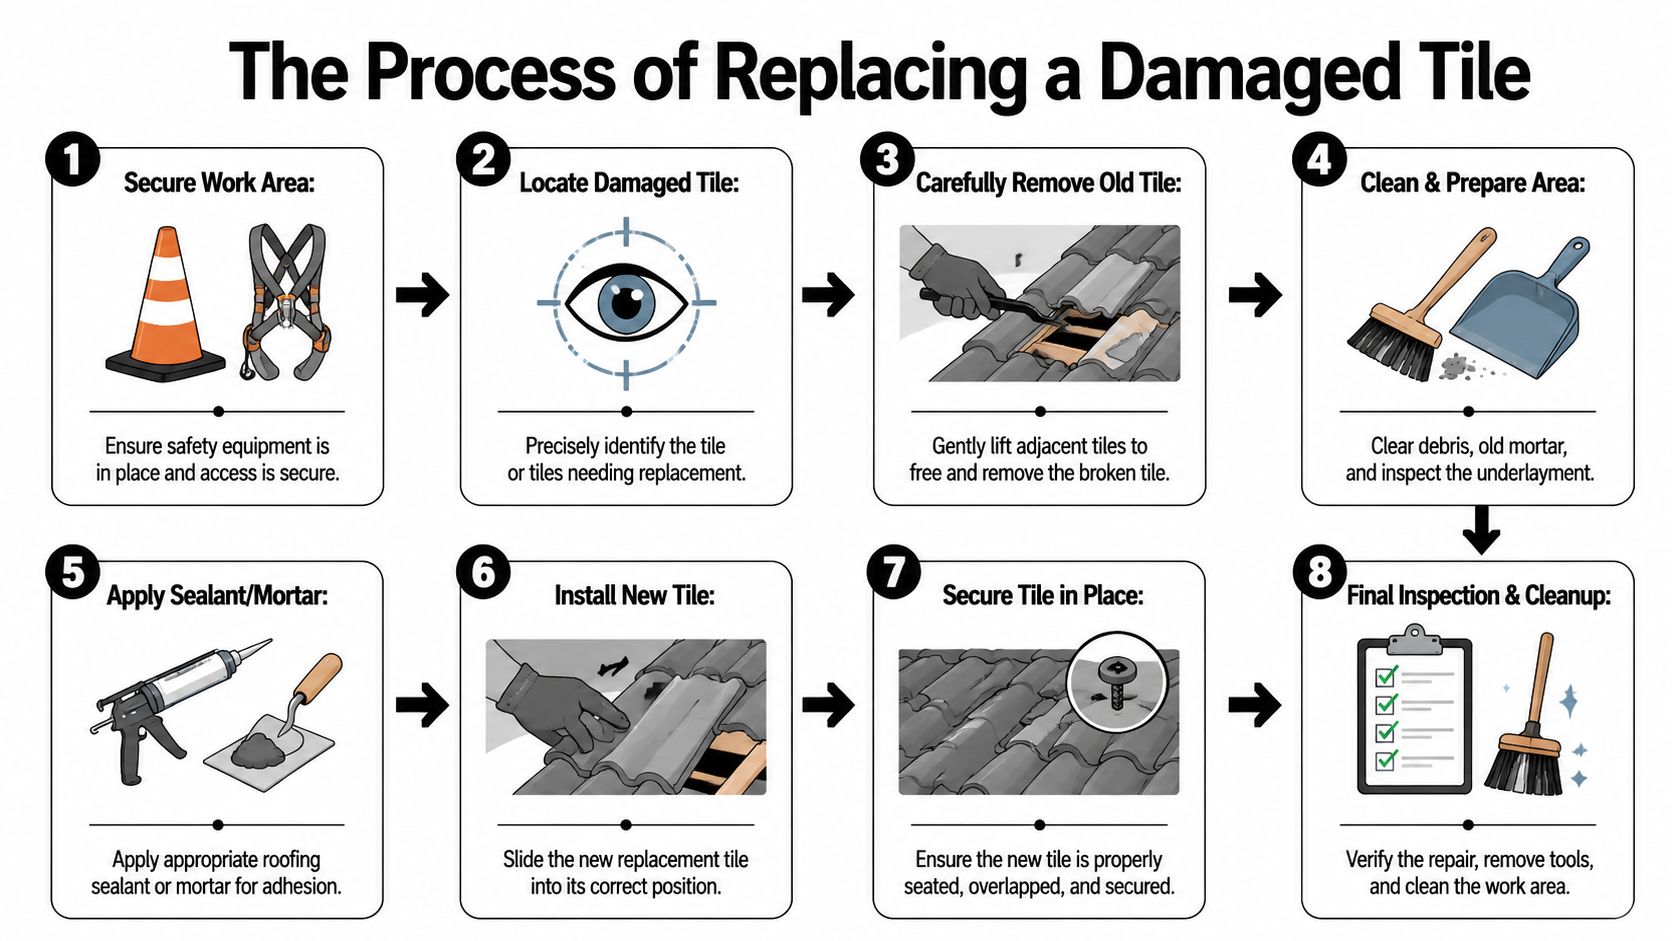
Phase one. Remove the tile without spreading the damage
Confirm the exact tile first. Hairline cracks, corner breaks, and slipped tiles can look similar from a few feet away, but they come out differently. On clay roofs, the job is as much about protecting the surrounding field as it is about removing the damaged piece.
Lift the adjacent tiles only as much as needed to release pressure on the broken one. If the tile does not move easily, stop and check what is holding it. Clay tile may be nailed, clipped, mortared, or locked into the profile around it. Force is what turns a one-tile repair into a five-tile repair.
Remove every fragment before going further. Small shards left behind can keep the replacement from seating flat, and they can scrape or puncture the material below.
Phase two. Inspect the layer that actually stops the leak
Once the tile is out, the most important part of the job starts. Examine the exposed area carefully. Look for torn underlayment, dark staining, soft decking, split battens, rusted fasteners, or a water track that runs beyond the opening.
This is the decision point. If the tile broke from impact and everything below it is dry and intact, a tile replacement may be enough. If the underlayment is torn, brittle, or pulled loose around fasteners, replacing the tile alone will not stop the leak for long. The tile sheds most of the water. The underlayment is what protects the house when wind-driven rain gets past the tile layer.
A practical installation reference is this tile installation guide, which covers overlap, fastening, and tile positioning. Those details matter because a replacement that looks right from the ground can still be wrong in the water path.
If the deck feels soft, if moisture extends beyond the immediate opening, or if multiple nearby tiles have to come up to reach damaged underlayment, that repair has moved out of simple DIY territory.
Phase three. Set the replacement tile so water sheds correctly
Dry-fit the new tile before fastening anything. It should sit in plane with the surrounding course, with no rocking, binding, or raised edge. A tile that sits proud often means debris is trapped below, the profile is mismatched, or the support beneath has shifted.
Pay attention to four details:
Keep the original headlap and side fit
The replacement has to shed water the same way the original course did. Changed overlap creates an opening for wind-driven rain and capillary intrusion.Use the right fastening method for that tile
Nails, clips, adhesive, or a combination may be appropriate depending on the profile, slope, and exposure. The wrong choice can crack the tile or leave it loose in high wind.Do not block the drainage path
Sealant belongs only where the repair method calls for it. Smearing sealant into channels or laps can trap water and redirect it under the system.Reset the surrounding tiles carefully
The repair is only complete when the neighboring pieces are back in their proper position and bearing evenly.
One reasonable option for homeowners who decide the risk is not worth it is hiring a contractor that specifically handles tile roofing, such as Penn Ohio Roofing & Siding Group, so the scope covers tile removal, underlayment assessment, and proper reset work.
Finish by checking the repair from upslope, downslope, and from the ground. The replacement should line up with the existing pattern, sit tight without stress, and leave no visible gap that could catch water.
Proactive Maintenance and Emergency Patching
A clay tile roof usually gives warning before it gives out. Homeowners who catch those warnings early spend less time dealing with interior damage and fewer repair surprises. The roof doesn't need constant interference, but it does need observation.
Routine habits that prevent bigger repairs
Preventive care on clay tile roofs is mostly about keeping water moving where it belongs and avoiding avoidable impact damage.
A simple maintenance rhythm includes:
- Check after storms: Look for shifted or newly broken tiles from the ground.
- Keep gutters and drainage paths clear: Backed-up water can push moisture into vulnerable roof areas.
- Trim overhanging limbs: Branch contact and falling debris break more tiles than many homeowners realize.
- Watch roof penetrations: Vents, chimneys, and skylights deserve repeat attention because transitions age differently than field tile.
- Limit foot traffic: Every unnecessary step on the roof increases the odds of hidden damage.
The true value of maintenance isn't cosmetic. It helps preserve a roof system that was built to stay in service for a long time if the vulnerable details are handled early.
What to do during an active leak
Emergency patching is about limiting interior damage until proper repair is possible. It is not the final repair.
If water is entering the house during a storm:
Protect the interior first
Move furniture, place containers under drips, and relieve bulging ceiling areas only if you can do so safely.Trace from inside if possible
A flashlight in the attic can help you identify whether water is following framing or dropping directly from the deck.Do not rush onto a wet tile roof
Clay tile becomes much more dangerous when wet. A nighttime or storm-time climb is one of the worst decisions a homeowner can make.Use temporary containment, not guesswork
Interior catchment, attic moisture control, and prompt scheduling of repair are safer than applying random roof cement where you think the leak might be.
A bad temporary patch often makes later repair harder. Sealants spread over drainage channels, mortar smeared into wrong joints, or tar applied over a hidden underlayment issue can all trap water and complicate diagnosis.
Short-term leak control should reduce damage, not bury the evidence needed for a proper fix.
Deciding Between DIY Repair and Professional Service
A common homeowner mistake is fixing the tile they can see and missing the failure that is letting water in. On clay tile roofs, the leak often starts below the tile field, at flashing, fastener penetrations, or worn underlayment. That is the line between a manageable repair and an expensive guess.
Professional tile work costs more because the roofer is not just swapping parts. The job often includes careful tile removal, protection of adjacent pieces, inspection of the water-shedding details below, and proper reset. On older roofs, that caution matters. One rushed repair can break surrounding tiles or cover up the actual leak path.
The National Park Service makes the same point in Preservation Brief 30 on clay tile roofs. Fragile clay, unusual profiles, and mortar-set details call for experience, especially on historic or aging roofs.
When DIY still makes sense
DIY repair can be reasonable under a narrow set of conditions:
- The problem is isolated: One cracked or slipped tile, with no signs that water has traveled beyond that spot.
- Access is controlled and low risk: Low slope, stable ladder setup, safe weather, and no need to cross large sections of tile.
- You have the right replacement tile: Same profile, size, and fit, not just a close color match.
- The repair stops at the tile layer: No evidence of flashing failure, soft decking, widespread moisture, or deteriorated underlayment.
If you cannot verify those points, you are not deciding between DIY and a contractor. You are deciding whether to diagnose blind.
When professional repair is the smarter investment
Hire a pro when the source of the leak is uncertain, the roof is steep, the tiles are brittle, or the repair may extend below the exposed tile. That is especially true if staining appears far from the broken tile, if leaks return after a patch, or if the roof has valleys, chimneys, skylights, or mortar-bedded details nearby.
Those are not cosmetic repairs. They are water-management repairs.
An experienced tile roofer knows how to lift and reset surrounding tiles without creating new breaks, how to check whether the underlayment has failed, and how to repair flashing details without trapping water. That skill takes training. If you want a sense of the hands-on work involved, this overview of a career as a roofing technician gives useful context.
DIY vs Professional Clay Tile Repair
| Factor | DIY Approach | Professional Service |
|---|---|---|
| Roof access | Depends on your ladder setup, balance, and comfort on the roof | Uses planned access methods and fall protection |
| Tile removal | Higher chance of cracking adjacent tiles | Better control during removal and reset |
| Leak diagnosis | Often limited to the visible broken area | Checks tile, flashing, and the concealed water barrier together |
| Repair scope | Works best for a single known defect | Better for uncertain leaks or repairs extending below the tile |
| Matching older tiles | Can be difficult to identify and fit correctly | Better chance of matching profile and installation method |
| Underlayment problems | Easy to miss until leaks continue | More likely to be found once tiles are lifted |
| Historic or specialty roofs | High risk for homeowner trial and error | Better suited to crews familiar with tile systems |
| Cost risk | Lower upfront spend, higher chance of repeated repair | Higher upfront cost, lower chance of treating the wrong problem |
The decision is less about confidence and more about consequences. If a mistake means replacing one tile, DIY may be reasonable. If a mistake means broken surrounding tiles, hidden water damage, or another leak after the next storm, professional service is usually the cheaper choice in the long run.
Frequently Asked Questions About Clay Tile Repair
How do I find a matching replacement tile
Start with any spare tiles left from the original installation. If you don't have extras, remove one broken piece carefully and use it to match profile, size, and color as closely as possible. Exact matching can be difficult on older roofs, which is one reason careful removal matters.
Is it safe to walk on a clay tile roof
Usually, that's where damage starts. Clay tiles can crack under point loads, especially older ones. Even if they don't break visibly, they can shift out of position. If you have to access the roof, keep movement limited and controlled.
Can I pressure wash my clay tile roof
Pressure washing can dislodge tiles, erode mortar details, and force water into places it shouldn't go. Cleaning methods need to protect the roof's water-shedding setup, not just improve appearance.
If one tile is cracked, should I assume the whole roof is failing
No. A single broken tile may be isolated. The key is checking whether the leak is local or whether the issue involves flashing or the concealed water barrier below the tile field.
If you're dealing with an active leak, broken clay tiles, or a roof that needs a closer inspection, Penn Ohio Roofing & Siding Group handles residential and commercial roofing work, including tile roof service. A proper assessment can help determine whether you need a targeted clay tile roof repair or a broader fix involving flashing or underlayment.