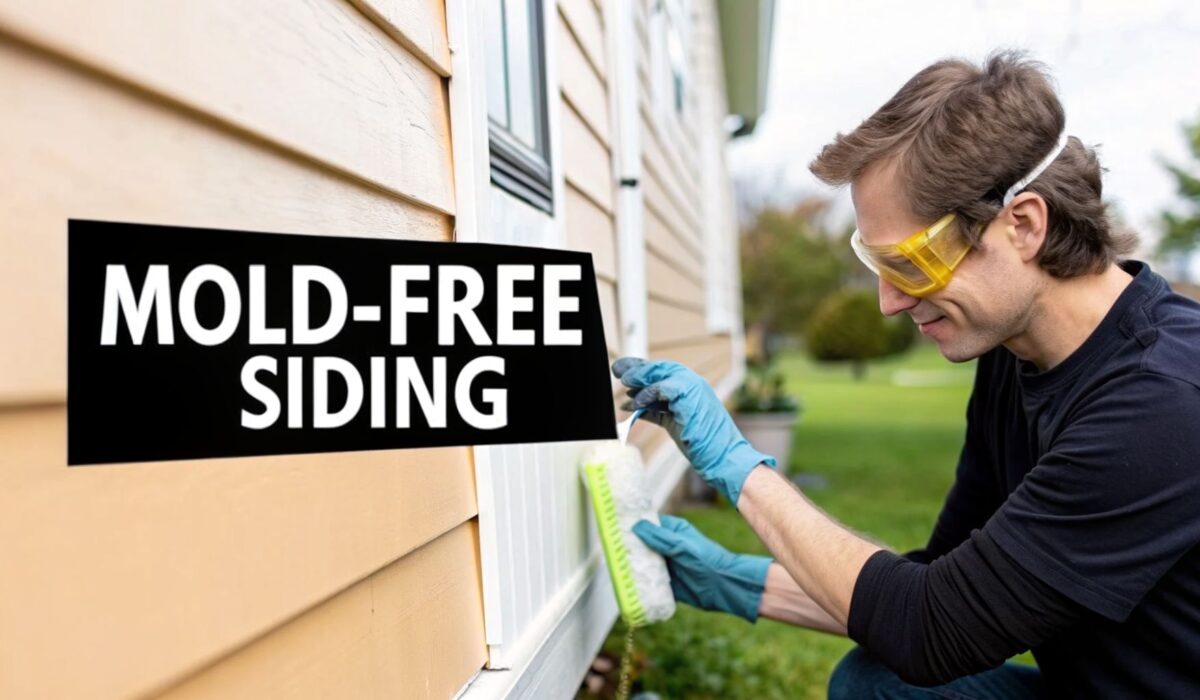
To get rid of the mold on your siding for good, you need to know exactly what you’re up against. Is it actually mold, or is it mildew, algae, or just plain old dirt? Figuring that out first makes all the difference. Most of the time, a simple homemade cleaning solution and some elbow grease will do the trick, but the real secret is tackling the moisture that’s causing it in the first place.
What Is That Green and Black Stuff on My Siding?
Before you even think about mixing up a cleaner or grabbing a brush, take a closer look at what's actually growing on your house. That unsightly green, black, or sometimes even whitish gunk isn't all the same. Getting the diagnosis right from the start is the key to cleaning it effectively without wasting your time or accidentally damaging your siding.
The usual suspects are mold, mildew, and algae. They all love damp, shady spots, but they look and act differently. Knowing which one you have helps you pick the right tools and cleaning mix for the job.
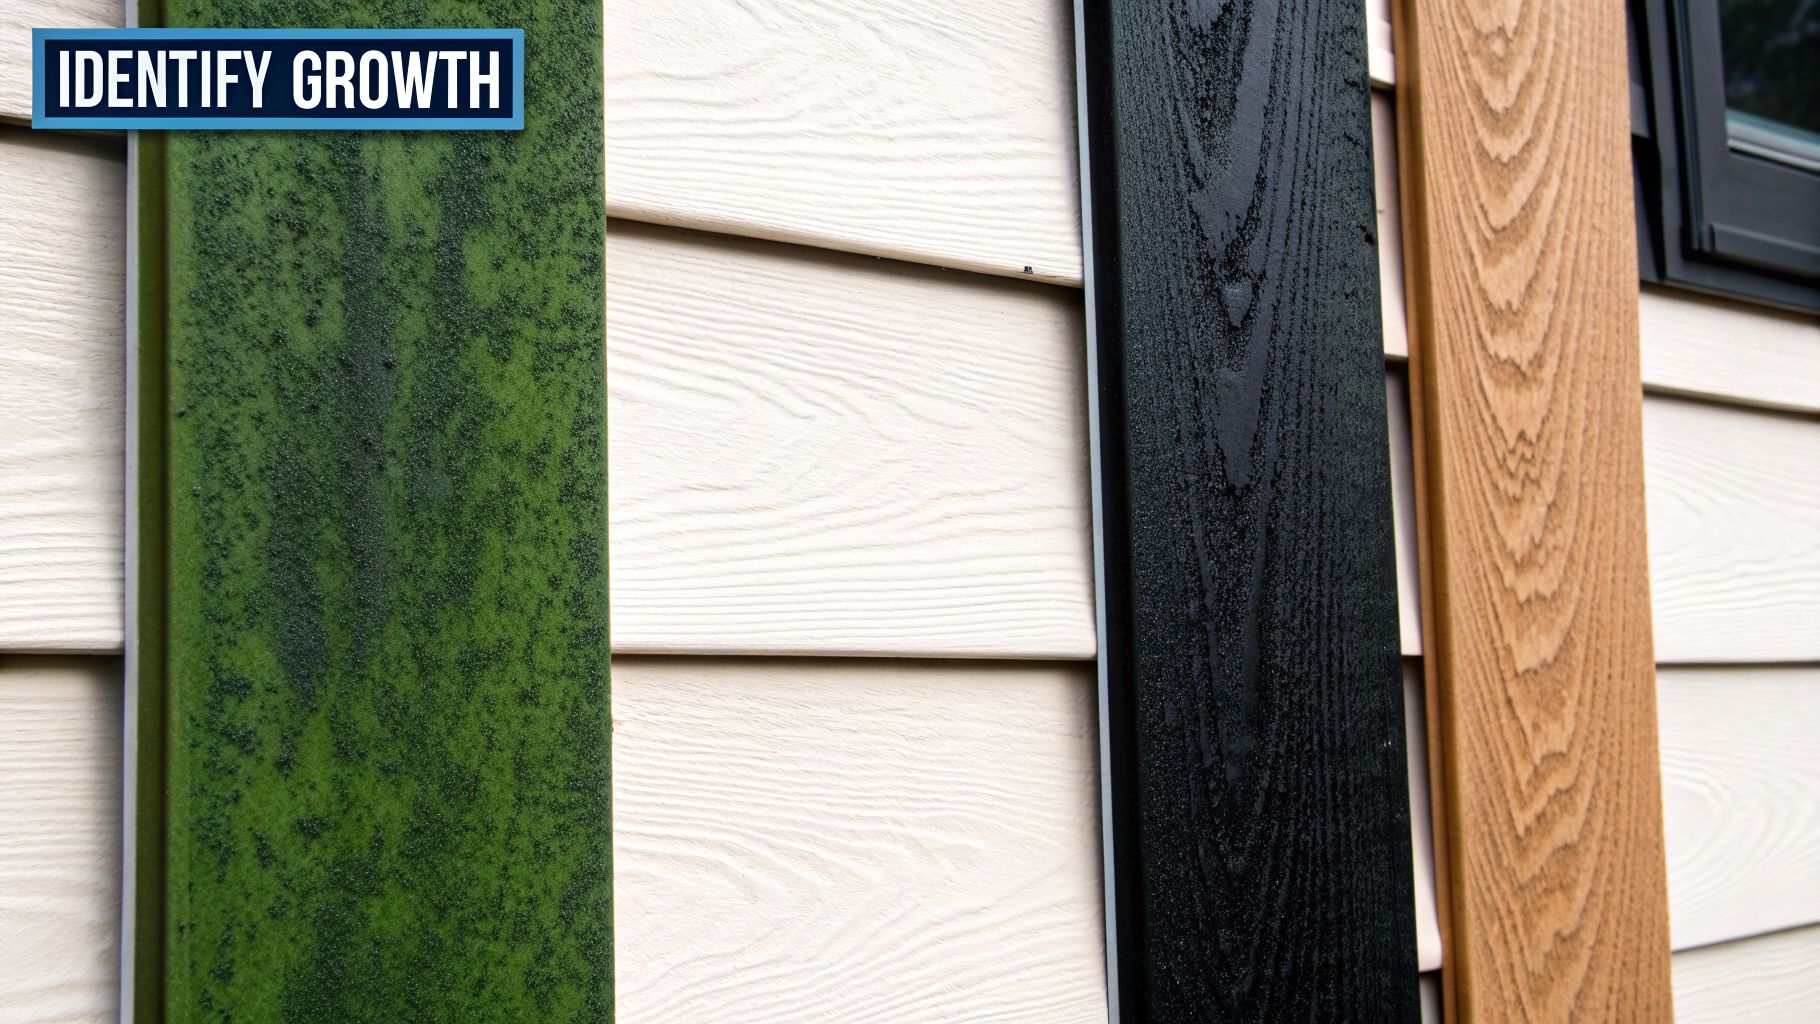
Identifying the Growth
Let’s get a closer look and figure out what’s what. This quick visual check will set the stage for your whole project.
Mold: This is the one you really want to pay attention to. It often shows up as slimy or even fuzzy patches that can be black, green, or brown. Mold can work its way into the siding material, sometimes leaving stains behind. Black mold, in particular, tends to form distinct, ugly splotches.
Mildew: Think of mildew as mold’s less aggressive cousin. It’s a surface-level fungus that looks powdery or downy, usually in shades of white, gray, or yellow. Because it lies flat on the siding, it’s typically much easier to scrub away.
Algae: If you see a green or dark film that looks almost like a thin coat of paint, you’re probably looking at algae. Unlike the spotty appearance of mold, algae tends to spread out in a more uniform layer, especially on the side of your house that rarely sees the sun.
Here’s a quick tip I use in the field: mix a little household bleach with water and dab it on a small, hidden spot. If the stain fades or vanishes in a couple of minutes, you’ve got mildew. If it doesn’t change, it’s more likely algae or just stubborn dirt.
Understanding the Root Cause
Just scrubbing the gunk off is only a temporary fix. If you don't solve the underlying problem, it’ll be back before you know it. The number one culprit is always the same: persistent moisture. When your siding stays wet, it becomes the perfect breeding ground for mold and algae.
So where is all this moisture coming from? It’s usually one of these things:
- Constant Shade: The north side of a house or walls shaded by big trees get very little sun to dry them out.
- High Humidity: If you live in a humid climate, you're already fighting an uphill battle.
- Poor Airflow: Overgrown shrubs and plants packed tightly against the house trap moisture against the siding.
- Water Sources: Things like leaky gutters, sprinklers hitting the house, or a dripping outdoor faucet create a constant source of dampness.
By figuring out both what's growing and why it’s there, you’re setting yourself up for success. This isn't just about how to clean the mold on your siding—it’s about keeping it clean for the long haul.
Getting Your Gear Together for the Job
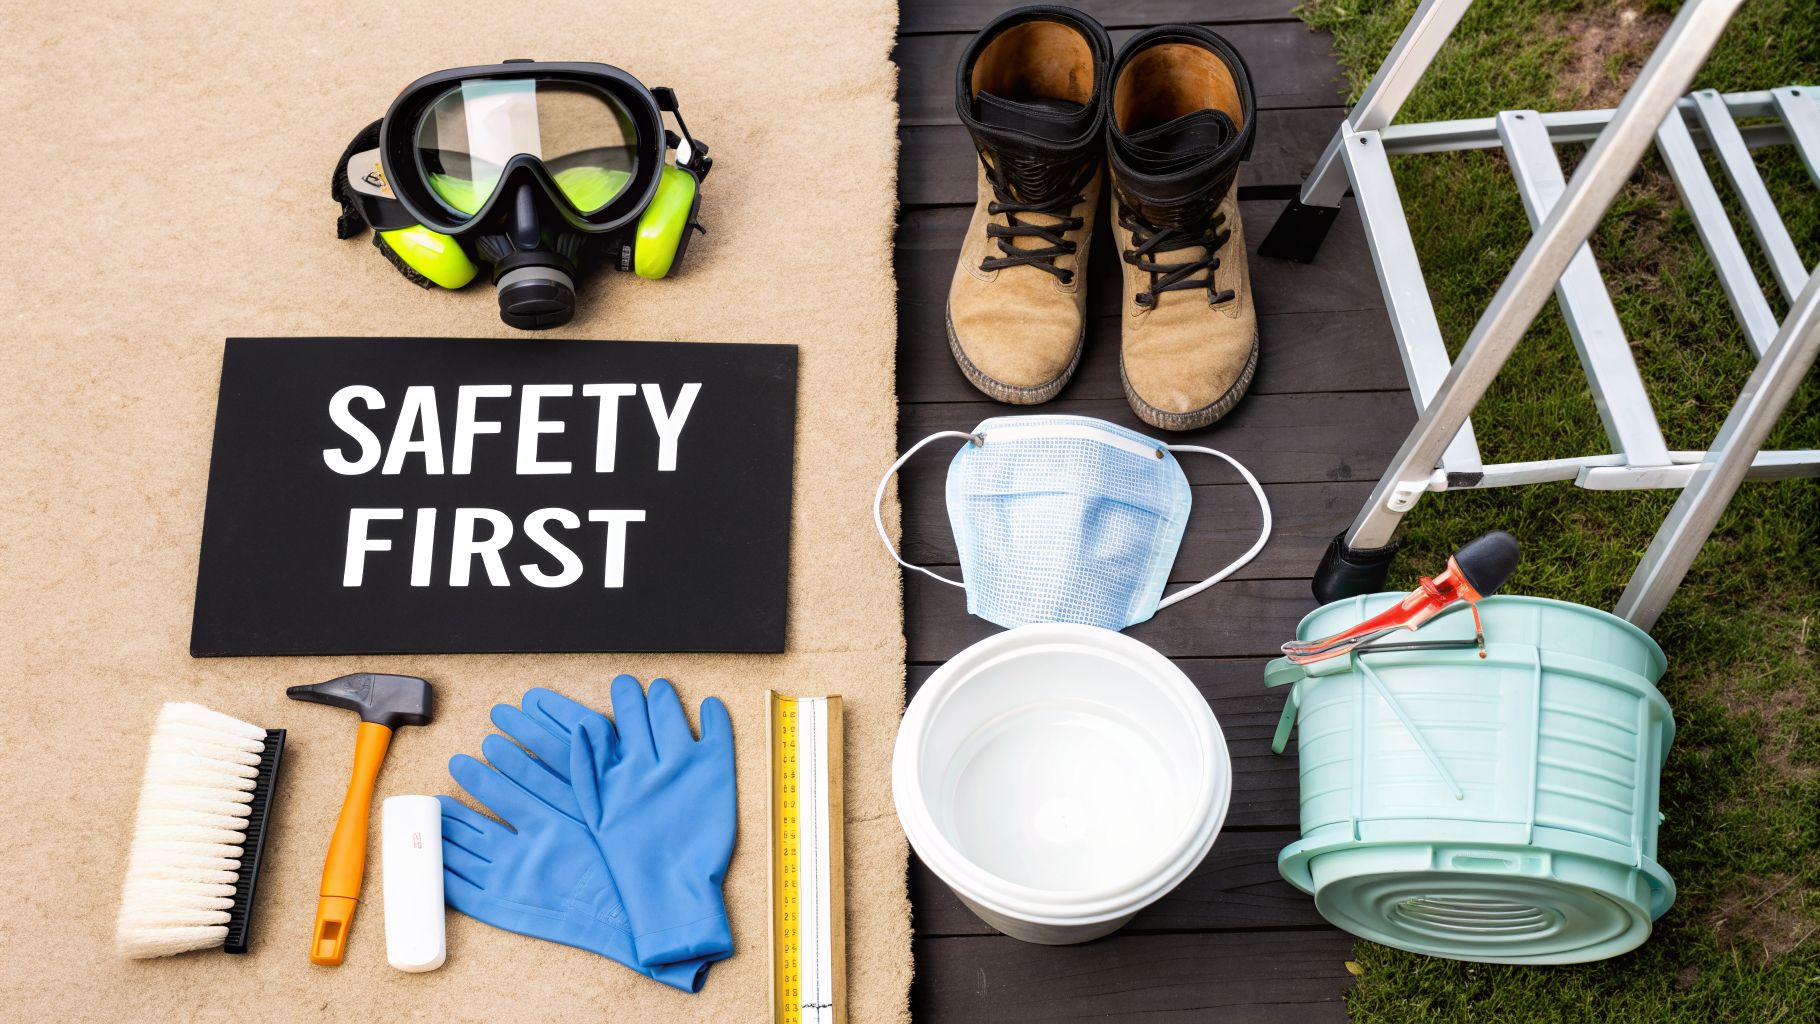
Before you even think about mixing up a cleaning solution to clean mold on siding, let's talk about gear. Getting this right isn't just about making the job go smoothly; it’s about keeping you safe. You’ll be dealing with mold spores and chemicals, and you don’t want either of them on your skin or in your lungs.
Seriously, don’t skip the safety prep. Your health comes first.
- Respirator Mask: A simple dust mask won’t do. You need an N95 respirator to properly filter out microscopic mold spores.
- Safety Goggles: Eye protection is a must to guard against chemical splashes and airborne debris.
- Waterproof Gloves: A heavy-duty pair of rubber or nitrile gloves will keep cleaning solutions from irritating your skin.
- Non-Slip Boots: You’ll be working on wet, potentially slick surfaces. Good traction is critical to prevent a fall.
This isn’t just being overly cautious. In the U.S., out of 21.8 million people with asthma, a staggering 4.6 million cases—that's over 21%—are attributed to dampness and mold in the home. It often starts right on the exterior siding.
Your Cleaning Tools and Equipment
Once you’re properly geared up, it’s time to gather your cleaning tools. The good news is you probably don't need a lot of expensive, specialized equipment.
For lighter patches of mildew, a standard garden hose with a decent spray nozzle might be all you need, especially on vinyl or aluminum siding. If you're facing more stubborn, set-in growth, a pressure washer can be your best friend—but you have to handle it with care. Keep it on a low-pressure setting (under 1,600 PSI) and use a wide-angle 25- or 40-degree nozzle. Anything more powerful risks blasting water behind your siding or damaging it.
A critical pro tip: Always spray at a downward angle. Never aim the water stream upward under the lip of the siding. This can force moisture behind the panels and create a brand-new, hidden mold problem inside your walls.
Brushes and Other Essentials
The final items in your kit are what you'll use for the actual scrubbing and cleanup. The brush you choose is important, as you want something that will scrub effectively without scratching or marring your siding’s finish.
Choosing the Right Brush
- Soft-Bristle Brush: This is your safest bet for most siding, particularly vinyl. A long-handled brush, like one you'd use for washing a car, is perfect.
- Medium-Bristle Brush: For more durable siding materials like fiber cement or wood, a slightly firmer brush can give you the extra scrubbing power you need to lift away grime.
You’ll also want to grab two buckets (one for your cleaning mix, one for clean rinse water), a sturdy ladder for any high spots, and some plastic sheeting to cover up nearby plants and protect your landscaping from any chemical runoff. If you're wondering which cleaners work best, this guide on vinyl siding cleaning products offers some great advice.
Choosing the Right Cleaning Solution for Your Siding
The cleaning solution you pick is going to do most of the heavy lifting when you clean mold on siding. Honestly, the right choice comes down to what's actually growing on your house and the type of siding you have. A light, hazy green film might just need a gentle touch, but those stubborn, deep-seated black spots are going to require something with a bit more muscle.
Let’s walk through the options, from simple homemade recipes I’ve used for years to powerful commercial products, so you can match the solution to the problem.
DIY Cleaning Solutions
For a lot of homes, a simple, affordable DIY mix is more than enough to get the siding looking new again. I usually recommend starting with one of these two recipes.
For Light Mildew and Algae (Vinegar-Based): If you're just starting to see a bit of green or some light spotting, plain white vinegar is a fantastic, non-toxic starting point. Its natural acidity kills mold and mildew spores without posing a threat to your siding or the garden beds below.
- Recipe: Just mix one part white vinegar with four parts water in a standard garden sprayer. I like to add a small squirt of gentle dish soap to help the solution cling to the siding a little better.
For Stubborn Mold and Stains (Oxygen Bleach): When vinegar doesn’t cut it, oxygen bleach is the next tool in the arsenal. It’s a much stronger cleaner that annihilates mold and brightens the siding, but it does so without the harsh, damaging effects of traditional chlorine bleach.
- Recipe: Mix one cup of powdered oxygen bleach (OxiClean is a popular brand) into one gallon of warm water. Make sure you stir it until all the powder is completely dissolved before you start spraying.
A Quick Word on Chlorine Bleach: I get asked about this all the time. While it's a powerful disinfectant, household chlorine bleach can be a disaster for siding. It can cause permanent discoloration on vinyl and aluminum, corrode the metal screws and fasteners holding everything together, and it’s highly toxic to your lawn and plants. Oxygen bleach is a far safer bet for your property.
Siding Cleaning Solution Comparison
Choosing between a homemade mix and a store-bought cleaner can be tricky. This table breaks down the most common options to help you decide what's best for your situation.
| Solution Type | Best For | Siding Compatibility | Safety/Environmental Impact |
|---|---|---|---|
| Vinegar & Water | Light mildew, algae, early-stage growth | Excellent for vinyl, wood, fiber cement, aluminum | Non-toxic, biodegradable, safe for plants and pets |
| Oxygen Bleach | Moderate to heavy mold, stubborn stains | Good for most siding, but test on a small spot first | Plant-safe, biodegradable, much safer than chlorine bleach |
| Commercial Cleaners | Targeted removal of heavy mold and algae | Varies by product; check label for vinyl, wood, etc. | Varies; look for biodegradable and eco-friendly formulas |
Ultimately, a simple vinegar solution is perfect for routine maintenance, while oxygen bleach and commercial cleaners offer the power needed for more significant mold problems.
Commercial Siding Cleaners
If you'd rather grab a ready-to-use product, there are plenty of great commercial siding cleaners out there. Many of these are formulated specifically to clean mold on siding and come in convenient bottles that attach right to your garden hose, which makes application a breeze.
When you're at the hardware store, read the labels carefully. You're looking for a few key things:
- Siding-Safe: The bottle must say it’s approved for your specific siding material, whether that’s vinyl, wood, fiber cement, or something else.
- Eco-Friendly: I always recommend choosing a biodegradable formula. There's no reason to risk harming your lawn or local waterways.
- Mold-Specific: Look for a product that explicitly lists mold, mildew, or algae removal as its main job.
Interestingly, you can sometimes find great cleaning insights in unexpected places. For example, learning about the best mildew remover for your boat can offer some powerful tips, since marine-grade cleaners are designed to fight mold in harsh, wet environments. And if you’re working with metal, our guide on how to clean aluminum siding has some very specific advice you’ll want to see.
How to Wash Your Siding for a Streak-Free Finish
Alright, you've mixed your cleaning solution and have your safety gear on. Now comes the satisfying part—actually getting that green or black gunk off your house. This is where you see the real transformation, but your technique matters just as much as the cleaner you chose. A little bit of strategy is what separates a DIY job from a professional-looking one.
First things first, let's do some prep. Take a few minutes to cover your prized rose bushes, patio furniture, and any sensitive garden beds with plastic sheeting. It’s also a smart move to tape some plastic over your exterior electrical outlets, light fixtures, and vents. You don’t want water getting in where it doesn't belong.
The Pro Method for Application and Rinsing
The key to avoiding those ugly, tell-tale streaks is to work in manageable sections, maybe about 10 feet at a time. This keeps your cleaning solution from drying on the siding before you have a chance to rinse it off, which is the number one cause of a splotchy finish.
You’ll want to follow a specific method that might seem backward at first, but trust me, it’s how the pros do it.
Apply Bottom-to-Top: Start spraying your cleaning solution at the bottom of your working section and move upward. This prevents the cleaner from running down over the dry, dirty siding and creating clean streaks before you've even started.
Rinse Top-to-Down: Let the solution sit and work its magic for about 5-10 minutes—but don't let it dry! Then, using fresh water, rinse thoroughly from the top of the section downwards. This lets gravity help you wash all the grime and soap away cleanly.
If you're looking for a few more professional pointers, this expert guide on how to remove mold from siding is a great resource. It’s no surprise this is a common problem; some estimates suggest that as many as 45 million buildings across the U.S. have unhealthy mold levels, often lurking where moisture gets trapped on exteriors.
Using a Pressure Washer Without Wrecking Your Siding
A pressure washer can make this job a lot faster, but it can also tear up your siding if you’re not careful. Remember, the goal is to let the cleaner do the heavy lifting, not blast the mold off with pure force.
Stick to these settings to stay safe:
- Pressure: Keep it low, somewhere between 1,300 and 1,600 PSI.
- Nozzle: Use a wide-angle tip—either a 25-degree (green) or 40-degree (white) nozzle is perfect.
- Distance: Hold the nozzle tip at least 12-18 inches away from the siding.
- Angle: Always spray directly at the siding or at a slightly downward angle.
A critical mistake is aiming the spray upward. This can force water up and behind your siding panels, soaking the wall sheathing underneath. You won't see the damage, but that trapped moisture can lead to a much bigger mold and rot problem inside your walls.
If you hit a stubborn spot, resist the urge to crank up the pressure or get closer. The safer and more effective approach is to grab a soft-bristled brush on a long handle and give it a gentle scrub. For more on matching the right cleaner to your siding material, our guide on cleaning solutions for vinyl siding has some great specific advice.
This graphic breaks down how to pick the right cleaner for the job, from light mildew to more serious mold.

As you can see, a simple homemade solution is often all you need for minor spots. But for more established growth, a stronger approach might be necessary. Following these steps won't just leave your home looking fantastic—it will also help protect its exterior from future damage.
You’ve just put in the work to get your siding looking brand new, and the last thing you want is to see those ugly green or black specks creeping back in a few months. The real win isn't just cleaning the mold; it's making sure it stays gone for good.
Thankfully, prevention is much easier than scrubbing. It all boils down to one thing: moisture. Mold simply can't survive without it, so your entire strategy should focus on keeping your siding as dry as possible.
Your first line of defense is actually your own backyard. Take a look at the plants and trees near your house. Are they touching the siding? Overgrown shrubs and low-hanging branches create a humid, shady pocket of air right against your walls—a perfect breeding ground for mold.
Give your house some breathing room. Trim back all foliage so there’s at least 12-18 inches of clearance. This simple step allows air to circulate and sunlight to bake away any lingering dampness after it rains.
Control the Water, Control the Mold
Beyond your garden, your home's water management systems are the next major factor. I've seen countless cases where a simple, overlooked issue was the root cause of a persistent mold problem.
- Check your sprinklers. Are they watering your siding as much as your lawn? Adjust those heads so they’re aimed at the grass and garden beds, not the house.
- Clean your gutters. This is a big one. Clogged gutters overflow, sending a waterfall down your siding every time it rains. Clean them twice a year, especially after the leaves fall.
- Fix your drainage. The ground around your foundation should gently slope away from the house. If it doesn't, water will pool right at the base of your walls, creating a constant source of moisture.
Here's a pro tip: After the next big rainstorm, take a quick walk around your house. See where the water is running, dripping, and pooling. You'll spot problem areas you’d never notice on a sunny day.
Stay Vigilant and Think Long-Term
Once you've got the surrounding environment in check, get into the habit of a quick visual inspection. A couple of times a year, just walk the perimeter and look for any new cracks, chips, or gaps where water might get in. Catching these small issues early is key.
If you're tired of the maintenance cycle and thinking about a more permanent fix, upgrading your siding is a fantastic option. There’s a reason the global siding market hit USD 126.25 billion in 2023—homeowners want materials that last.
Modern options like fiber cement, which now commands over 15.1% of the market, are specifically designed to resist moisture, rot, and mold. They offer a powerful, long-term defense. If you're curious, you can discover siding market insights on GrandViewResearch.com to see the trends. By taking these steps, you'll ensure your hard work to clean mold on siding pays off for years to come.
When to Call a Siding Professional
Look, I'm all for a good DIY project. Taking care of a small patch of mold on your siding can be pretty satisfying. But you’ve got to know where to draw the line, because some mold situations are waving a big red flag that something more serious is going on.
Calling in a professional isn't admitting defeat; it’s making a smart call to protect your home's value and structural integrity. It's about preventing a small, visible problem from becoming a massive, hidden headache.
Signs You’re In Over Your Head
So, how do you know it's time to put down the scrub brush and call for backup? If you spot any of these issues while you're inspecting the siding, it’s a sign that a simple cleaning won't cut it.
- The Mold is Everywhere: We're not talking about a few small, isolated spots here. If the mold or mildew covers a significant area—say, an entire side of the house or large sections that stretch up to the roofline—you're dealing with a persistent moisture problem that a professional needs to diagnose.
- It Comes Right Back: You scrubbed everything clean, it looked great for a month, and now… it’s back. When mold returns that quickly, it’s a dead giveaway that the root cause, the moisture source, was never actually fixed.
- The Siding Itself is Damaged: Get up close and really look at the siding panels. Are they warping, buckling, or feeling soft to the touch? Can you see panels pulling away from the wall? This is a major warning sign. It means moisture has likely penetrated the siding and is now damaging the wall structure underneath.
Here's something I've seen time and time again: surface mold is often just the tip of the iceberg. I can't count the number of homes where a little exterior mold was the only clue to water getting into the wall cavity, rotting out the sheathing and studs. Don't let a siding problem turn into a structural nightmare.
Why a Professional Makes the Difference
What does a pro bring to the table that you can't get from a bottle of cleaner and a ladder? It comes down to a combination of specialized tools, deep expertise, and the experience to see what's really going on.
A true professional doesn't just clean what's visible. They have the know-how to perform advanced diagnostics, figuring out if the mold is just on the surface or if it's a symptom of a bigger issue like failed flashing, compromised house wrap, or even an interior leak.
They also have the right gear for the job. Many professionals use soft washing systems, which use specific, targeted cleaning solutions at very low pressure. This technique kills mold at a biological level without blasting water behind your siding, which is a huge risk with high-pressure washers.
Finally, there’s safety and efficiency. They have the right equipment to safely work on two-story homes and can eliminate a widespread mold problem far more effectively and quickly, ensuring every last spore is dealt with. They don’t just treat the symptom; they find the cure.
If you're staring down a stubborn, widespread mold problem or you see any signs of siding damage, don't wait for it to get worse. The expert team at Penn Ohio Roofing & Siding Group has the experience to diagnose and resolve complex siding and moisture issues. Visit our website to schedule a free estimate and get the peace of mind that comes with a professional solution.