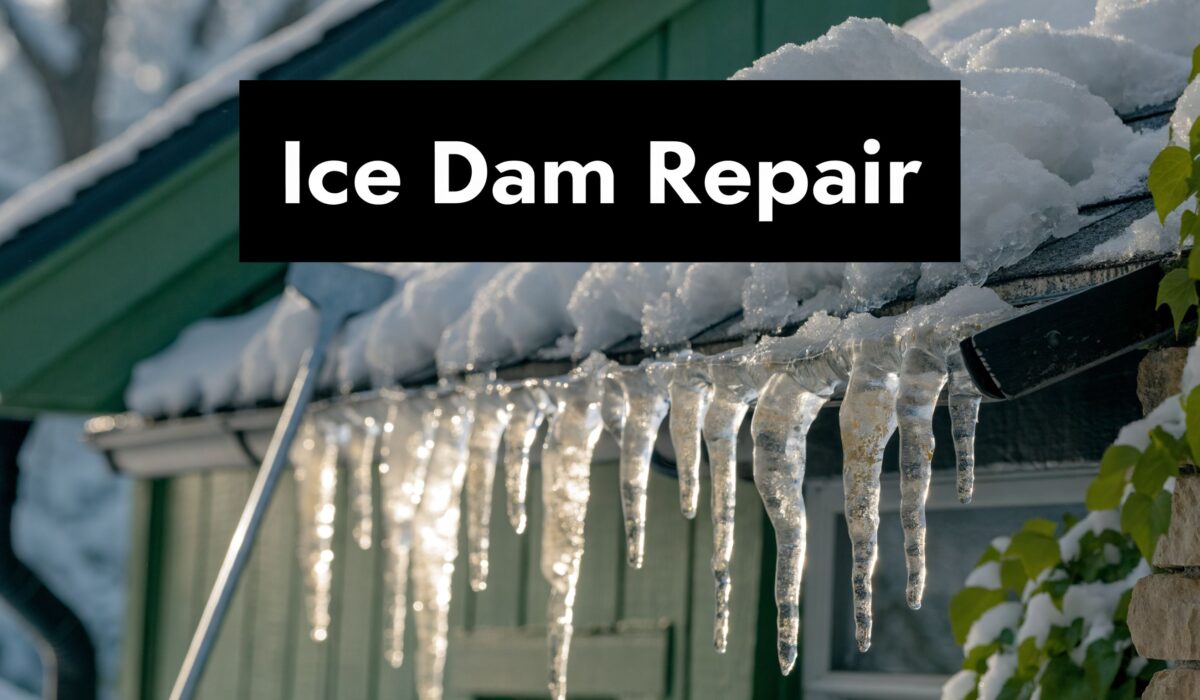
A Mercer County winter roof problem often begins subtly. Snow falls hard, the temperature bumps up just enough to soften the top layer, then the cold comes back overnight. The next morning, you see long icicles on the eaves and maybe a damp spot on a bedroom ceiling that wasn't there before.
That’s when most homeowners start searching for Ice dam roof repair Mercer County PA. They need answers fast, but they also need the right answers. Ice dams aren't just a cosmetic winter nuisance. They trap water where it shouldn’t be, push it under shingles, soak insulation, stain ceilings, and start wood rot in places you can’t easily see.
In Mercer County, that risk is tied directly to our weather. We get the kind of snow and freeze-thaw swings that let ice build fast and hold water in all the wrong places. If you deal with the visible ice and ignore the attic, ventilation, insulation, and drainage issues behind it, the problem usually comes back.
The Unwelcome Winter Guest on Your Mercer County Roof
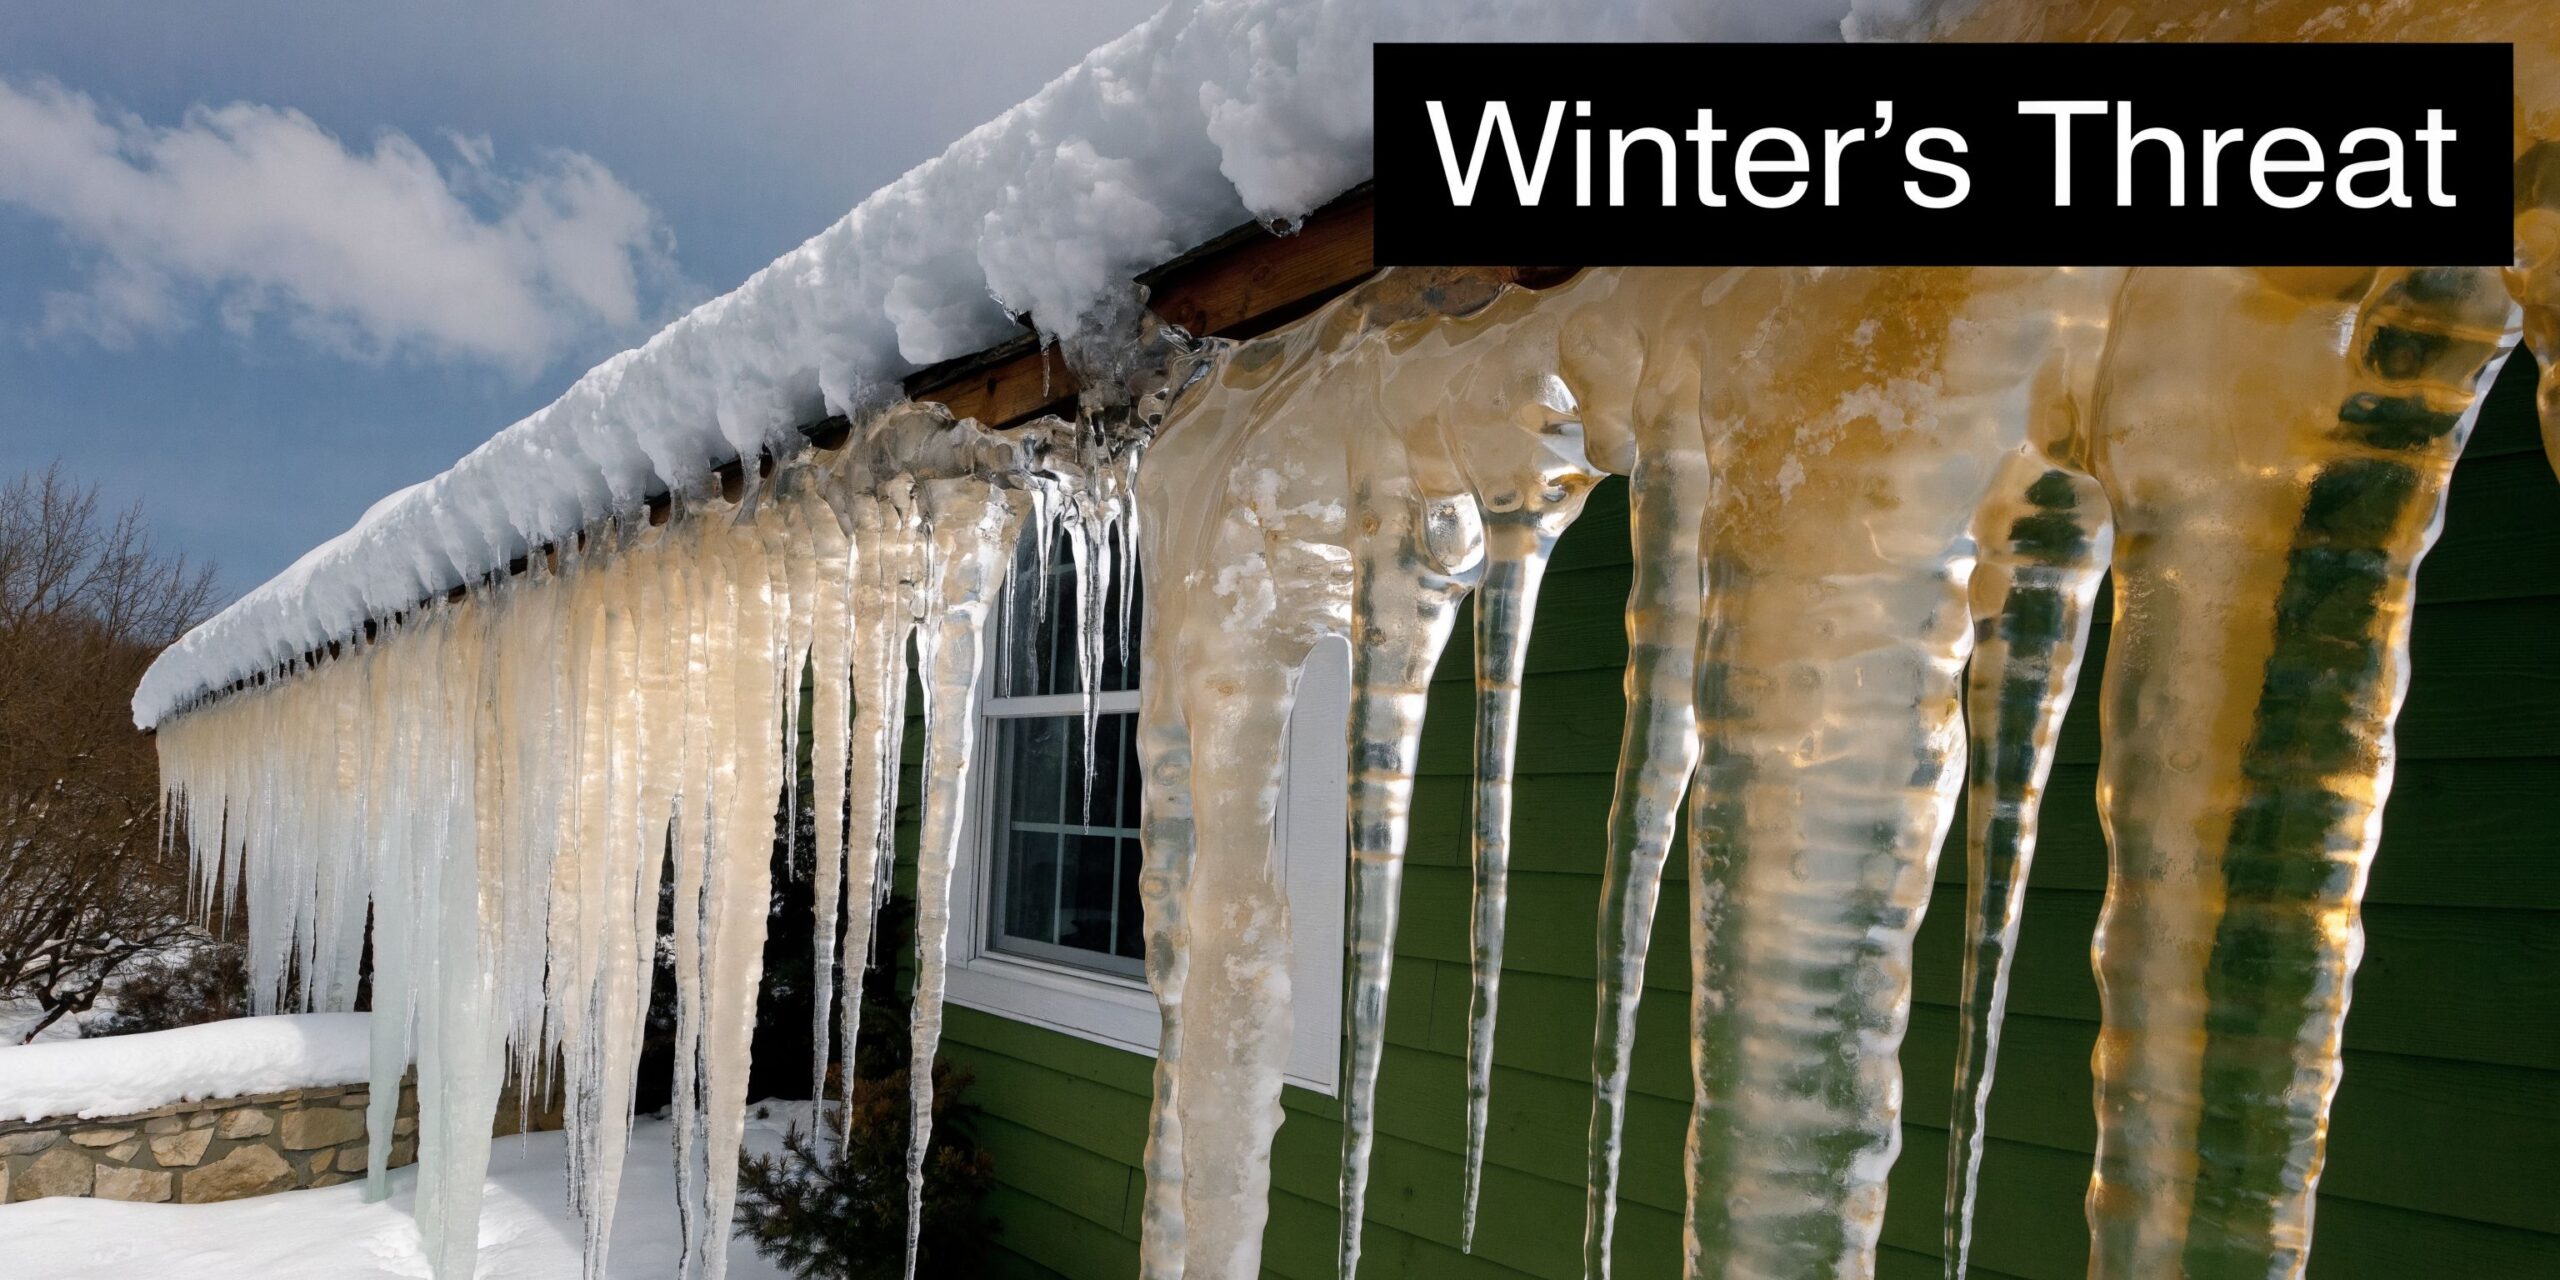
You wake up after a Mercer County storm, clear the driveway, and figure the house made it through fine. Then you notice thick icicles along the eaves, a hard band of ice at the gutter line, and a faint stain spreading across the ceiling near an outside wall. That is how ice dam season usually starts, beginning subtly and then appearing everywhere.
An ice dam forms when snow on the upper part of the roof melts, runs down toward the colder roof edge, and freezes again at the eaves. Once that ice ridge blocks drainage, the next round of meltwater has nowhere to go. It backs up under shingles, wets the roof deck, and starts showing up inside the house.
Why Mercer County gets hit hard
This area gets the exact weather pattern that feeds ice dams. We see snow cover that stays put, daytime warming that starts surface melt, and nighttime temperatures cold enough to refreeze that water at the roof edge. A single storm is not always the problem. Repeated freeze-thaw cycles are what turn a manageable roof into a leak call.
Local homeowners know the pattern well. The visible icicles get attention, but the primary issue is usually inside the roof system. Warm attic air, uneven insulation, blocked ventilation, and clogged gutters all change how snow melts and where that water refreezes. Remove the ice without fixing those conditions, and the same house often has the same trouble the next winter.
What the damage looks like in real life
Ice dams rarely stay at the gutter line. Water can travel several feet uphill under shingles before it shows itself indoors, which is why the leak stain on a bedroom ceiling does not always sit directly below the ice.
Common results include:
- Ceiling stains and wet drywall: Often near exterior walls, corners, and window headers
- Soaked insulation: Wet insulation loses R-value and makes attic heat loss worse
- Roof deck and fascia rot: Wood stays damp long after the surface dries
- Gutter and soffit damage: Heavy ice can loosen fasteners and bend metal
- Mold risk in enclosed spaces: Repeated moisture in attics and wall cavities creates the right conditions
One hard truth homeowners should know is that a newer roof can still develop ice dams. New shingles help shed water, but they do not solve attic heat loss or poor airflow by themselves.
That is why a good ice dam plan has to cover more than emergency removal. Homeowners who want to get ahead of winter should start with practical steps to prevent ice dams before the next freeze, then build a yearly schedule for attic checks, gutter cleaning, and roof inspections. It also helps to document stains, damaged insulation, and exterior ice buildup as soon as you spot them. That record can matter later if repairs turn into an insurance claim.
Diagnosing Ice Dams and Taking Safe Immediate Action
When water is already backing up, the first job is simple. Slow the damage without creating a second emergency.
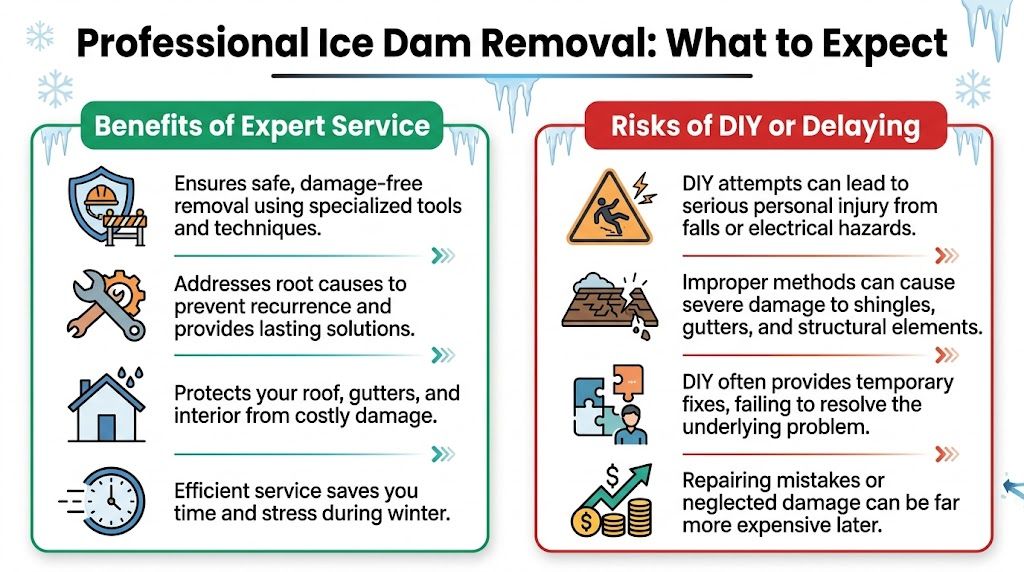
That means staying off the roof if you can, staying off ladders in icy conditions, and avoiding the old methods that destroy shingles and send people to the hospital.
What to look for before you act
Some signs are obvious. Others are easy to miss.
Check for these conditions from the ground and inside the house:
- Heavy icicles at the eaves: Especially when they form in clusters or behind the gutter line
- Ice packed in gutters: Water has nowhere to drain once the gutter freezes solid
- Interior ceiling spots: Fresh stains near exterior walls or around soffits
- Peeling paint or swollen trim: Moisture often shows up around window tops and wall edges
- Attic dampness: Wet insulation, frosty nails, or darkened roof sheathing near the lower roof edge
If you see active dripping indoors, collect the water immediately and move belongings out of the area. Small actions matter when you’re buying time.
What you can do safely from the ground
A homeowner does have a few safe options, but they’re limited.
Use a long-handled roof rake to pull down the bottom section of loose snow from the eaves. Don’t scrape to the shingles. The goal is to reduce the amount of meltwater feeding the ice ridge, not to grind the roof clean.
You can also monitor attic conditions. If you have safe access, look for obvious heat leaks around bath fans, recessed lights, plumbing penetrations, and the attic hatch. That won’t stop an existing dam today, but it will explain why it formed.
If the only way to reach the problem is by climbing onto a slick roof or leaning off a ladder over a frozen driveway, stop there.
What not to do
The fastest way to turn an ice dam into a roof repair bill is to attack it with force.
Avoid these mistakes:
- Don’t chop ice with a hammer or chisel: That breaks shingle tabs, punctures membranes, and scars flashing
- Don’t dump rock salt on the roof: It can damage roofing materials and surrounding metal components
- Don’t use a pressure washer: High pressure and winter conditions are a bad mix for shingles
- Don’t climb up with a heat gun or extension cord: Water, ice, electricity, and unstable footing don't belong together
- Don’t assume icicles alone are the problem: The backed-up water above them is the main issue
The safety side isn’t optional. An estimated 96% of snow and ice removal injuries happen to homeowners attempting DIY fixes, according to Valley Peak Roofing’s Pennsylvania ice dam prevention article.
The right short-term mindset
Think in terms of mitigation, not full removal.
A roof rake may help reduce incoming meltwater. Indoor buckets, towels, and quick attic checks may limit damage. But once the roof edge is locked up with ice, ground-based homeowner action has limits.
A simple triage sequence works best:
- Protect the interior: Catch water, move furniture, and document visible damage.
- Reduce fresh snow at the eaves: Only from the ground with the right rake.
- Check the attic if it’s safely accessible: Look for wet insulation and obvious air leaks.
- Call for professional removal if water is backing up: Especially on steep, high, or complex roofs.
A fast visual test
Use this quick comparison when you’re deciding whether it’s a watch-and-wait situation or an immediate service call.
| Condition | Likely urgency | Best next move |
|---|---|---|
| Small icicles, no indoor leak | Moderate | Monitor and rake loose snow from ground |
| Thick ice at eaves, gutter frozen solid | High | Arrange professional assessment |
| Indoor ceiling stain or dripping water | High | Protect interior and call for removal |
| Multi-story or steep roof with heavy buildup | High | Keep off ladders and leave removal to a pro |
Most homeowners don’t get in trouble because they ignored the problem. They get in trouble because they tried to solve a dangerous roof condition with the wrong tools.
The Professional Approach to Removal and Repair
A proper ice dam service call has two jobs. Open a path for trapped water to drain, then find out what the backup already damaged.
Homeowners in Mercer County get into trouble when the call ends after the visible ice comes off. The leak may slow down, but the roof edge, underlayment, decking, insulation, and interior finishes can still need attention.
What proper removal looks like
For heavy buildup at the eaves, professional crews typically use controlled steam instead of chopping at the ice with hand tools. The benefit of steam is that it targets the ice without the impact damage that can crack shingles, loosen flashing, or dent gutters.
The process should be methodical. A technician works channels through the dam, relieves the backed-up water, and clears enough ice to restore drainage without tearing up the roof system to do it. Good removal is controlled work, not brute force.
If you want to see the service process in plain terms, this page on how to remove roof ice dams gives a useful overview.
What the crew should assess after the ice is gone
Removal only answers the immediate water backup. Repair decisions come from the inspection that follows.
Once the dam is opened up, a roofer should check for:
- Shingle damage: lifted tabs, torn edges, broken seal strips
- Flashing failure: open joints at walls, chimneys, vents, and other penetrations
- Roof deck damage: staining, softness, or signs that moisture sat in the assembly
- Gutter and fascia problems: bent runs, pulled fasteners, loose sections, split wood
- Attic moisture: wet insulation, frost, mold risk, and obvious heat-loss points
Water rarely shows up directly under the entry point. It follows decking, nails, framing, and insulation before it stains a ceiling.
That is why an experienced roofer traces the leak path instead of repairing the first wet spot they see.
What works and what usually wastes time
Some approaches solve the active problem. Others just make the roof look better for a day or two.
Methods that usually work
- Controlled steam removal
- Limited snow reduction where access and roof conditions allow
- Inspection of the roof edge, flashing, attic, and drainage path
- Repairing damaged shingles, flashing, gutters, fascia, and wet materials
- Tying the repair back to the cause, usually attic heat loss, air leakage, or poor venting
Methods that often fall short
- Hammering or chiseling at the dam
- Dumping de-icer on every trouble spot and assuming the problem is handled
- Replacing a few shingles while leaving the warm-attic condition untouched
- Treating the leak as only a roofing problem when the attic assembly is part of the cause
Heat cable has a place on some homes. So does insulation work. But both need the right diagnosis first. In some houses, better air sealing and added insulation solve most of the issue. In others, you still have a drainage problem at a stubborn eave, and targeted cable is part of the answer. If the attic needs upgrades, homeowners often end up comparing options such as fiberglass, cellulose, and spray foam insulation based on cost, air sealing value, and how accessible the space is.
When removal turns into repair
Some calls stop at safe removal. Others uncover damage that should be repaired as soon as weather and roof conditions allow.
A roofer may recommend repair when the inspection finds:
| Problem found after removal | Typical response |
|---|---|
| Torn or dislodged shingles | Targeted shingle repair or replacement |
| Wet roof decking | Further evaluation and replacement of compromised wood |
| Saturated insulation | Removal of wet material and attic correction |
| Pulled gutters or fascia damage | Re-secure, replace damaged sections, then address drainage |
| Repeat leak path at same eave | Repair plus insulation, air sealing, or ventilation correction |
Penn Ohio Roofing & Siding Group handles steam-based removal and follow-up roof repair in Mercer County. That type of combined service matters when an emergency leak call exposes deeper roof-edge damage.
What a good service call should leave you with
By the end of the visit, the homeowner should know three things:
- Where the water entered
- What materials were damaged
- What needs to change before next winter
If those answers are missing, the job was only partial. Ice dam roof repair in Mercer County should address the immediate leak, the hidden damage, and the reason the same section froze up in the first place.
Building Your Defense Against Future Ice Dams
Emergency removal gets attention because the leak is happening now. Prevention is where homeowners save the roof.
That’s also the biggest information gap. Many online resources focus on removal and very little on timing. A documented gap in homeowner education is that most guidance skips the seasonal schedule for insulation and ventilation work before winter in Mercer County, as noted by Burke Home Services.
The homes that suffer repeat ice dams usually have the same pattern. Warm attic. Uneven roof temperatures. Poor drainage at the edge. Then winter exposes it again.
Start in early fall, not mid-winter
By the time you see a thick ridge of ice, your choices are limited.
The better timeline looks like this:
- Early fall: Inspect the attic for air leaks, insulation gaps, and vent blockage
- Mid-fall: Clean gutters and confirm downspouts are draining
- Late fall: Test heat cables if the home has them
- First major snowfall: Watch for uneven melt patterns and early icicle formation
- Throughout winter: Remove loose edge snow from the ground when conditions allow
That timing matters because insulation and ventilation upgrades are planning jobs. Ice removal is an emergency job.
Pillar one is air sealing and insulation
This is the root-cause fix most homes need.
Ice dams form because living-space heat escapes into the attic and warms the roof deck from below. If that heat stays where it belongs, snow on the roof melts less unevenly.
The problem areas are familiar:
- Plumbing penetrations
- Recessed light openings
- Bath fan housings
- Chimney chase gaps
- Attic access hatches
- Top plates and wiring penetrations
Air sealing closes those leakage paths. Insulation then slows heat transfer across the attic floor.
For homeowners comparing materials and upgrade options, a practical overview of spray foam insulation can help explain where foam fits into an air-sealing strategy versus where blown-in or batt insulation makes more sense.
A cold roof starts with a controlled attic. If the attic behaves like conditioned space in January, the eaves will keep freezing.
Pillar two is balanced ventilation
Ventilation gets oversimplified all the time.
It’s not enough to have a vent somewhere on the roof. The attic needs a balanced intake-and-exhaust path so outside air moves through the space and helps keep the roof deck cold and even. In many homes, that means soffit vents feeding ridge ventilation. In others, the system is blocked by insulation baffles missing at the eaves, painted-over vents, or years of debris.
Good ventilation helps prevent warm pockets that melt snow high on the roof while the eaves stay frozen.
Bad ventilation creates a patchwork roof temperature. That’s prime ice dam territory.
Pillar three is selective use of heat cables
Heat cables have a place. They also get misused.
They’re useful on:
- Roof sections with chronic freeze points
- Complex valleys and dormers
- Areas above walkways where controlled drainage matters
- Problem spots where structural changes aren’t practical right away
They’re a weak answer when someone uses them instead of correcting a badly leaking attic.
That distinction matters. Cables can create melt channels. They don’t stop the roof from being warmed from below. If the underlying attic problem remains, the cables act more like symptom control than a full solution.
Pillar four is gutter and drainage management
A roof edge that can’t drain is easier to ice up.
Gutters should be clear before winter, securely attached, and pitched to move water. If they’re already sagging, packed with debris, or repeatedly freezing at one end, they’re part of the problem.
A roof inspection should pay attention to:
| Roof-edge issue | Why it matters |
|---|---|
| Clogged gutters | Meltwater backs up faster at the eaves |
| Loose gutter sections | Ice weight can pull drainage apart |
| Poor downspout discharge | Water lingers and refreezes near the roof edge |
| Damaged fascia | Hidden moisture may already be present |
What prevention investment changes
Prevention usually feels less urgent because it happens before visible damage.
But the practical trade-off is clear. The Pennsylvania data in the verified research puts preventive attic insulation and air sealing at about $2,500 to $3,500, while the same source notes that ice dam-related interior claims average around $8,000, and total repairs can reach $25,000 or more when roof work and mold remediation are involved, according to Valley Peak Roofing’s Pennsylvania ice dam analysis.
That doesn’t mean every house needs a large attic project. It means the cheapest-looking path often isn’t the cheapest path over time.
Budgeting for Repairs and Navigating Insurance Claims
Once the immediate leak is under control, homeowners usually ask two questions.
How much is this going to cost?
Will insurance help?
Those questions belong together. A smart response to an ice dam includes repair budgeting, documentation, and a clear understanding of what your policy may or may not cover.
What the cost side usually looks like
The cost range depends on whether you’re paying for removal only, interior drying, mold work, roof repair, or prevention upgrades after the fact.
Here’s a practical comparison based on the verified Pennsylvania figures available.
| Service | Average Cost Range | Notes |
|---|---|---|
| Professional ice dam removal | Around $1,200 per incident | Emergency removal cost from the verified Pennsylvania data |
| Water damage restoration | About $3,150 on average | Can exceed $10,000 in heavier-loss situations |
| Mold remediation | About $2,250 | Severe cases can reach $30,000 |
| Attic insulation and air sealing | $2,500 to $3,500 | Prevention-focused investment noted in the verified data |
| Ice dam-related interior insurance claim | Around $8,000 average claim | Total repairs can rise to $25,000 or more when roof and mold work are included |
Those figures come from the Pennsylvania data summarized in the verified research and show why homeowners should compare reaction costs against prevention costs, not just the emergency visit charge.
Why insurance catches people off guard
Most online articles about ice dam repair barely touch insurance. That’s a real gap. Homeowners need guidance on documentation and common coverage issues, which is why this area remains underserved according to this review of the insurance guidance gap around ice damage claims.
The confusion usually comes from the fact that policies may treat different parts of the event differently. Water damage from a sudden covered event may be handled one way. Ice removal itself may be handled another way. Damage tied to neglected maintenance may lead to a dispute.
That’s why documentation has to start early.
What to document before anything changes
If it’s safe, gather evidence before cleanup removes the proof.
Use this checklist:
- Take exterior photos: Icicles, roof-edge ice, overflowing gutters, visible roof areas
- Take interior photos: Ceiling stains, peeling paint, wet drywall, damaged belongings
- Write down the timeline: When the snowfall happened, when temperatures changed, when you noticed the leak
- Keep invoices and estimates: Removal, drying, repairs, temporary mitigation
- Save communication records: Calls, emails, and claim numbers
Claim habit: Photograph the cause, the damage, and the progression. Adjusters often need all three.
If a contractor provides an inspection report, keep that with your claim file. It can help establish whether the damage appears weather-related, maintenance-related, or tied to a longer-term building issue.
How to talk with the adjuster
Keep the conversation specific and factual.
Describe what you observed. Describe when you saw it. Describe what emergency steps you took to limit further damage. Don’t guess about things you haven’t confirmed yet.
Ask direct questions such as:
- Is emergency mitigation covered?
- Is interior water damage covered?
- Is mold remediation subject to separate limitations?
- Is the ice removal itself covered or excluded?
- What documentation does the carrier want first?
If you want a plain-language overview of policy problems that often slow or block payment, this guide to common insurance claim denial reasons is useful background before you start the back-and-forth.
Homeowners who need a roof-specific walkthrough can also review the roof insurance claim process to see how documentation and inspections are usually handled on the roofing side.
Choosing the right contractor for this kind of work
Not every roofer is set up for ice dam response, winter safety, and insurance-friendly documentation.
Look for:
- Licensed and insured status: Ice dam work is a liability-heavy service
- Local winter experience: Mercer County roofs see different winter patterns than milder markets
- Clear written estimates: Removal, repair, and prevention should be separated when possible
- Damage documentation: Photos and inspection notes help both the homeowner and the claim
- Repair depth: You want someone who can address shingles, decking, roof edge details, and attic-related causes
The wrong hire usually shows up in one of two ways. Either the contractor only removes the ice and misses the rest of the problem, or they jump straight to a big recommendation without documenting what failed.
Your Year-Round Action Plan for an Ice Dam-Free Roof
The safest way to handle ice dams is to make fewer emergency decisions in bad weather.
A year-round plan gives you that advantage. You’re not waiting until water is dripping onto drywall to figure out who to call or what to inspect.
Fall jobs that prevent winter calls
Fall is when most of the useful work gets done.
Use a simple checklist:
- Clean gutters and downspouts: Water needs a clear path before freezing weather arrives
- Schedule a roof and attic inspection: Look for ventilation issues, damaged shingles, and heat-loss paths
- Seal obvious attic air leaks: Hatches, penetrations, and fixtures matter
- Check insulation coverage: Thin spots over eaves and top plates are common trouble areas
- Test heat cables if you have them: Don’t wait for the first storm to learn they failed
If your home has had even one ice dam event, don’t skip the attic review. Roof symptoms often start inside the thermal envelope.
Winter habits that reduce damage
Winter isn’t the season for big upgrades. It’s the season for observation and quick, safe response.
Pay attention to:
- Icicle patterns: Long, repeated buildup in the same spots usually points to a repeat issue
- Indoor ceiling changes: Fresh stains, damp paint, and musty odors need quick attention
- Snow load at the eaves: Use a roof rake from the ground when conditions are safe
- Emergency contact readiness: Know who handles removal before you need them
Don’t wait for a ceiling drip to confirm there’s a problem. The roof edge usually tells the story first.
Spring follow-up that protects next winter
After the thaw, inspect what winter left behind.
Focus on:
| Season | Priority task | Reason |
|---|---|---|
| Spring | Inspect shingles and flashing | Ice movement may have lifted or torn components |
| Spring | Check attic for wet insulation | Hidden moisture can linger after the roof dries |
| Spring | Review gutter alignment | Heavy ice may have shifted sections or loosened fasteners |
| Spring | Plan any insulation or ventilation work | Off-season scheduling is easier than winter emergency scheduling |
That spring check is where many repeat problems get caught. A homeowner sees that the leak stopped and assumes the issue is over. Meanwhile, wet insulation stays in place, fascia remains damp, or the same roof edge is set up to freeze again next year.
Summer is for correction, not waiting
If the house needs attic work, ventilation changes, roof-edge repair, or gutter adjustments, summer is when those projects are easiest to schedule and complete.
That gives you time to go into the next winter with a roof system that’s ready, not patched.
A strong plan for Ice dam roof repair Mercer County PA always comes back to the same sequence. Handle the active leak safely. Repair what the water damaged. Then fix the roof and attic conditions that created the dam in the first place.
If your home has recurring icicles, interior staining, or roof-edge ice buildup, contact Penn Ohio Roofing & Siding Group for a free, no-obligation prevention assessment. A proper inspection can identify whether the problem is coming from attic heat loss, ventilation imbalance, drainage issues, existing roof damage, or a combination of all four.