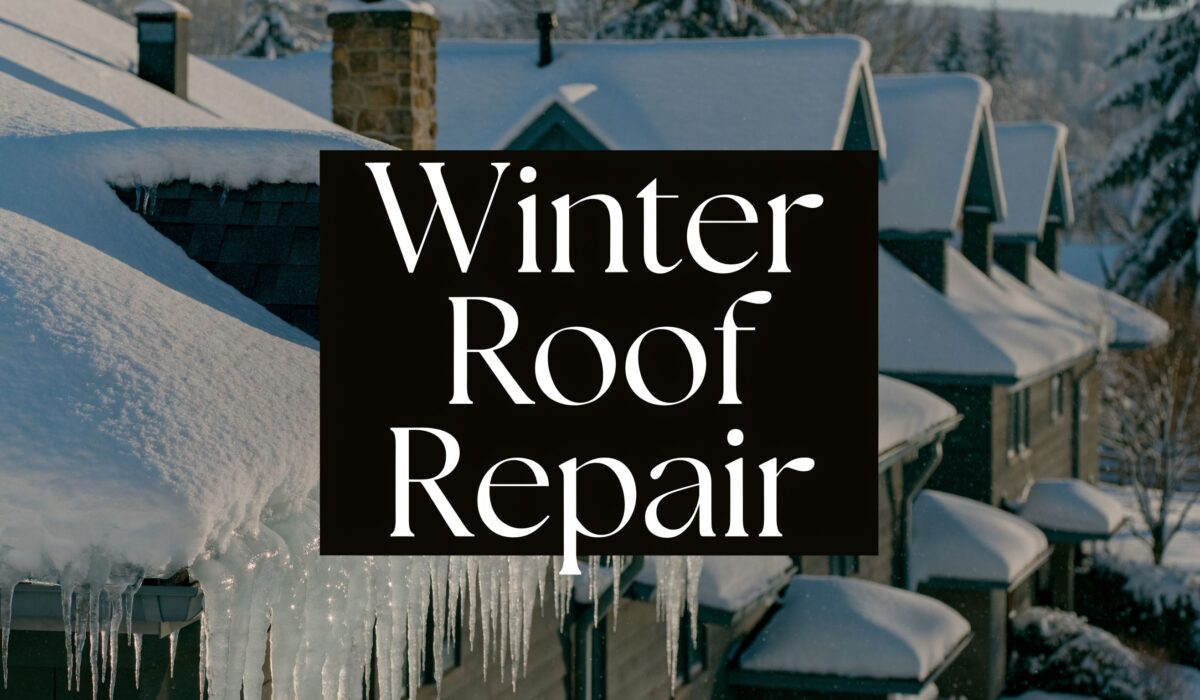
You usually notice winter roof trouble in Northwestern Pennsylvania at the worst time. A brown ceiling stain shows up after a hard freeze. Snow starts melting near one eave but stays packed on the rest of the roof. A gutter turns into a solid ridge of ice, and then water appears where it shouldn’t.
That’s how winter roof repair Northwestern Pennsylvania jobs often begin. Not with dramatic storm damage you can see from the street, but with small warning signs that mean water is finding a path in.
Cold-weather roof work is different from spring or summer repair. Materials react differently. Ice hides damage. Metal panels move as temperatures swing. Insurance claims get harder when the source of the leak isn’t obvious. The right response depends on knowing what winter is doing to the roof system, not just the shingles you can see.
Recognizing Winter Roof Threats in Northwestern Pennsylvania
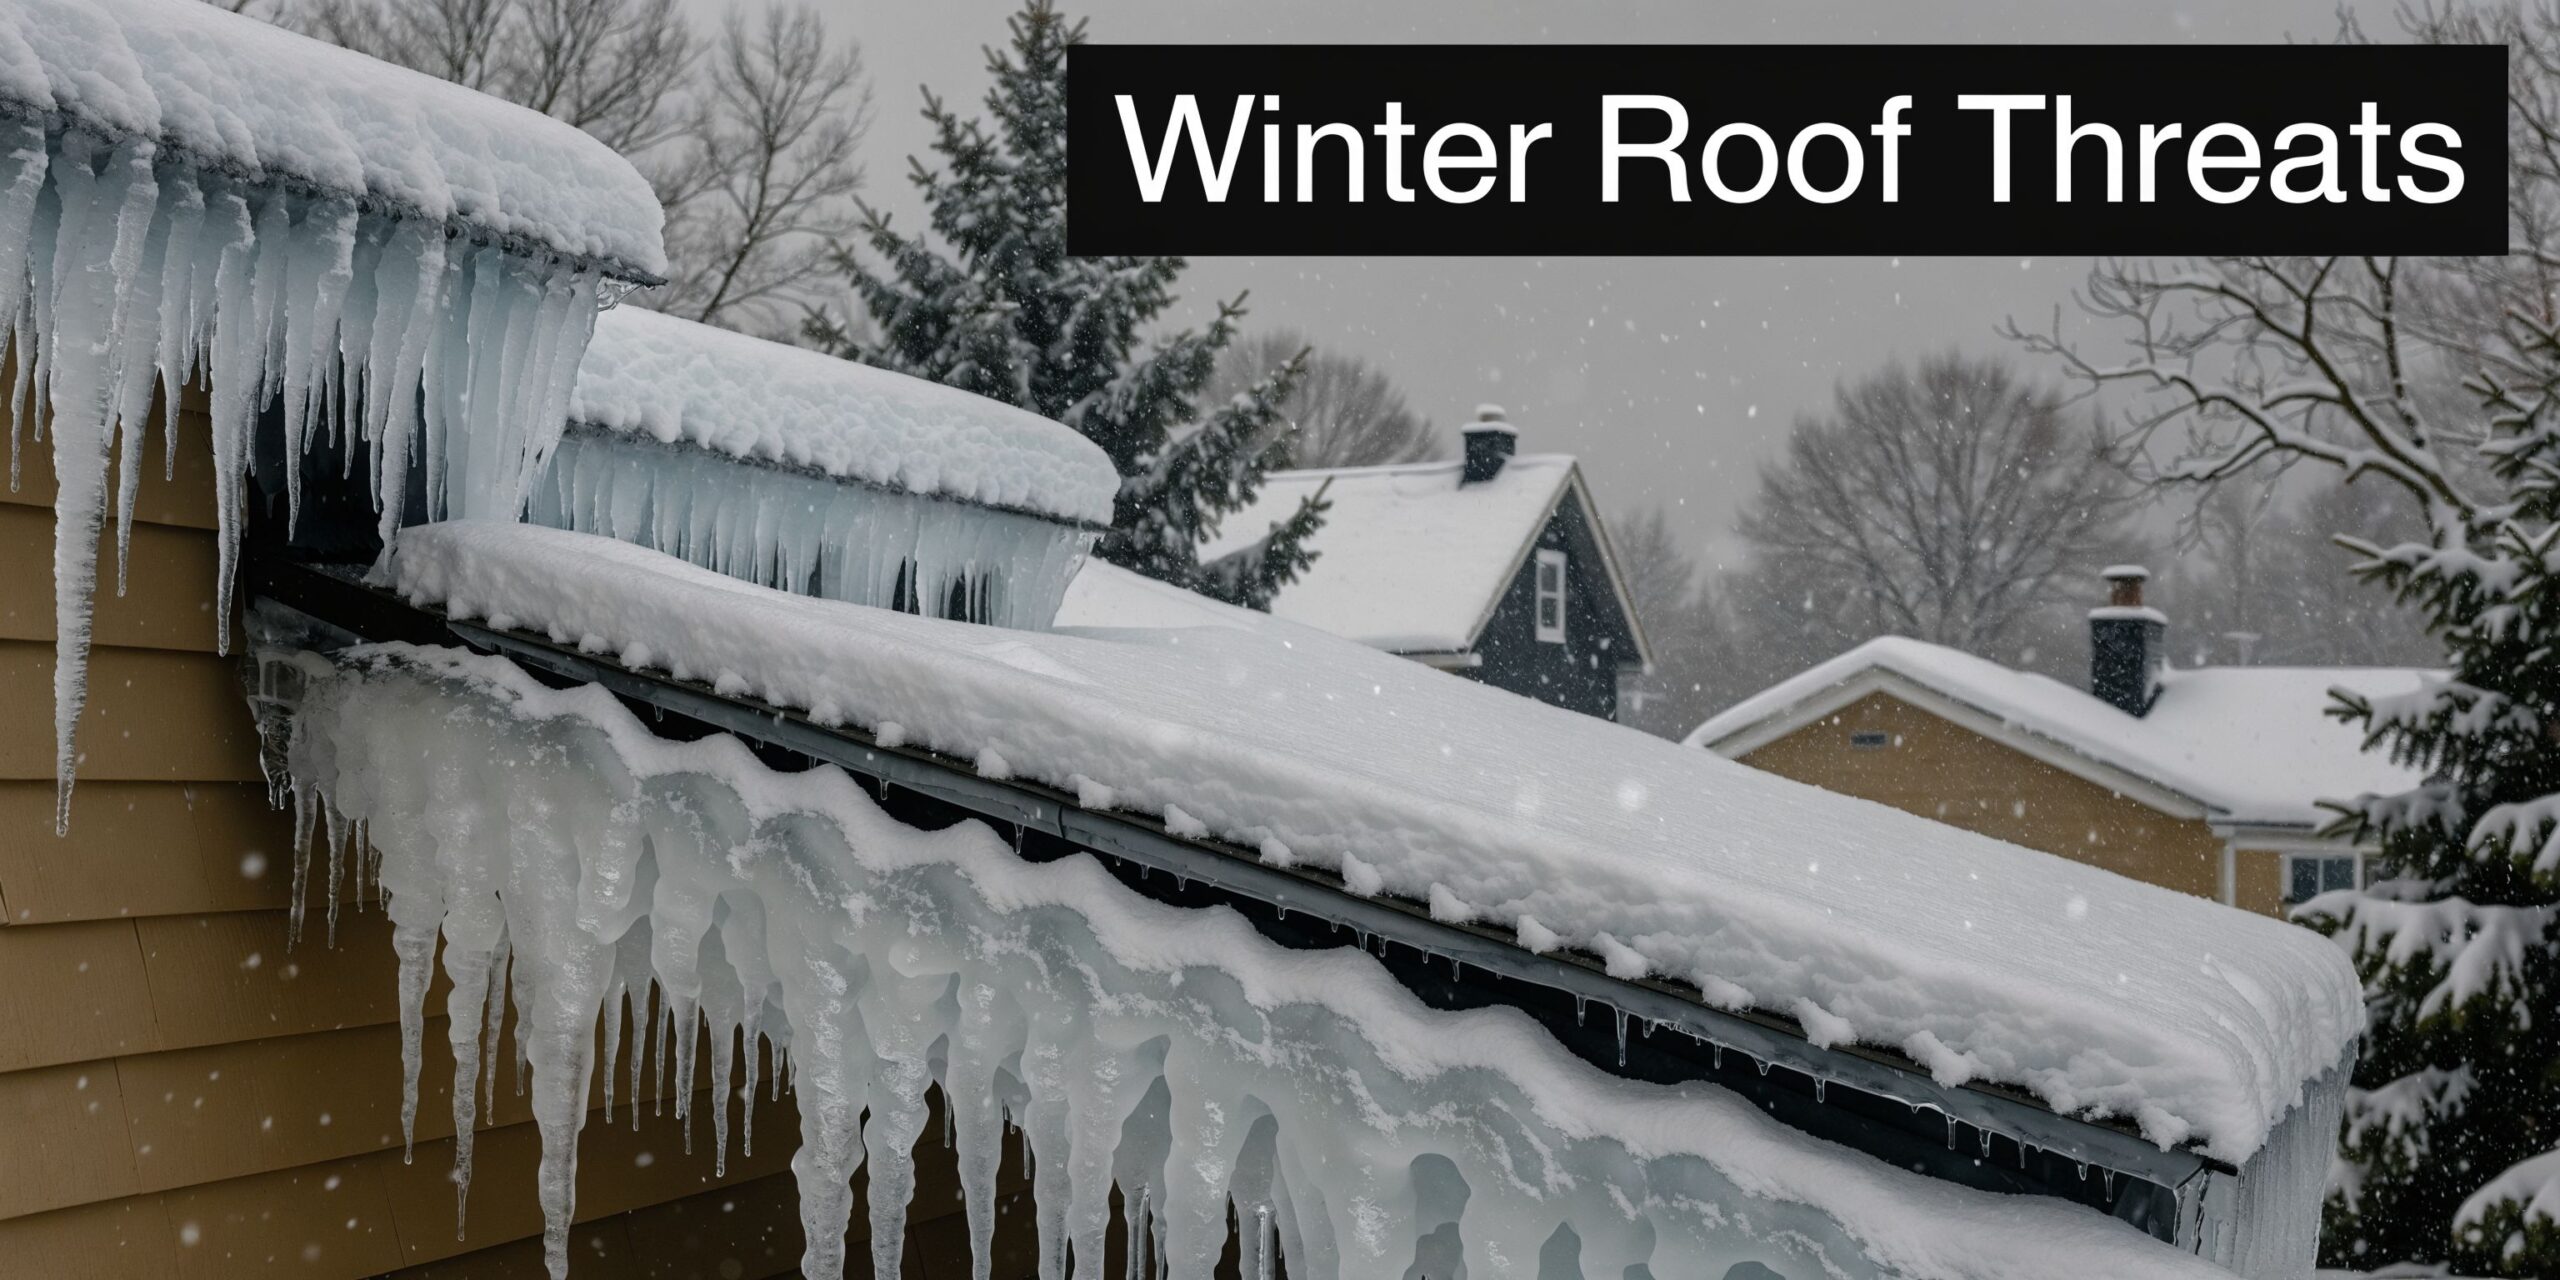
A roof in this part of Pennsylvania doesn’t fail from one problem alone. It gets hit from several directions at once. Snow sits. Wind drives moisture sideways. Daytime melt runs down to colder edges and refreezes. That cycle keeps repeating until the roof assembly gives up at its weakest point.
In Northwestern Pennsylvania, winter weather shortens service life faster than many homeowners expect. Regional roofing guidance notes that the area sees 30+ inches of annual snowfall, and that architectural shingles average 25 to 35 years while metal roofs last 40 to 70 years under proper maintenance in these conditions (roof lifespan in PA and NY weather).
What usually starts the damage
The first issue is often ice at the eaves. Warmth from the attic or upper roof melts snow higher up. That water runs down to the colder roof edge and freezes. Once enough ice builds, it blocks drainage and forces water backward under shingles.
The second issue is freeze-thaw stress. A shingle can look intact from the yard and still have a crack where cold made it brittle. The same thing happens around exposed fasteners, pipe boots, and transition flashing.
Then there’s wind-driven rain and sleet. Winter storms don’t always attack from above. Moisture can push into laps, seams, and flashing details, especially on older roofs or roofs with uneven wear.
Warning signs homeowners can spot
Not every roof problem is visible from the top. Most are easier to catch from inside the house or from the ground.
- Icicles along one roof edge often mean uneven roof temperature or drainage trouble.
- Ceiling stains near exterior walls can point to ice dam backup rather than a field shingle leak.
- Granules in downspouts or at splash blocks can suggest shingle wear after repeated freeze-thaw exposure.
- A gutter pulling away from the fascia may mean ice weight is stressing both the gutter and the roof edge.
- Dripping around vent pipes or chimneys often traces back to flashing movement, not just missing shingles.
Practical rule: If the symptom appears after a thaw instead of during snowfall, trapped water is often involved.
Why metal and shingles behave differently
Asphalt roofs usually show winter damage as cracking, lifting, or hidden water entry below the tabs. Metal roofs behave differently. They shed snow better in many cases, but they also expand and contract with temperature changes. That movement can open seams or stress fastener points.
That’s why winter roof repair Northwestern Pennsylvania work has to start with diagnosis, not assumptions. The stain on the ceiling might come from an ice dam, a separated flashing joint, a metal seam, or attic moisture that’s mimicking a roof leak. Treating the wrong cause wastes time and leaves the opening in place.
Conducting a Safe Winter Roof Inspection
The first inspection mistake is climbing too soon. Snow cover hides roof edges, black ice forms where you don’t expect it, and ladders set on frozen ground can shift before you even reach the eave.
Start from the ground. Then move inward to the attic. Only consider roof access if conditions are stable and you have the right gear.

Begin with safety and weather judgment
A winter inspection isn’t worth a fall. If the roof is glazed, visibility is poor, or wind is pushing you around on the ladder, stop there and document from safer positions.
Use equipment that matches the conditions:
- Footwear matters first. Good traction beats speed. If you’re comparing options, this guide to durable work boots is useful for understanding what to look for in grip, support, and cold-weather jobsite use.
- Eye and hand protection help when you’re checking gutters, soffits, and downspouts with ice buildup.
- A ladder stabilizer reduces the chance of crushing gutters or slipping at the top contact point.
- A harness and anchor setup are for trained roof access, not casual homeowner improvisation.
If that list sounds excessive, that’s the point. Winter inspection injuries usually happen during “quick checks.”
Follow a logical inspection path
A scattered inspection misses patterns. Move in the same order every time so you can connect exterior clues with interior moisture.
- Scan the roofline from the yard. Look for sagging areas, heavy snow drift, bent gutters, missing shingles, and thick ice ridges at the eaves.
- Check downspouts and gutter outlets. Frozen blockages often tell you where runoff stopped moving.
- Inspect penetrations with binoculars. Vents, chimneys, satellite mounts, and wall-to-roof transitions are common leak points.
- Go into the attic. Bring a flashlight and look for darkened decking, wet insulation, moldy sheathing, and frost buildup on nails or framing.
- Document everything. Take wide shots, close-ups, and interior photos that show location and pattern.
For homeowners trying to build a better maintenance routine after winter, Penn Ohio’s page on benefits of regular roof inspections gives a useful baseline for what should be checked before small issues turn into repair calls.
Documentation needs to happen before repairs
Winter roof damage can be hard to prove once snow melts, water dries, or a temporary patch covers the opening. Professional guidance for Pennsylvania winter repair stresses systematic documentation before any work begins, including aerial inspections to identify ice dams and wind-driven rain patterns, followed by photographic records for insurance purposes (winter roof documentation and inspection approach).
That matters for two reasons. First, some damage is hidden from ground level. Second, the source of a leak may look different after emergency work has already been done.
Take photos before moving snow, before lifting a shingle edge, and before placing a tarp. The “before” condition often decides how easy the claim process becomes.
What to record during the inspection
A useful inspection file is simple and specific.
| Area checked | What to capture | Why it matters |
|---|---|---|
| Roof edge | Ice ridges, icicles, snow depth pattern | Helps show ice dam behavior |
| Penetrations | Flashing gaps, lifted sealant, displaced collars | Isolates leak-prone details |
| Gutters | Blockages, pull-away, overflow marks | Connects drainage failure to water backup |
| Attic | Wet insulation, stained decking, frost | Separates roof leak clues from ventilation issues |
| Interior rooms | Ceiling stains, wall streaks, bubbling paint | Shows active water path and timing |
A complete inspection doesn’t always mean stepping onto the roof. In winter, the safest and most useful inspection is often the one that combines ground observation, attic evidence, and careful photo records.
Executing Temporary Repairs Under Harsh Conditions
Temporary repair is about control, not perfection. The goal is to slow water entry, protect the interior, and keep the damaged area stable until permanent work can happen under safer conditions.
That means knowing what holds in the cold and what usually fails fast.
What works on shingle roofs
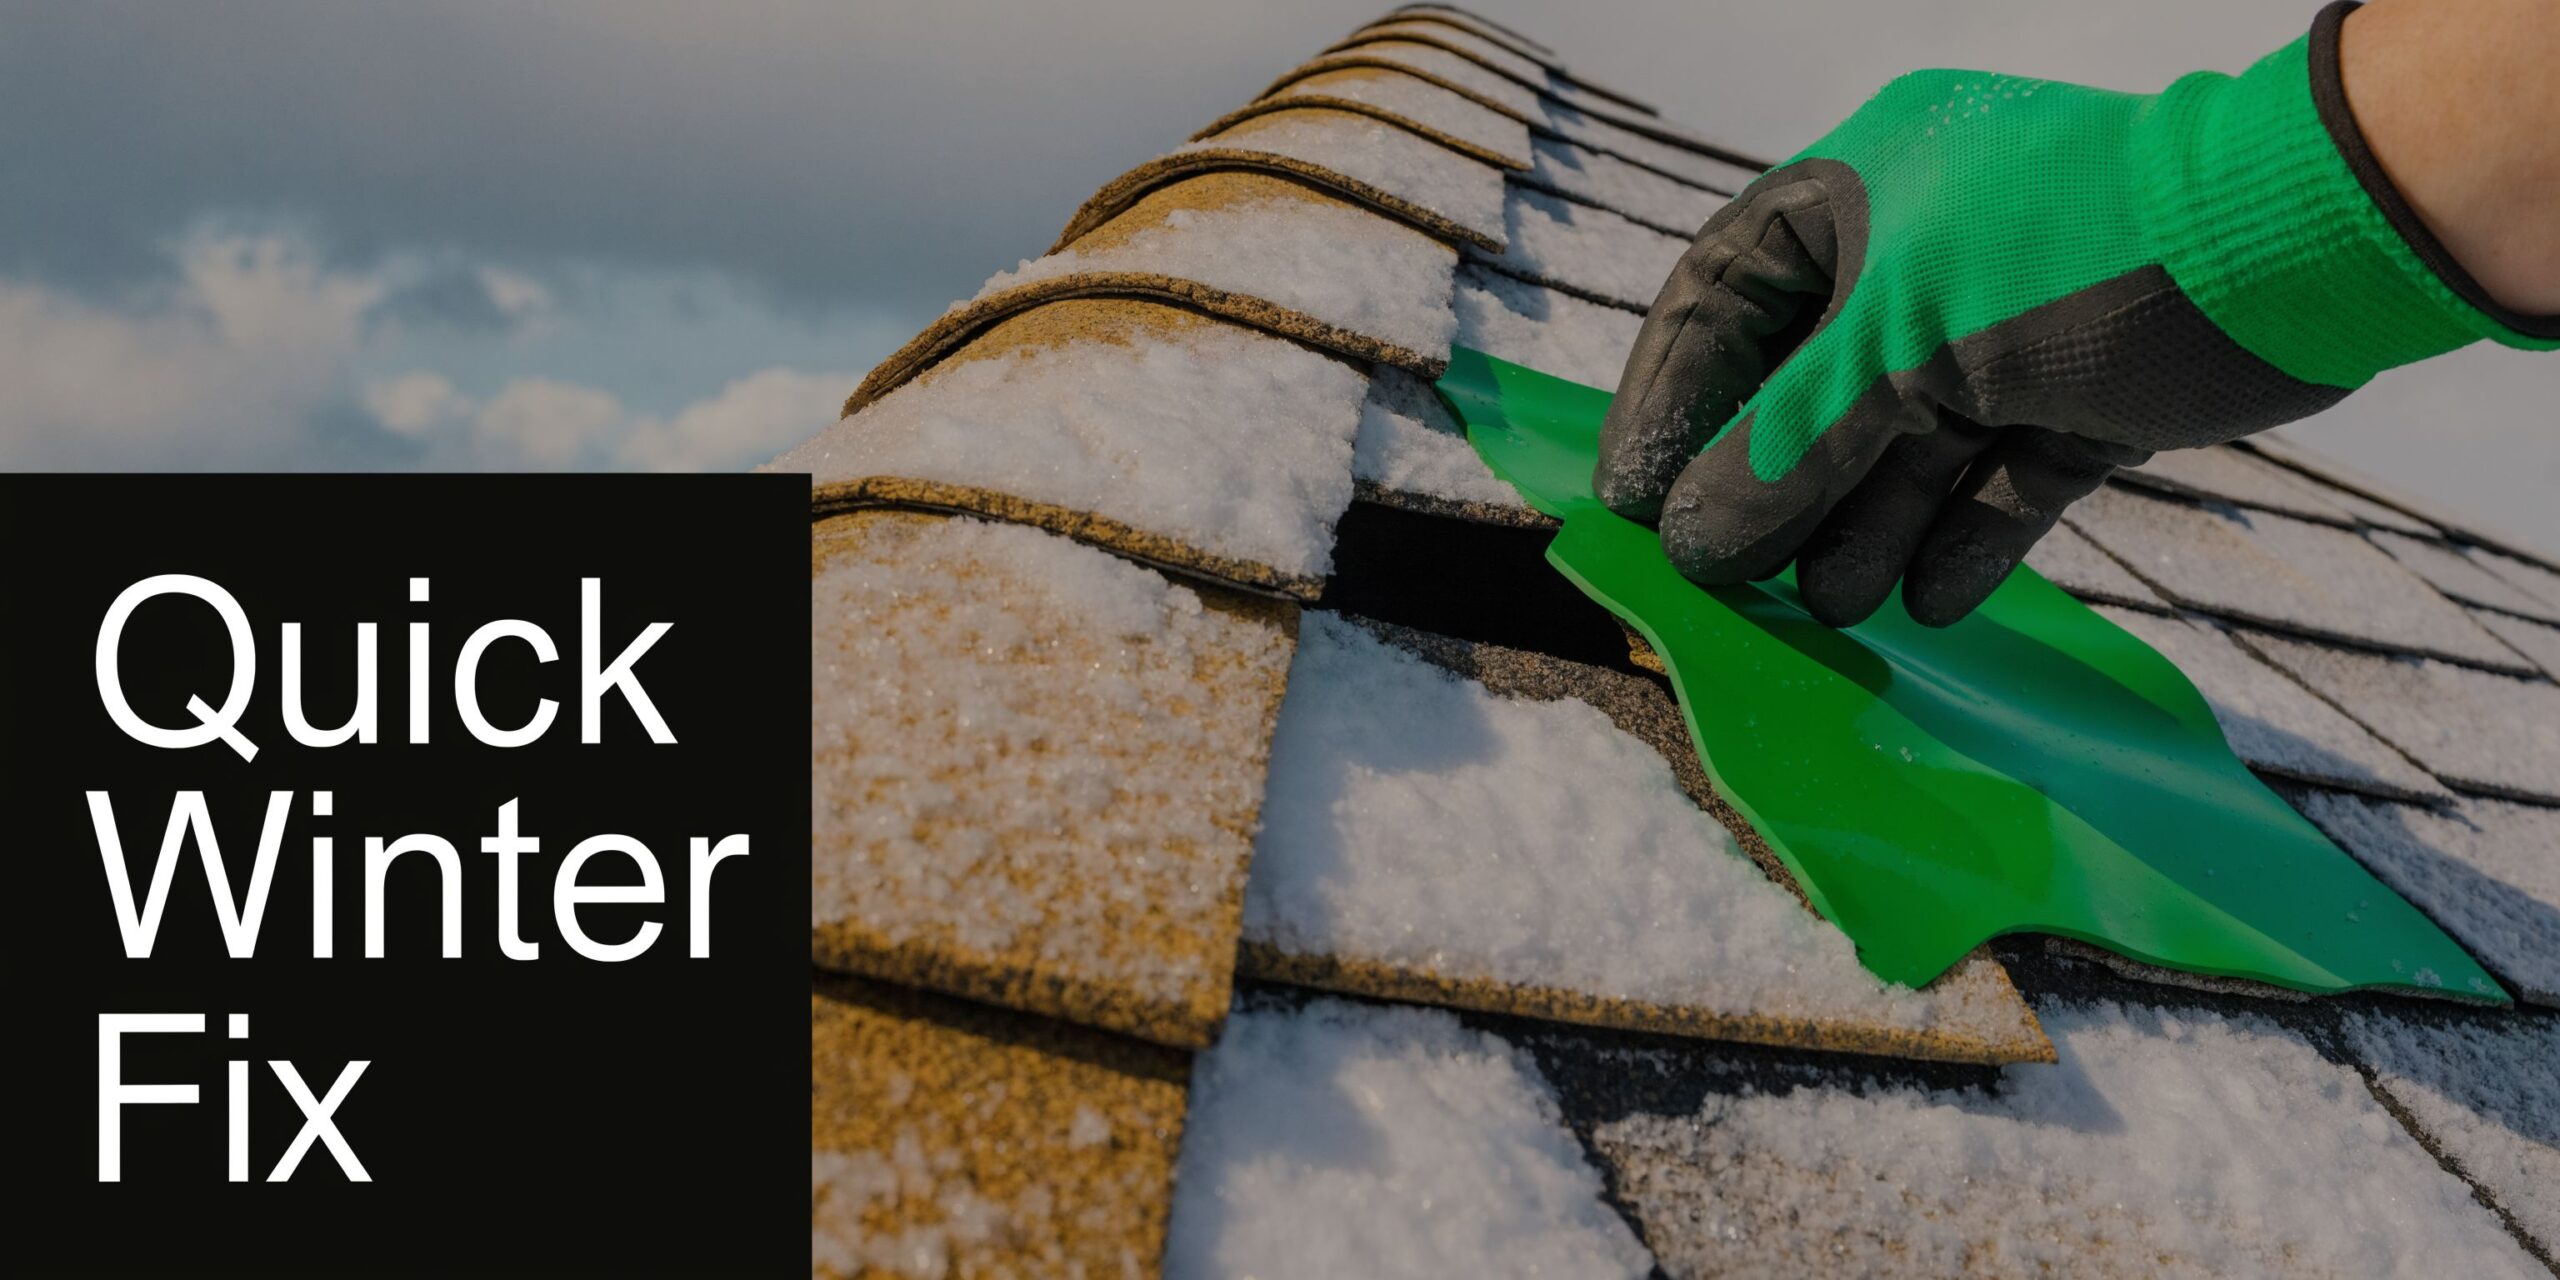
A tarp works only if it extends past the damaged zone and is fastened so wind can’t lift it. Throwing plastic over a leak and weighting it with random debris usually creates a bigger problem at the next gust.
For a limited emergency response on shingles, these methods are the most practical:
- Snow rake from the ground: Remove excess snow from the lower roof edge only. Don’t scrape down to the shingle surface. The goal is pressure relief and drainage, not a bare roof.
- Tarp placement: Cover from above the suspected leak path and carry the tarp over the ridge if possible. Secure it to wood strips rather than relying on loose weights.
- Cold-weather roofing cement: Useful for small exposed flashing gaps or a lifted shingle corner in a localized area. It is not a substitute for replacing failed materials.
- Interior containment: Buckets, plastic sheeting in the attic, and moving insulation away from active drips can prevent secondary interior damage while exterior conditions are still unsafe.
What not to do
Some emergency “fixes” create more damage than the original leak.
- Don’t chip at ice dams with metal tools. That often tears shingles and punctures membranes.
- Don’t pressure wash snow or ice off the roof. Water intrusion gets worse fast in freezing conditions.
- Don’t torch ice or seams. Open flame near roofing materials, soffits, or sealants is a bad idea.
- Don’t rely on caulk alone where flashing has separated or substrate movement is involved.
A temporary repair should buy time. If it hides the problem without controlling water, it isn’t helping.
Metal roof tactics in sub-zero weather
Metal roofs need a different approach. Winter movement can open seams, stress clips, or expose sealant failure at panel joints. Guidance specific to winter metal work notes that expansion and contraction can cause seam leaks, and that safer repair methods include thermal imaging and heat tapes used in a controlled way to seal seams without burn injuries (winter metal roof repair guidance).
That changes the temporary repair playbook.
For metal roofs, practical short-term steps often include:
- Identify the seam pattern first. Water may enter uphill from where it shows inside.
- Use thermal imaging where available. It helps locate moisture paths beneath snow cover or around concealed seams.
- Clear only what’s needed. Remove snow from the work area carefully so panels and coatings aren’t gouged.
- Apply compatible sealant to the actual seam defect. Generic patching products often fail because they don’t move with the metal.
- Use heat tape cautiously where the repair method calls for it and where trained handling avoids scorching adjacent material or creating a new hazard.
Matching materials can also be tricky in winter. Color runs change, panel profiles vary by manufacturer, and older surfaces weather differently than new stock. A patch can be watertight and still stand out visually, especially on a visible slope.
For urgent help when active leaks are moving fast, Penn Ohio offers a local page for emergency roof repair in Sharon, PA, which is useful if conditions have already moved beyond safe homeowner action.
How to judge whether the patch is holding
A good temporary repair shows results quickly. You should see less active dripping, no spreading ceiling stain during the next melt cycle, and no flapping, lifting, or water bypass around the patch area.
If the leak path changes rooms, moves farther down a wall, or appears only after refreeze, the original opening may still be active. That’s common on both metal and shingle systems in winter because water rarely travels straight down.
Preventing Future Winter Damage with Proactive Measures
Emergency repair is expensive in effort, stress, and interior disruption. Prevention is less dramatic, but it’s what keeps a winter roof from turning into a spring rebuild.
In this region, ice dams and snow loads cause widespread roof damage, with 30+ inches of snow and frequent freeze-thaw cycles contributing to brittle shingles, flashing separation, and frozen gutters if the roof goes unmaintained (winter roof inspection issues in Pennsylvania).
The house has to manage heat correctly
Most winter roof trouble starts with uneven temperature. Snow should stay cold until it can melt and drain normally. When warm air leaks into the attic or underside of the roof deck, snow begins melting in the wrong places.
That’s why the smartest prevention work usually happens below the shingles:
- Seal attic air leaks around penetrations, top plates, and access hatches so indoor heat doesn’t warm the roof deck unevenly.
- Keep insulation consistent instead of letting thin spots develop near eaves or around mechanical runs.
- Maintain ventilation paths so moisture can leave the attic and roof temperatures stay more uniform.
- Check bath fan and dryer terminations to make sure they’re venting outside, not into the attic.
If one section of roof melts off much faster than the rest, the problem often starts inside the building envelope.
Focus on drainage before the first freeze
A clean gutter system won’t solve every winter issue, but clogged gutters make backup and edge ice much worse. Water has to leave the roof. If it can’t, it pools, freezes, and starts pushing under the roofing.
A strong pre-winter routine includes:
- Clearing leaves and debris from gutters and valleys
- Securing loose gutter brackets before ice adds more weight
- Checking downspout discharge so meltwater doesn’t freeze back near the foundation and splash zones
- Inspecting flashing seals around chimneys, walls, skylights, and vent pipes before cold stiffens materials
Use snow and ice control carefully
Heat cables can help in specific trouble spots, but they aren’t a substitute for insulation and ventilation fixes. If you place them without understanding the drainage path, you can create a narrow melt channel that refreezes lower down.
Snow removal has trade-offs too. Taking some load off the lower roof edge can help. Scraping aggressively can shorten roof life faster than the snow would have.
The best prevention plan is simple. Inspect in fall. Correct ventilation and drainage issues before deep winter. Watch for the first signs of uneven melting, because that’s often your earliest warning that the roof system is working harder than it should.
Navigating Insurance Claims and Managing Repair Costs
Insurance trouble usually starts with weak documentation. A homeowner sees a stain, calls in a claim, and assumes the leak itself proves the cause. It doesn’t. Adjusters want a cause, a timeline, and evidence that separates storm-related damage from wear, neglect, or pre-existing conditions.
That’s why winter claims should be handled like a file, not a phone call.
In Mercer and Beaver counties, winter ice dam claims rose 22% in 2025, and many insurers undervalue these claims by 20 to 40% without professional documentation and drone or thermal evidence (ice dam claim issues in Pennsylvania).
Build the claim before the adjuster visit
The strongest claim package usually includes dated photos, interior damage photos, notes on when the leak appeared, and evidence from the roof or attic that points to the actual failure area.
Useful items to gather:
- Timestamped exterior photos showing ice buildup, displaced materials, or visible storm impact
- Interior photos of stains, dripping, damaged insulation, or warped finishes
- Weather timing notes that connect the leak to a specific storm or freeze-thaw event
- Contractor inspection records with clear descriptions instead of vague statements like “roof leaking”
- Drone or thermal images when hidden moisture or snow cover makes visual proof harder
For homeowners who want to understand the sequence before talking to an insurer, Penn Ohio’s overview of the roof insurance claim process is a practical starting point.
Know where disputes usually happen
Ice dam claims often become arguments about cause. Was the water backup storm-related, or was it caused by poor ventilation? Did wind damage flashing, or was the flashing already failing? Did code-related scope belong in the repair, or only the visibly damaged area?
Those are not small details. They affect what gets approved, what gets excluded, and how much negotiation follows.
A good contractor estimate should describe the physical condition in plain language. It should also identify code-related requirements where applicable, especially if matching, visible roof plane work, or related components are part of a compliant repair.
Common winter damage coverage outline
| Damage Type | Coverage Likelihood | Documentation Needed |
|---|---|---|
| Ice dam water intrusion | Often depends on policy language and cause | Photos of ice buildup, interior leak pattern, attic evidence, contractor findings |
| Wind-lifted shingles in winter storm | Often stronger if storm timing is clear | Exterior photos, missing material evidence, date of storm, repair assessment |
| Flashing separation near penetrations | Often disputed if wear is involved | Close-up photos, leak path notes, inspection write-up |
| Metal seam leak during freeze-thaw | Depends on proving active failure point | Thermal imaging if available, seam photos, interior moisture evidence |
| Gutter-related backup damage | Often tied to maintenance questions | Photos of blockage, overflow marks, ice formation, related roof edge damage |
Good claim support is specific. “Leak in bedroom after thaw, staining on north wall, ice ridge at eave, wet insulation above ceiling line” is far more useful than “winter roof issue.”
Repair cost management starts before damage happens
Winter work can cost more than mild-weather work because crews move slower, safety measures increase, and access can be harder. The best way to control out-of-pocket exposure is to know your policy before you need it. A yearly annual insurance policy review can help homeowners spot gaps in coverage language, deductibles, and endorsements before a winter claim puts those details under pressure.
If you’re comparing contractor estimates, look for scope clarity. Temporary stabilization, material matching issues, decking concerns, flashing replacement, and interior protection should be spelled out. An estimate that looks cheaper because it ignores those items usually becomes more expensive later.
Knowing When to Call Penn Ohio Roofing & Siding Group and Emergency Protocols
Some winter roof problems are manageable from the ground. Some aren’t. The line is usually clear once safety or structural risk enters the picture.
Call for professional help when you see:
- Active interior leaking that continues through freeze-thaw cycles
- Sagging roof lines or ceiling movement under snow load
- Repeated ice dam formation in the same area after cleanup
- Loose metal panels, exposed seams, or lifted flashing
- Damage near power service lines, steep slopes, or high roof sections
This is also the point where one local option may fit the situation. Penn Ohio Roofing & Siding Group serves Mercer, Beaver, and Lawrence county areas, offers 24/7 emergency service, and brings 25+ years of experience to residential and commercial roof work in the region.
When you call during an emergency, have the basics ready:
- Your address and callback number
- Where the leak or damage is showing inside
- Photos from the ground or attic, if you can get them safely
- A brief note on when the problem started
- Your insurance carrier information, if you plan to file a claim
If water is entering the house, protect the interior first. Move contents, place containers, and shut off power to affected areas if water is near fixtures or wiring. Don’t climb onto an icy roof to “just check one spot.” The emergency is the leak. It doesn’t need to become a fall injury too.
Frequently Asked Questions
Can heat cables solve ice dams by themselves
Not usually. They can help manage a problem area, but they don’t replace good insulation, air sealing, and ventilation. If the roof is warming unevenly, the ice tends to come back.
How long should a temporary winter patch last
Only until permanent repair conditions are safe and the failure can be corrected. A tarp or cold-weather seal may hold through a storm cycle, but you shouldn’t treat it as a finished repair.
What counts as a roofing emergency in winter
Active leaking, visible sagging, heavy edge ice causing backup, loose roofing materials, and water entering around electrical areas all qualify as urgent.
Can a roof rake damage shingles
Yes, if you drag it hard across the roof surface or try to scrape down to bare shingles. Use it to reduce load and clear the lower edge carefully, not to grind against the roofing.
Should I remove icicles
Small icicles aren’t the main problem. The ice behind them is. Pulling them down aggressively can damage gutters, fascia, and lower roof edges.
If your roof is leaking, icing over, or showing signs of winter stress, contact Penn Ohio Roofing & Siding Group for practical next steps. A qualified inspection, clear documentation, and the right repair sequence can prevent a winter problem from turning into a much larger structural and insurance headache.