
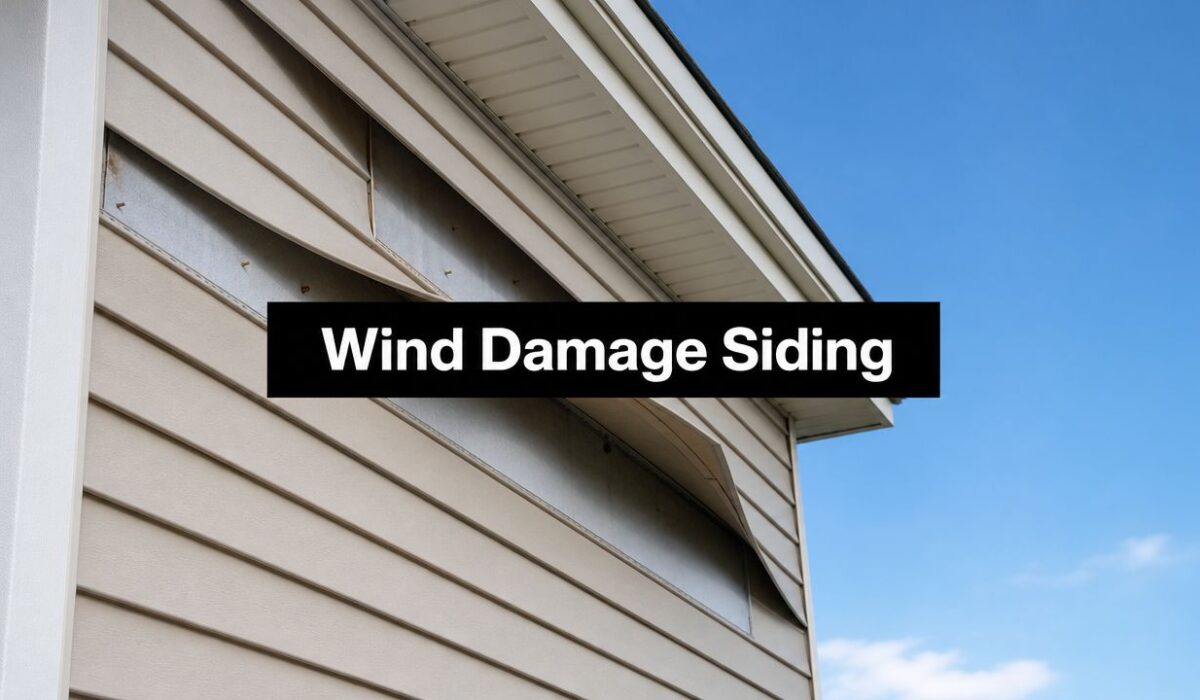
You walk outside after the storm and start scanning the house line by line. A gutter looks crooked. A shutter is hanging loose. Then you notice a siding panel that wasn't lifted yesterday. That's the moment most homeowners in Sharon, Pittsburgh, Erie, and nearby Pennsylvania communities feel their stomach drop.
That reaction is normal. Wind damage to siding is common, and it's fixable. The key is not missing the damage you can't see from the driveway. The obvious cracks and missing panels matter, but the greater financial impact often starts when wind opens small gaps that let water get behind the siding and into the wall system.
A lot of homeowners make the same mistake. They look for pieces on the ground, don't see much, and assume the house escaped. Sometimes it did. Sometimes it didn't. If the storm pushed panels loose, bowed the wall line, or opened corners and seams, you may be dealing with a hidden moisture problem that gets worse long after the wind stops.
According to American Family Insurance's summary of Insurance Information Institute claim data, nearly 1 in 36 insured homes file a wind or hail-related claim annually, which is about 2.78% of U.S. homeowners each year. That should tell you two things. First, you're not dealing with some freak event. Second, there's a process for this, and if you handle it correctly, you can protect the house and your claim.
Table of Contents
- Your First Look After the Storm
- How to Identify Different Types of Wind Damage
- Immediate Safety and Documentation Steps
- Deciding Between Siding Repair and Full Replacement
- Navigating Repair Costs and Insurance Claims
- How to Prevent Future Wind Damage to Siding
- When to Call a Siding Professional in PA and OH
Your First Look After the Storm
The first walk around the house should be slow and boring. That's how you catch real damage. Don't just look for a dramatic missing section. Look for one panel that's shifted higher than the rest, an edge that's fluttering, a corner post that looks slightly open, or a line that suddenly isn't straight anymore.
A homeowner in western Pennsylvania might come outside after a rough night and see only one loose strip near the back corner. It doesn't look serious. But that loose strip often means the wind got under the edge and stressed the attachment points farther down the wall. The visible damage is just the clue. The wall behind it may be the underlying problem.
Start from the ground and walk the full perimeter. Check every elevation, especially the sides that took the brunt of the storm. In Pittsburgh and Erie, wind-driven rain can push water into places a calm rain never reaches. In Sharon, repeated storm exposure can leave older siding more vulnerable than it looks.
Practical rule: If the siding looks different from one wall section to the next, treat that as damage until someone proves otherwise.
Keep your inspection simple at first:
- Look low and high: Check lower courses, corners, window trim, gable ends, and the area under roof edges.
- Watch for movement: If a panel rattles when you touch it lightly from the ground, attachment may have failed.
- Check for water clues: Staining, dampness, or musty smell inside near exterior walls matters just as much as the outside view.
- Take notes immediately: You won't remember which wall looked worst after you've made three phone calls.
Most siding problems after wind are manageable if you move quickly. What turns a manageable repair into a larger project is delay. Once water gets behind the cladding, time starts working against you.
How to Identify Different Types of Wind Damage
Wind damage to siding shows up in layers. The broken piece you can see matters. The loosened wall assembly behind it matters more.
What minor damage looks like
Minor wind damage usually starts with small changes in the panel surface or how the siding sits on the wall. You may see a hairline crack, a dent from flying debris, a bottom edge that has come loose, or a small gap where trim pulled away. The wall can still look “mostly fine” from the driveway and still be taking on water.
Pay close attention to these trouble spots:
- Hairline cracks: Common in older vinyl that flexed hard during gusts.
- Loose lower edges: A panel that won't stay locked can let wind-driven rain get behind the cladding.
- Trim gaps: Separation at J-channels, corners, soffit lines, and around windows often shows up before larger sections fail.
- Dents and scuffs: Sometimes cosmetic, sometimes the first sign the panel took enough force to weaken.
Small defects around openings deserve extra attention. Water does not need a large hole. It needs time, gravity, and one path behind the siding.
The signs that point to hidden wall damage
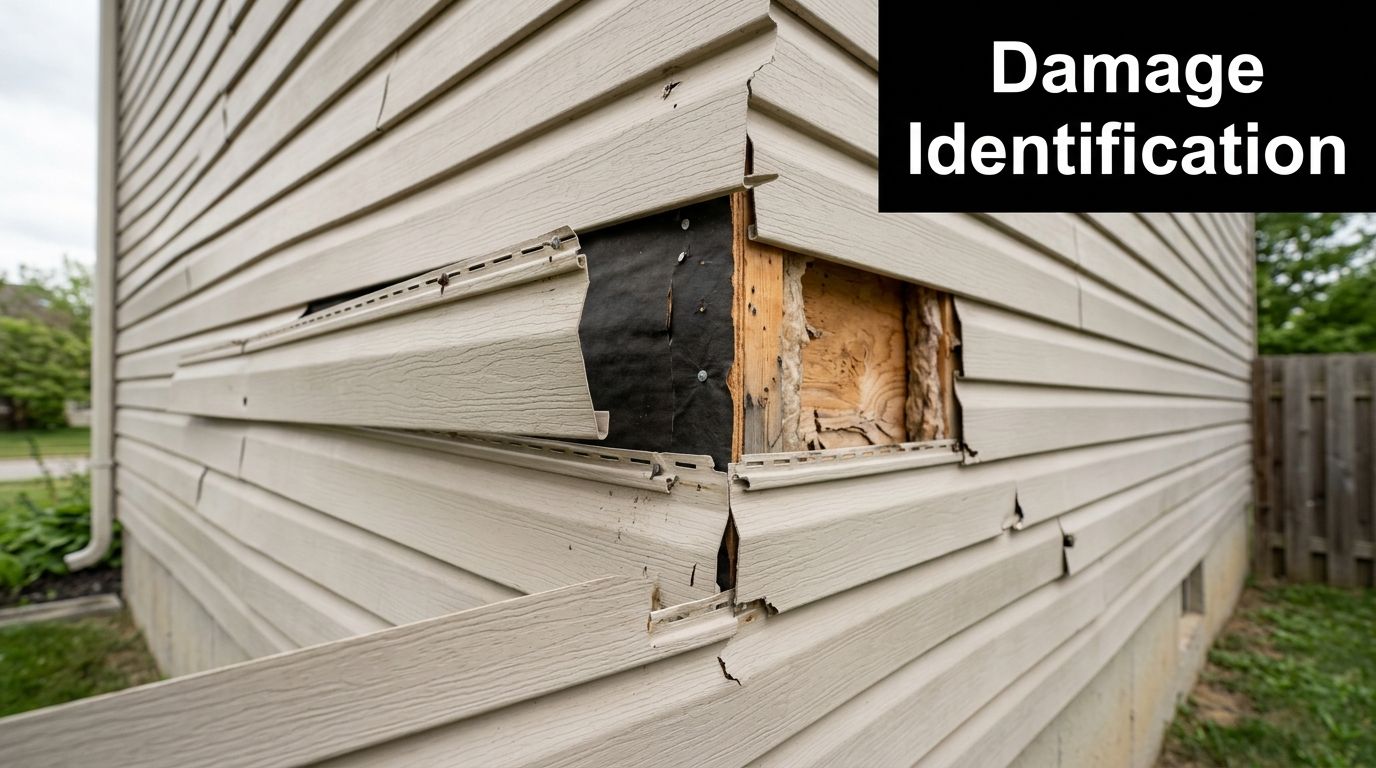
This is the part homeowners miss, and it is where repair bills grow fast. Shifted, rippled, or bowed panels often mean the wind stressed the attachment points, distorted the nailing pattern, or opened a path for water behind the siding.
Look for siding that no longer lies flat, corners that sit proud, uneven shadow lines, panels that look slightly waved in afternoon light, or one wall section that suddenly looks different from the rest of the house. Those are not cosmetic quirks after a storm. They often point to wet sheathing, compressed insulation, loosened fasteners, or framing that has started to move under load.
Check inside too. Hidden damage often leaves clues indoors before the outside looks dramatic:
- A cold or warm patch on an exterior wall
- Fresh staining near windows, baseboards, or ceiling lines
- Paint or drywall tape starting to bubble
- A damp, earthy smell after rain
- One room that suddenly feels harder to heat or cool
The pattern matters. One bowed panel near a bedroom wall, plus a faint odor indoors, is enough to justify a closer inspection.
If the storm also involved tree impact or heavy debris pressure on the structure, review this expert guide for Perth property owners. The tree response is different, but the lesson is the same: the visible exterior hit is often only part of the damage.
What severe failure looks like
Severe wind damage is easier to spot and more dangerous to ignore. Panels may be missing, hanging loose, punctured, split across multiple courses, or torn free at the fasteners. Corner posts can crack. Underlayment or sheathing may be exposed. Once that happens, the wall is no longer doing its job.
Treat widespread failure as a water-entry problem first and a siding problem second. If wind stripped siding off one elevation, assume rain reached places it should never reach. That means the inspection should include the sheathing, insulation, trim details, and the framing around windows and corners, not just the exposed panels.
The worst mistake here is replacing the obvious missing pieces and stopping there. A good inspection checks whether the wall stayed dry and structurally sound after the siding failed.
Immediate Safety and Documentation Steps
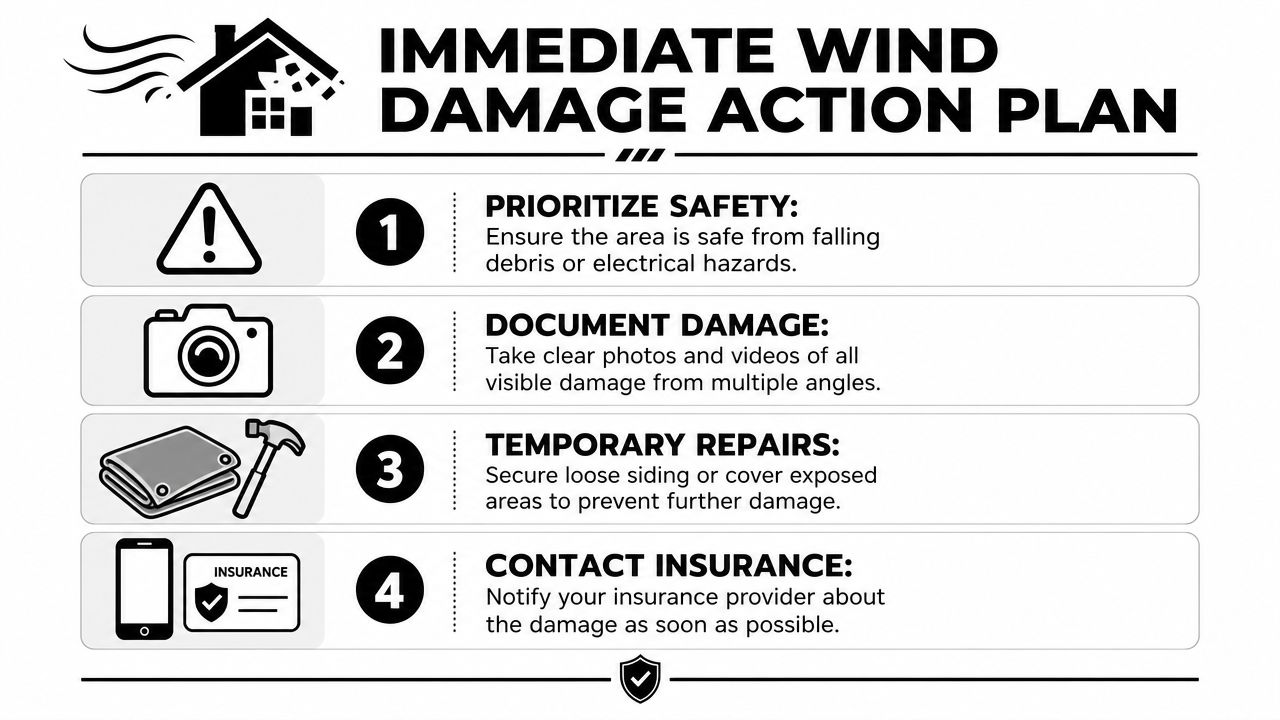
Once you've confirmed wind damage to siding, stop trying to diagnose every last detail and switch into action mode. You need to protect people, preserve evidence, and prevent more water intrusion.
Protect people before property
If siding is hanging loose, don't stand directly under it. Wind-damaged exterior pieces can tear free without warning. If there's nearby power equipment, fallen lines, or storm debris tangled around the home, keep everyone clear until the area is safe.
Use a simple priority order:
- Keep your distance from unstable areas. Don't climb a ladder in wet conditions or during ongoing gusts.
- Move vehicles if debris is overhead. A loose section of fascia or siding can drop later.
- Check interior walls. If water is entering, place containers and towels to limit interior damage.
- Shut off power to affected interior areas if water is actively reaching outlets or fixtures. If you're unsure, call an electrician or emergency service.
If storm damage involved a tree impact or major debris load, it helps to review an emergency response checklist outside the siding trade too. This expert guide for Perth property owners lays out the same basic principle I'd recommend anywhere. Secure the scene first, then document, then stabilize.
Document the claim like an adjuster will read it
Take wide photos first. Then take medium shots. Then close-ups. Homeowners often do the reverse and end up with a phone full of detail shots that don't prove where the damage was located.
Your documentation should include:
- Full elevations: Front, rear, and both side walls.
- Context shots: Damage in relation to windows, doors, meter boxes, decks, and roof lines.
- Close detail: Cracks, lifted seams, exposed sheathing, broken trim, and any interior staining.
- Storm evidence: Debris field, fallen branches, dents on gutters, displaced outdoor items.
- Written notes: Date, time discovered, weather conditions, rooms affected, and what changed after the storm.
Don't throw away detached pieces right away. Bag and label them if it's practical. They can help show material type, age, and failure pattern.
For temporary protection, cover exposed wall sections if you can do it safely from the ground or with qualified help. Don't nail random materials through undamaged sections just to “hold something in place.” Bad temporary work can create fresh entry points and complicate the claim.
Deciding Between Siding Repair and Full Replacement
A lot of bad siding decisions start with the wrong question. Homeowners ask, “Can you patch that spot?” The better question is, “What happened behind that spot?”
Many wind losses look small from the yard. Then a crew pulls a few courses and finds wet sheathing, loosened fasteners, crushed insulation, or framing that took repeated water exposure after the siding opened up. That hidden damage is what turns a cheap repair into a second claim, a mold problem, or a full wall rebuild next season.
When repair makes sense
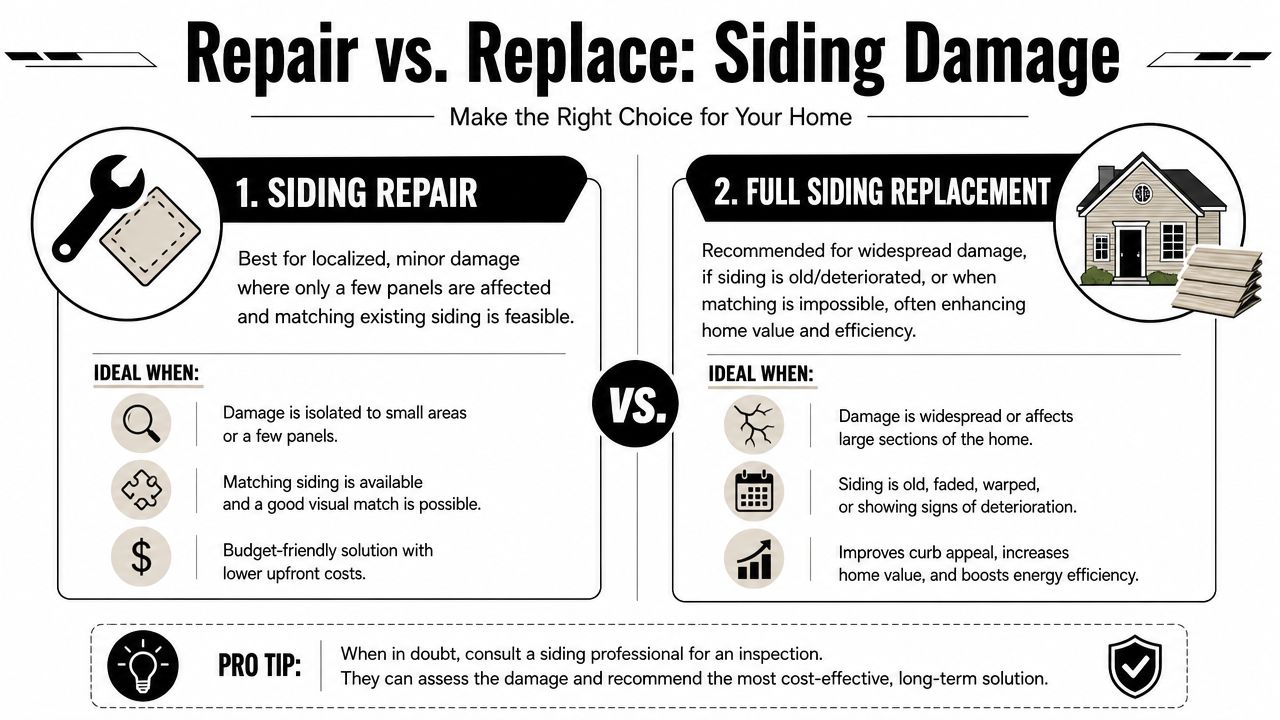
Repair makes sense when the damage is confined, the siding can be matched, and the wall assembly behind it is still dry and firmly attached. Visible panel damage alone is not enough to make that call.
A proper repair candidate usually has a clean failure pattern. One section lifted or cracked. The nearby panels still lock tightly. Trim is intact. The housewrap and sheathing behind the opened area are dry. The fastener line has not torn out. If those conditions are present, a targeted repair can restore the wall without wasting money on replacement you do not need.
Repair is usually the right choice when:
- Damage is limited to a small, clearly defined area
- Matching siding is available in the same profile and close color
- Adjacent panels are still flexible, secure, and not chalking or brittle
- The sheathing behind the damaged section is dry and solid
- Nailing hem failures, pulled fasteners, or loose substrate are not spreading beyond the impact area
When full replacement is the smarter call
Full replacement is the better decision when wind damage exposed a bigger wall problem. Age, fading, brittleness, and discontinued product lines matter. Hidden substrate damage matters more.
If I see rippling in nearby courses, repeated loose panels on the same elevation, staining around window heads, soft spots at lower walls, or trim that has separated at corners, I stop thinking about a simple patch. Those signs often mean the wall has been taking on water for a while, or the attachment points have weakened enough that the next storm will pull off more siding.
Insurance can push the same decision. Carriers often evaluate whether a reasonably uniform repair is possible based on material availability, matching, and the condition of surrounding elevations, as outlined in claims guidance from Property Insurance Coverage Law. If the original product is discontinued or the adjacent siding has aged past a workable match, partial replacement gets harder to justify.
Ask a contractor to answer three direct questions before you approve a patch:
- Is the wall behind the damaged section dry?
- Are the surrounding panels still secure enough to survive removal and reinstallation?
- Will this repair solve the failure, or just cover where the wall first opened up?
If those answers are weak, replace more now.
You also need to look at related exterior systems. If wind pulled at the siding hard enough to open joints, it may have stressed nearby trim, fascia, and drainage components too. This is one reason homeowners end up adding gutter replacement cost factors to the same scope.
A quick decision table
| Situation | Repair | Full replacement |
|---|---|---|
| One isolated impact area, dry wall behind it, matching product available | Strong choice | Usually unnecessary |
| Siding is faded, brittle, or discontinued | Short-term fix at best | Usually better |
| Fastener lines are failing or panels are loose beyond the visible damage | Poor choice | Usually needed |
| Sheathing is wet, soft, stained, or moldy behind the siding | Won't solve the problem | Needed |
| One elevation has repeated storm damage and age-related wear | Often poor value | Cleaner long-term result |
| You need a practical pricing comparison for replacement variables | Review HIBCO ROOF LLC's Columbus siding costs | Helpful for budgeting |
A patch only makes sense if it restores the wall system, not just the appearance. If hidden moisture, weak attachment, or deteriorated sheathing are already in play, full replacement is the cheaper decision in the long run.
Navigating Repair Costs and Insurance Claims
The hard part for homeowners is not the first broken panel you can see. It is the wet sheathing, loosened fasteners, and wall movement hiding behind it. That hidden damage is what turns a modest siding repair into a much larger bill months later.
Repair pricing rises fast once the wall has to be opened. Surface damage is cheaper. Structural drying, sheathing replacement, and reattachment of trim and drainage details are not. A small isolated fix may stay in the low hundreds. Replacing multiple damaged sections usually lands much higher. If wind drove water behind the siding or pulled enough to loosen the wall assembly, costs can climb into the thousands without much effort.
If you want a practical look at how contractors discuss material and replacement variables in another market, HIBCO ROOF LLC's Columbus siding costs is a useful reference point for the kinds of factors that push a quote up or down.
Related exterior work often gets folded into the same scope. If wind also pulled on drainage components, review these gutter replacement cost factors so you know why the final number may include more than siding alone.
What actually drives the price
The biggest cost difference is simple. Are you paying for visible siding work, or are you paying to correct what the wind exposed?
Expect estimates to change based on:
- Material type and availability: Vinyl, fiber cement, engineered wood, and insulated panels all repair differently. Discontinued products push costs up fast.
- Access: Second-story gables, steep grades, decks, and tight lot lines add labor.
- Hidden wall damage: Wet insulation, swollen sheathing, mold staining, and loosened attachment points increase both labor and materials.
- Matching work: One broken area can still require broader replacement if color fade or discontinued profiles make a clean patch impossible.
- Related components: Trim, fascia, soffit, housewrap, and flashing often need work at the same time.
If a bid seems low, check what it leaves out. Ask whether the contractor included removal, disposal, wall inspection, sheathing replacement if needed, and reinstallation of trim and weather barrier details. A cheap number that ignores the wall behind the siding is how homeowners pay twice.
How to handle the insurance claim
Treat the claim like a documented construction problem, not a casual conversation. Insurance adjusters respond better to organized facts than to broad descriptions of storm chaos.
Use this process:
- File early: Report the loss promptly. Delays create unnecessary coverage fights.
- Describe what you know: “Panels detached on the rear elevation near the corner post” is better than guessing at the full scope.
- Show progression: Include photos of the exterior damage and any interior staining, damp drywall, or trim movement that appeared after the storm.
- Ask about payment method: Find out whether your policy pays actual cash value or replacement cost value.
- Request a wall inspection if warranted: If panels pulled loose, ask how hidden moisture, sheathing damage, and failed attachment will be evaluated.
- Keep every receipt: Save invoices for tarping, temporary fastening, cleanup, and emergency protection.
- Get the decision in writing: If the carrier limits repairs to one area, make them explain matching, discontinued siding, and partial-elevation repairs in writing.
One more recommendation. Be present when the adjuster inspects the house, and have your contractor there if possible. Hidden damage gets missed when nobody opens the conversation beyond the obvious cracked panel. The goal is not a bigger claim. The goal is a complete scope that fixes the wall correctly.
How to Prevent Future Wind Damage to Siding
Most wind damage to siding starts before the storm. It starts with weak attachment, bad layout, loose edges, or neglected maintenance. If the installation was sloppy, the storm just exposed it.
Installation details that actually matter
The technical side matters here. According to the NAHB wind-resistant exterior cladding guidance, vinyl siding should conform to ASTM D3679, and fasteners at fascia and wall ends should be spaced no greater than 16 inches, while FEMA recommends 12 inches, to reduce detachment under wind loads. The same guidance notes that minor lifting at corners creates entry points for moisture.
That means prevention isn't just “buy better siding.” It means making sure the starter strip, channels, fasteners, and panel edges are installed correctly. If those details are wrong, wind gets underneath, panels flex harder than they should, and failure starts at the edges.
Check these points on your house:
- Loose corners: Small corner lift is not cosmetic. It's an opening.
- Rattling sections: Panels shouldn't sound unstable in normal wind.
- Uneven courses: A crooked line often means poor engagement or movement.
- Old brittle vinyl: Aged material cracks faster when stressed.
Maintenance that catches trouble early
Walk the house after major storms and at least seasonally. Look for loose seams, trim gaps, and caulk failure around penetrations and transitions. If one section gets repeated wind exposure, pay extra attention there.
A broader exterior maintenance plan helps because roof edges, gutters, and flashing all affect how water reaches the walls. This 2026 roof maintenance checklist is worth reviewing if you want to catch connected problems before they show up as interior damage.
Good siding performance depends on boring details. Straight starter strips. Proper fastener spacing. Secure corners. That's what keeps a storm from turning into a wall repair.
When to Call a Siding Professional in PA and OH
A homeowner can spot a problem. A professional needs to confirm the scope. That line matters because hidden moisture, failed attachment, and sheathing damage don't show themselves clearly from the lawn.

Local storm patterns change the risk
In western Pennsylvania, this isn't theoretical. PerilIQ storm history for Sharon, PA shows 59 verified reports of hail, wind, and tornado activity within a 10-mile radius since 2023. That tells you the local issue isn't just one dramatic storm. It's repeated wind stress over time.
In places like Sharon, Pittsburgh, and Erie, repeated exposure changes how I'd evaluate an exterior. A panel that survives one event may still be weakened. Trim that looks fine may already be starting to separate. Homes in these areas need a more skeptical inspection after heavy weather.
Call for help when the damage goes beyond the surface
Call a siding professional when you see missing panels, widespread lifting, bowed courses, exposed substrate, water staining inside, or any sign that the wall may have opened up. You should also call when the siding is older and matching will be difficult, or when you need documentation that will stand up in an insurance file.
A proper inspection should answer four questions:
- What failed first
- How far the damage extends
- Whether water got behind the siding
- Whether repair will hold
If you're comparing options for exterior restoration work, review the company's siding service information and ask direct questions about moisture checks, matching strategy, and claim documentation. If they only talk about swapping panels fast, keep looking. You need someone who understands the wall system, not just the visible skin.
If your home took a hit from wind and you're not sure whether you're looking at a simple panel repair or hidden wall damage, contact Penn Ohio Roofing & Siding Group. They serve homeowners across the Penn Ohio region with siding and exterior expertise, free estimates, and emergency availability when fast action matters.