
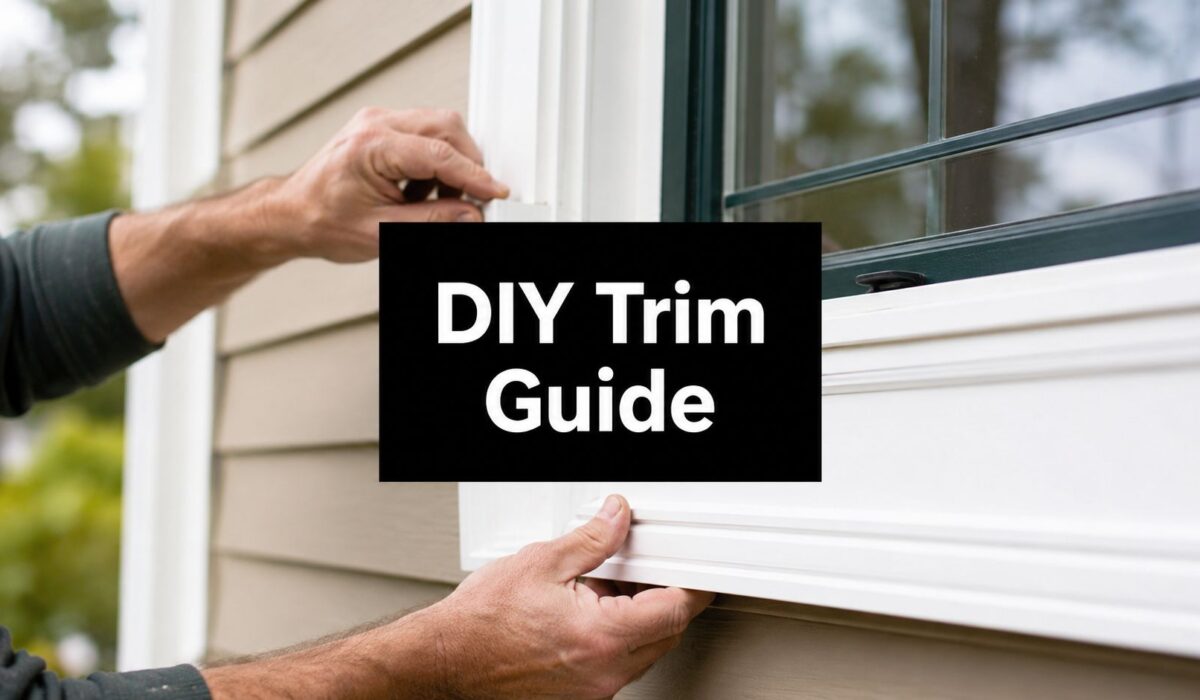
You're probably looking at trim that has started to tell on itself. Paint is peeling at the bottom edge. A corner board feels soft when you press it. The casing around a window has a hairline gap that wasn't there last fall. In Pennsylvania, that usually means water has already been testing the weak spots.
Exterior trim installation looks simple from the street, but it's really a water-control job with a finish carpentry layer on top. That matters in places like Sharon, Pittsburgh, and Erie, where trim has to stand up to wind-driven rain, freeze-thaw cycles, wet spring seasons, and snow that lingers where details trap moisture. If you build the joints right, trim protects the house. If you build them like a picture frame and rely on caulk alone, the house eventually lets you know.
A capable homeowner can handle a weekend trim project on a garage, porch, first-floor window, or a clean section of facade. The key is knowing where water wants to go, and making sure every piece you install helps it keep moving out.
Table of Contents
- Why Quality Exterior Trim Is a Smart Investment
- Choosing Materials and Gathering Your Tools
- A Step-by-Step Guide to Trim Installation
- Pro Tips for Fastening and Finishing
- Common Installation Pitfalls and How to Avoid Them
- Long-Term Maintenance for Lasting Curb Appeal
- When to Call a Professional Trim Installer
Why Quality Exterior Trim Is a Smart Investment
Bad trim rarely fails all at once. It starts with a split end grain, a failed joint, or a bottom edge that stays wet too long. Homeowners often notice the cosmetic side first, but the bigger issue is that trim sits at transitions. Around windows, doors, corners, and rooflines, it helps protect the places where water is most likely to work its way in.
That's why replacing worn trim is more than a paint-and-caulk project. In Erie, lake-effect moisture and long winters punish horizontal details. In Pittsburgh, repeated rain exposure finds weak joints fast. In Sharon and across western Pennsylvania, trim has to bridge appearance and protection at the same time. If it can't shed water cleanly, the finish won't last and the substrate behind it takes the hit.
Exterior trim also stays popular because it changes the look of a house while solving a real performance problem. Demand for exterior trim is projected to increase to 2.5 billion linear feet by 2025 as homeowners prioritize weatherproofing and aesthetic durability, according to Principia's exterior trim demand outlook.
Protection and appearance work together
Fresh trim sharpens the lines of the home, but curb appeal isn't just about the boards themselves. Clean glass, crisp paint lines, and intact trim all reinforce each other. If you're improving the exterior as a whole, this roundup of window cleaning advice for curb appeal is useful because it addresses the parts homeowners usually notice first.
For houses where the trim ties into broader exterior updates, it also helps to look at the surrounding cladding system and siding service considerations. Trim only performs as well as the wall assembly around it.
Practical rule: If a trim board is peeling, cupping, or opening at a joint, assume water management needs attention before you assume it only needs paint.
Choosing Materials and Gathering Your Tools
Good trim starts with the wall you have, not the board you want. In western Pennsylvania, wind-driven rain, freeze-thaw cycles, and snow sitting against horizontal surfaces will expose a bad material choice fast. If you plan to use the trim-over-siding method, pick products and tools that help water drain, not trap it.
Match the trim material to the exposure
A front entry under a deep porch can tolerate details that would fail on a second-story gable or a window that gets pounded from the southwest. That is the trade-off homeowners miss. Material choice decides how much maintenance you sign up for, how tight your cuts need to be, and how forgiving the assembly will be if moisture gets behind the trim.
| Material | Durability | Maintenance Level | Best For |
|---|---|---|---|
| Wood | Looks excellent and machines cleanly, but it absorbs moisture if edges and end cuts are not sealed | Higher | Historic homes, custom profiles, paint-grade work |
| PVC | Handles wet exposure well and won't rot, but it moves with temperature and needs the right fastening pattern | Lower | Window and door surrounds, rake details, splash-prone areas |
| Fiber cement | Stable and durable, but heavier, more brittle at edges, and less forgiving during cutting and fastening | Moderate | Homes with fiber cement siding, wide flat trim, painted exterior packages |
Wood still has a place. I use it where the house calls for crisp traditional detail and where we can keep it out of chronic splashback. Prime every face, seal the cut ends, and leave no raw edge exposed.
PVC is often the safest DIY choice around windows and doors because water is the enemy there. It cuts differently than wood, can expand in summer heat, and usually looks best with intentional joint layout instead of forcing long runs to act like wood. Fiber cement gives a solid finished look, but you need clean support, proper fasteners, and control of silica dust while cutting.
If your trim ties into roof edges or eave details, check the whole drainage path before you buy material. Water running off a roof can soak trim, fascia, and the wall below if those parts are not working together. Review how gutters, soffits, and fascia work as one exterior drainage system if your project reaches those transitions.
For homeowners also comparing how trim relates to cladding buildup, TimberSol's cladding installation process is a useful reference because it shows how sequencing affects moisture control behind finished exterior surfaces.
Buy fasteners and sealants for the material, not from habit
During exterior trim installation, weekend projects often drift off course. A box of leftover nails and a tube of generic caulk can ruin good trim.
Use exterior-rated fasteners that match the trim product and the substrate behind it. PVC and fiber cement each have manufacturer-specific fastening guidance, especially on edge distance and movement. Stainless or hot-dipped galvanized fasteners are the safer pick in wet locations. For sealants, choose a paintable exterior product rated for long-term movement and weather exposure. Cheap caulk shrinks, cracks, and invites water behind the board.
On a trim-over-siding job, also plan for spacers, flashing tape, and WRB patch material if the siding cutback exposes vulnerable edges. That method works because it respects drainage. The trim sits proud of the siding, the head detail sheds water over the verticals, and the assembly avoids burying critical edges where water can sit.
Tool and supply checklist
Have the full setup on site before removal starts.
- Cutting tools: Miter saw, circular saw, sharp finish blade, utility knife
- Layout tools: Tape measure, speed square, combination square, level, pencil, chalk line
- Removal tools: Flat bar, cat's paw, oscillating multi-tool, stiff putty knife
- Fastening tools: Drill/driver, impact driver, exterior-rated screws, finish nailer if the trim product allows it
- Water-management materials: Flashing tape, metal or flexible head flashing as needed, weather-resistive barrier patches, high-quality exterior sealant, backer rod
- Prep materials: Primer for wood trim, especially cut ends, sandpaper, rags, cleaner
- Safety gear: Eye protection, hearing protection, gloves, stable ladder, ladder levelers where needed, dust control for fiber cement cutting
Pull off old trim carefully
Removal is diagnostic work as much as demo. Score paint lines first. Slip a putty knife behind the trim to protect the siding face, then work a flat bar in slowly. If the board hangs on, cut the fasteners with an oscillating tool instead of prying harder and damaging the drainage plane around the opening.
Watch for swollen sheathing, black staining, brittle housewrap, soft corners, and old caulk packed tight where water should have escaped. Those signs matter more than the trim profile you choose. New boards over wet backing will fail, especially in a Pennsylvania winter.
A Step-by-Step Guide to Trim Installation
Most DIY guides treat trim like decorative casing. That's the wrong starting point. Trim belongs in the drainage plane, so the sequence matters as much as the cuts.
Start with water, not with trim boards
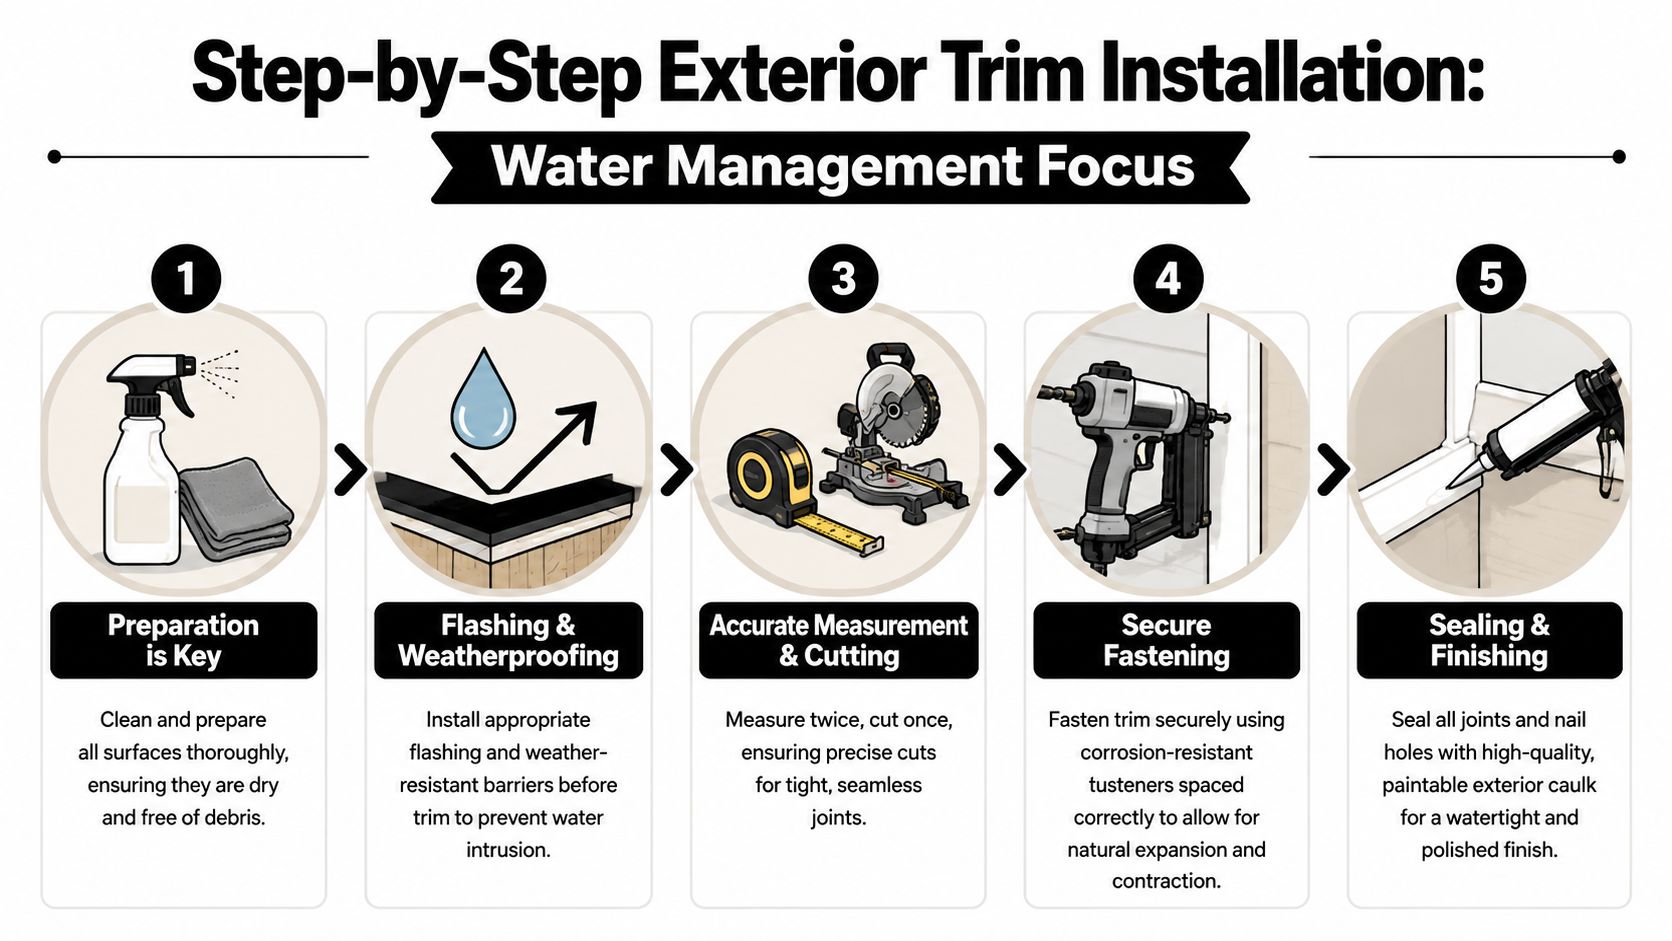
Begin by cleaning the work area and exposing the full opening or transition. Remove failed caulk, loose paint, and damaged trim. If you're trimming a window, make sure the weather-resistive layer and flashing details are intact before new boards go up.
For wood window trim, one practical field detail matters a lot. Metal flashing should be stapled to the head piece first, with the flange kept slightly higher than the outside surface to promote runoff, then screws should be driven from the bottom into the trim and down into the window frame.
The sequence at the top of the opening is not optional. Expert methodology calls for installing head trim first so it overlaps the vertical side boards and creates a gravity-driven water-shedding interface, as explained in this trim-over-siding installation discussion.
The trim-over-siding method
This is the method many homeowners never get shown. Instead of forcing trim behind siding and depending on a caulked joint where siding meets trim, the trim-over-siding approach puts the siding behind it and the trim on top. That removes a common failure point because the assembly doesn't rely on that exposed trim-to-siding caulk joint the same way.
In practical terms, that means the wall plane does more of the water work and the trim becomes a cleaner cap over the transition. On houses in Sharon, Pittsburgh, and Erie, where rain can hit hard and sit in exposed joints, that's a smarter detail than building an exterior frame that depends on perfect sealant forever.
If you want to compare sequencing ideas, TimberSol's cladding installation process is worth reading for its emphasis on ordering layers correctly before finish pieces go on. The products may differ, but the water-management logic carries over.
Fit, fasten, and seal in the right order
Use a simple sequence and don't rush it.
Measure the opening or run carefully. Check width in more than one spot because old walls drift. Record long point and short point clearly if you're cutting miters.
Dry-fit the head piece first. Confirm it projects and overlaps side boards properly. On windows and doors, this top piece sets the drainage logic for the rest of the trim.
Cut the side boards to fit under the head trim. Make sure they sit plumb and tight without forcing the opening out of square.
Install bottom pieces only where the detail allows drainage. Around windows, think carefully about where water escapes. Don't build a sealed trough.
Seal the correct joints after fastening. Seal where water would enter from the side or top. Leave drainage paths where the assembly needs to release moisture.
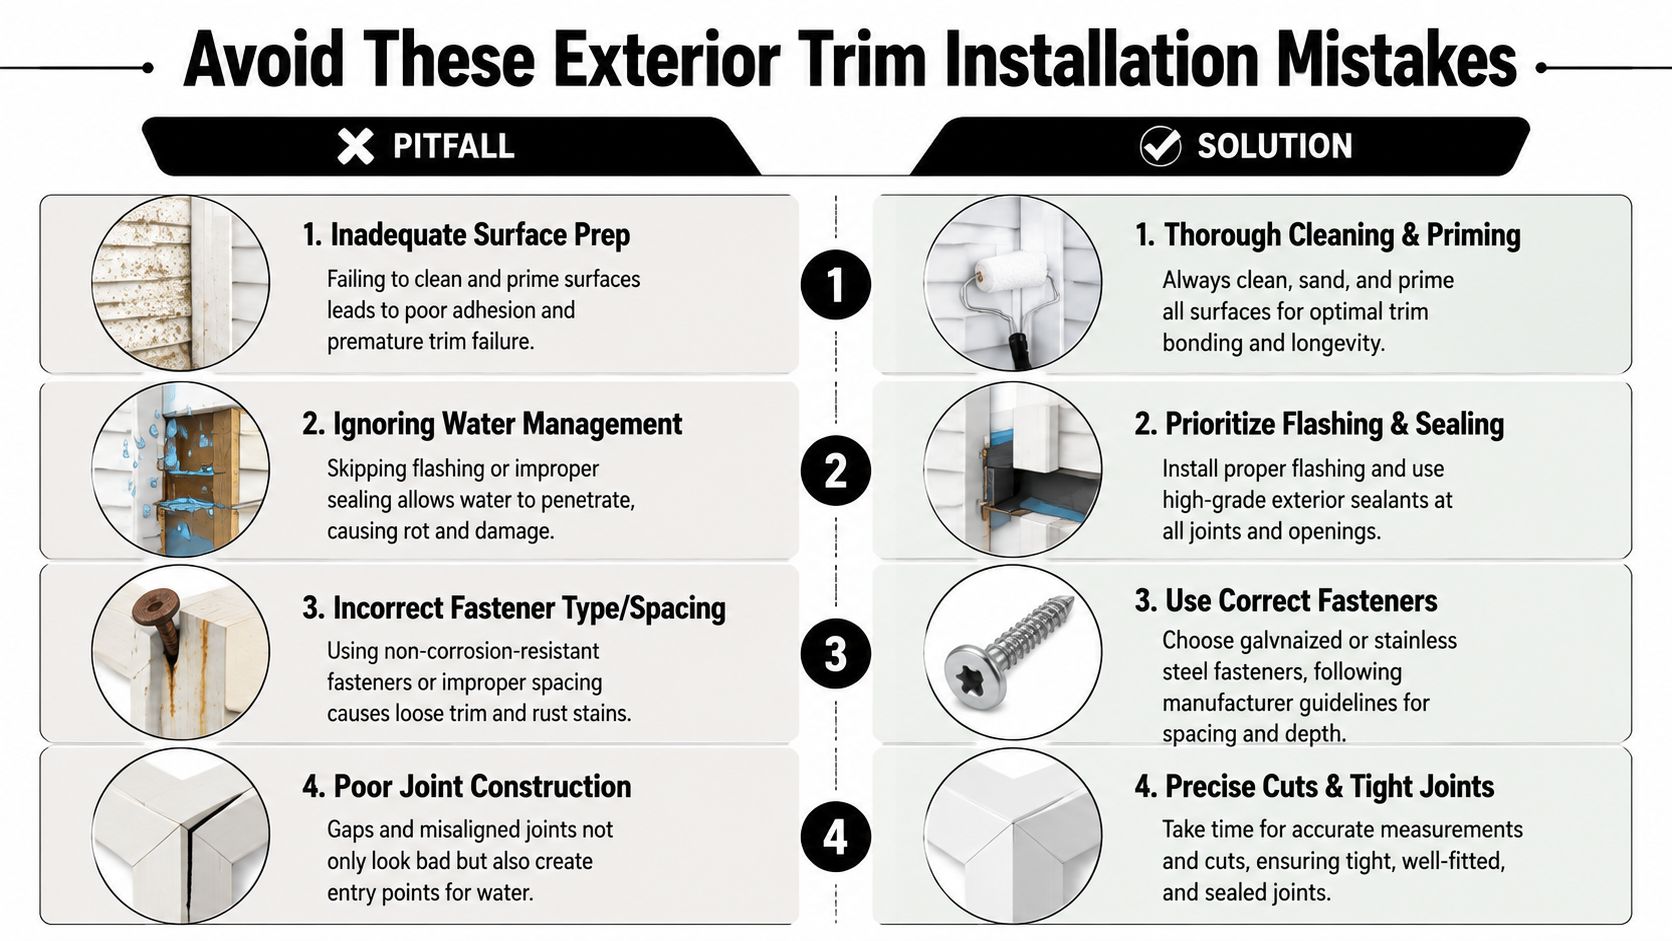
For outside corners and long runs, scarf joints usually outperform blunt butt joints because they direct water across the face instead of straight into the end grain or seam. Keep the upper piece lapped over the lower piece so runoff passes over the joint.
The best-looking trim jobs usually come from installers who stop chasing tight decorative joints and start asking where the water goes first.
Pro Tips for Fastening and Finishing
Fastening is where a lot of otherwise decent trim jobs go sideways. The board may be straight, the cuts may be clean, and the paint may look good on day one. If the fasteners are wrong or driven badly, the trim still fails early.
Fastener placement that holds up
Fasteners need to support the material without splitting it or pinning it so hard that movement creates stress. Technical guidance requires fasteners to be placed within 2 inches of board ends and to include two fasteners per framing member to limit end-grain splitting and maintain structural integrity, according to Belco's exterior window trim installation guidance.
Use corrosion-resistant fasteners that fit the material and exposure. Screws are often the better choice for engineered wood and fiber-cement trim because they provide more consistent clamping and reduce some of the damage that comes from aggressive nailing. Whatever you use, don't overdrive it. Crushed trim faces, dimpled edges, and broken surface coatings all create entry points for moisture.
Finishing details that separate clean work from callback work
A few details make a visible difference.
- Prime field cuts on wood: End grain pulls in moisture fast. If you cut it, coat it before it goes up.
- Use scarf joints on longer runs: They hide movement better and shed water more cleanly than square butt joints.
- Keep reveals consistent: Uneven setbacks around windows and doors make good material look sloppy.
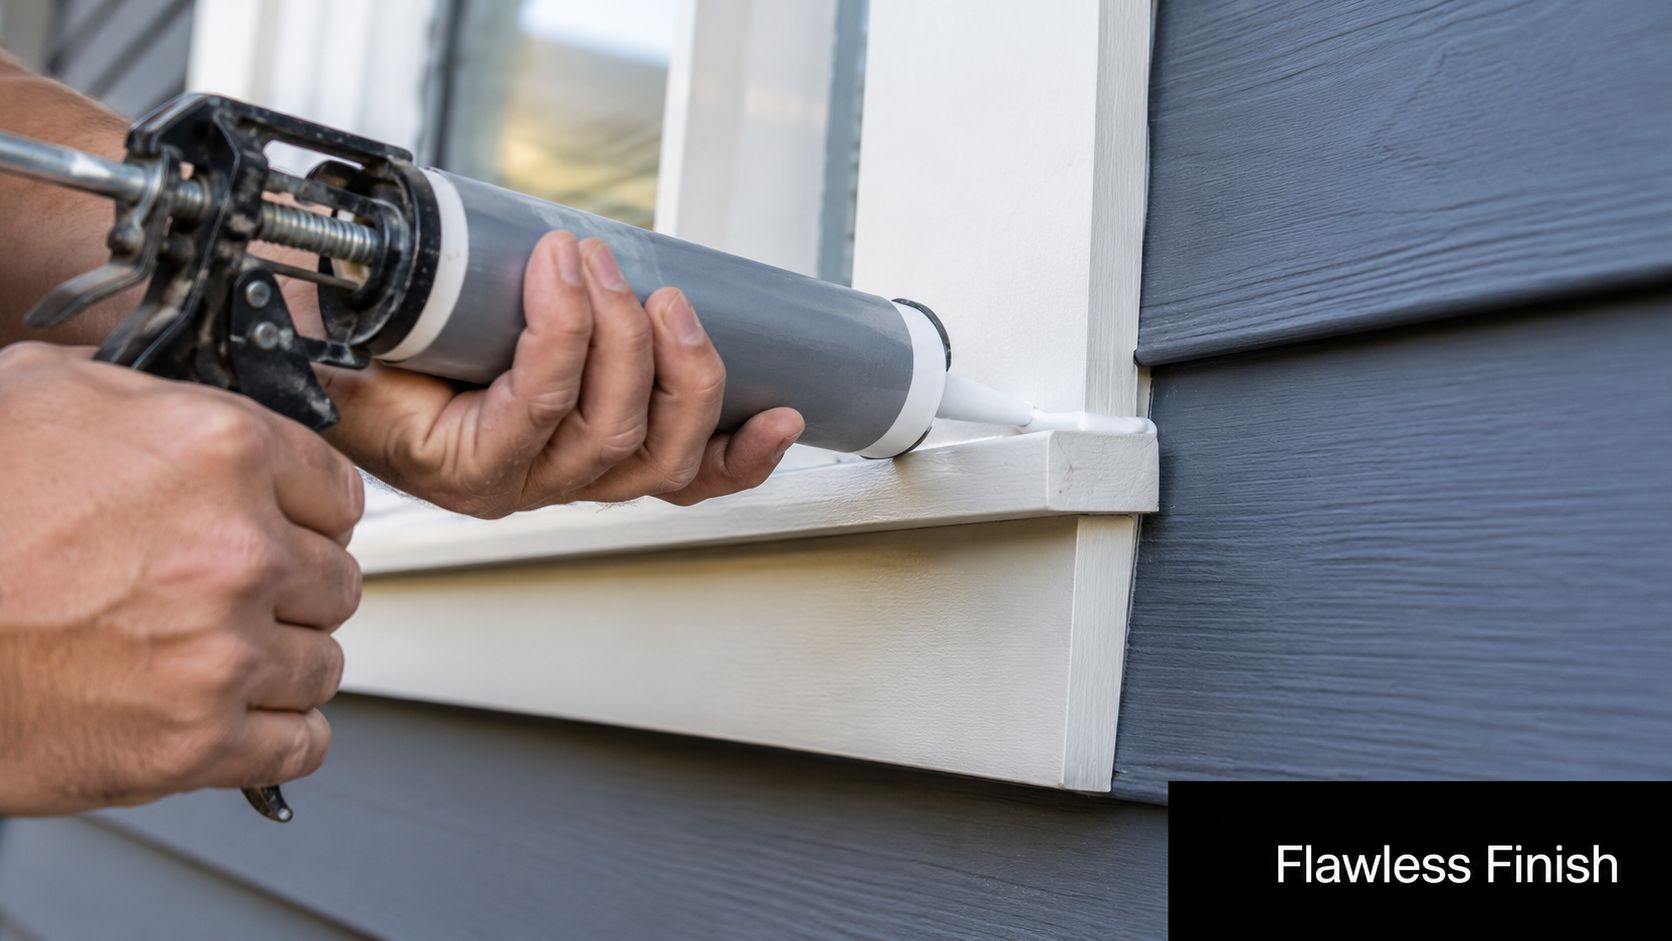
- Tool sealant neatly: A thin, controlled bead lasts longer and looks better than a heavy smear.
For painted trim, leave enough time for primer, sealant cure, and topcoat. Rushing finish steps is one reason first-season failures show up around joints and fastener heads.
Field note: If the trim face is scarred by overdriven fasteners, fix the technique before you fix the cosmetics.
Common Installation Pitfalls and How to Avoid Them
A lot of trim jobs look fine on Saturday afternoon and start showing trouble after the first hard rain. Around western Pennsylvania, that usually means water got trapped where it should have drained, or the trim was installed as decoration instead of part of the wall's water-control layer.
Mistakes that trap water
The biggest miss I see is treating caulk like waterproofing. Sealant only works when the assembly behind it can still drain. Around windows and doors, the bottom edge often needs to release water, not trap it. If you caulk that sill tight, any moisture that gets behind the trim stays there and works on the sheathing, the fasteners, and the trim itself. This exterior trim best-practices article explains that drainage point well.
The other mistake many DIY guides skip is the trim-over-siding approach. On a lot of repair work, especially on homes that have already been sided, forcing trim behind existing siding can open up more problems than it solves. Installing trim over the siding with the right clearances, backing, flashing details, and sealed top transitions often manages water better than cutting everything apart and hoping it goes back together clean. That matters in Pennsylvania, where wind-driven rain, freeze-thaw cycles, and splash-back at lower walls expose every weak detail.
Placement matters too. Trim installed too close to roofing, masonry, decks, or grade stays wet longer and takes more abuse from bounce-back water. Leave proper clearance so the material can dry. If mulch, snow, or wet leaves sit against the bottom edge, the trim will lose that fight.
If wall movement or separation around the trim makes you question whether the issue started with weather exposure, signs of wind damage to siding and trim lines can help you sort out what to inspect.
Material-specific errors
Each trim material has its own failure pattern, and good results depend on following that material instead of forcing one method onto every board.
- Engineered wood: Leave the manufacturer-required joint gap and seal it correctly. If boards are jammed tight, seasonal movement can telegraph through the joint or push the coating apart.
- Fiber cement: Protect cut edges and keep joints detailed the way the manufacturer specifies. It holds up well, but careless cuts and exposed edges invite moisture.
- PVC: Follow the adhesive sequence and temperature guidance. If the joint is assembled at the wrong stage, you can end up with visible separation later.
- Dimensional wood: Prime all sides and every field-cut end before installation. Wood takes on moisture unevenly, and that usually shows up first at end grain and joints.
One more pitfall is assuming trim alone stops water. It does not. Flashing, housewrap integration, drainage space, and smart joint layout do that work. The trim protects those details and finishes the opening. Pros usually have the edge here because they know where a clean-looking job can still fail behind the face.
Long-Term Maintenance for Lasting Curb Appeal
A trim job usually looks its best right after install. In western Pennsylvania, the true test starts after a few hard rains, freeze-thaw swings, and the first stretch of wind-driven weather. Good maintenance is less about keeping it pretty and more about catching water entry before it gets behind the trim and into the wall.
That matters even more on homes where the trim is installed over the siding profile instead of being integrated with proper drainage details. That trim-over-siding approach can look fine from the yard while trapping water at top edges, inside corners, and horizontal joints. I see that problem show up after wet winters, when a board still looks solid from ten feet away but has soft edges, failed caulk, or staining underneath.
What to inspect after rough weather
After a storm or a long wet spell, walk the house slowly and stay focused on places that shed or hold water. Lower walls, outside corners, window trim, gable ends, and areas below roof edges deserve the first look. Splash-back near grade is hard on trim in our part of PA, especially on walls that get less sun and stay damp longer.
Look for separation at joints, cracked sealant, swollen edges, peeling paint, loose trim faces, and dark streaking below horizontal pieces. If one elevation looks rougher than the rest, do not assume it is just age or shade. That wall is usually taking more runoff, more wind exposure, or more splash from the ground.
Pay close attention to the top edge of head trim and any flat or nearly flat surfaces. Water sitting there is what starts many trim failures.
A simple upkeep routine
A workable routine stays simple:
- Wash dirt off gently: Clean enough to expose failing paint, open joints, and mildew. High pressure can force water into places you are trying to protect.
- Check sealant where water enters first: Look at top terminations, vertical joints, and inside corners before you worry about cosmetic touch-up.
- Touch up coating damage early: Small bare spots turn into wet end grain, swollen trim, and joint failure if they sit through a season.
- Watch the water around the trim: Overflowing gutters, short downspouts, and roof runoff can wreck a well-installed trim package.
- Inspect bottom edges: Probe lightly if a board looks swollen or stays discolored. Bottom-edge rot often starts before the face gives it away.
One practical rule helps here. If you keep fixing the same joint every year, the problem usually is not the caulk. The problem is water getting trapped by the trim layout, often where trim was applied over siding without enough thought to drainage and drying.
That is where a pro has an edge. A homeowner can handle washing, repainting, and minor joint repair. Once trim starts moving, staining keeps returning, or moisture damage shows up in the same area more than once, the job shifts from maintenance to diagnosis. At that point, the right fix is to correct how the assembly sheds water, not just make the face look better again.
When to Call a Professional Trim Installer
Saturday starts with a simple plan. Replace a few tired trim boards, repaint, and be done by dinner. Then the old casing comes off and you find soft sheathing, no flashing above the head trim, and siding that was trapped behind face-applied boards with nowhere to drain. At that point, the project has shifted from carpentry to water management.
A capable homeowner can handle straightforward replacement on a reachable wall when the surrounding siding, flashing, and sheathing are sound. Call a pro when the job moves into second-story work, steep grades, grouped windows, roof-to-wall intersections, or any detail that has to shed water across more than one surface. I would also hand it off if you uncover rot around openings, stained sheathing, failed housewrap, or trim that was installed over siding in a way that traps runoff instead of letting the wall dry.
That last one gets missed all the time in western Pennsylvania. In Sharon, Pittsburgh, Erie, and nearby communities, repeated freeze-thaw cycles, wind-driven rain, and long wet stretches punish trim details that look fine in dry weather. A pro is not just replacing boards. A pro is checking whether the trim layout belongs over the siding, whether the siding needs to be cut back, where the top edge should be flashed, and how bottom edges will drain instead of holding moisture.
Cost matters, but the bigger decision is scope. Professional trim work usually gets more expensive as access gets harder, material footage increases, and hidden repair shows up after demolition, as noted earlier. Labor is a large share of that price because careful removal, flashing integration, repairs behind the trim, and finish work take time.
What you buy with a professional install is judgment.
Good installers sequence the work so water stays on the face of the assembly and exits cleanly. They know when a trim-over-siding detail can work, when it needs a drainage gap, and when the only durable answer is to pull back adjacent materials and rebuild the opening correctly. They also have the ladders, scaffolding, brake work, and repair experience to fix the wall before it gets covered again.

If your trim project has moved past basic replacement, Penn Ohio Roofing & Siding Group can help with the parts that matter most: water management, exterior detailing, and durable installation for homes across Sharon, Pittsburgh, Erie, and surrounding western Pennsylvania communities. Reach out for a professional assessment if you're seeing rot, storm damage, failed flashing, or trim problems that keep coming back.